
Using Token2 hardware tokens for pfSense OpenVPN
 pfSense® software is a free, open-source, customized distribution of FreeBSD tailored for use as a firewall and router. In addition to being a powerful,
flexible firewalling and routing platform, it includes a long list of related features and a package system that allows further expandability without adding bloat and potential security vulnerabilities to the base distribution.
pfSense® software is a free, open-source, customized distribution of FreeBSD tailored for use as a firewall and router. In addition to being a powerful,
flexible firewalling and routing platform, it includes a long list of related features and a package system that allows further expandability without adding bloat and potential security vulnerabilities to the base distribution.In pfSense,we can add 2FA authentication for OpenVPN using the FreeRadius package. The guide assumes that you already have a working OpenVPN server, and we will show the procedures required to configure the 2FA method for it.
pfSense allows using Token2 programmable tokens or Token2 classic tokens for two-step verification.
Requirements:
• A fully installed and ready-to-use pfSense OpenVPN server .
• An admin access to the pfSense WebConfigurator.
• A Token2 programmable or classic token.
• An iPhone or Android device with NFC*.
[* Android and Windows versions are available for all models, but this guide will use the iPhone app as an example. iPhone apps are compatible with "-i" models only].
Step 1. Enable an MFA method
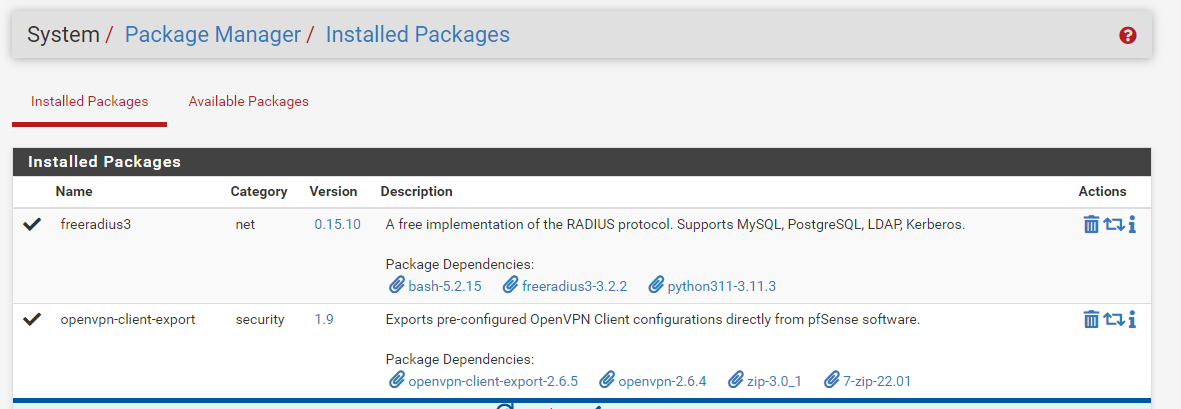
1) Log in to the pfSense WebConfigurator.2) Go to System/Package Manager/Available Packages. Search for and install freeradius3 package.
After successful installation, you will see the freeradius3 package in System/Package Manager/Installed Packages.
3) Go to Services/FreeRADIUS/Interfaces and click the "Add" button.
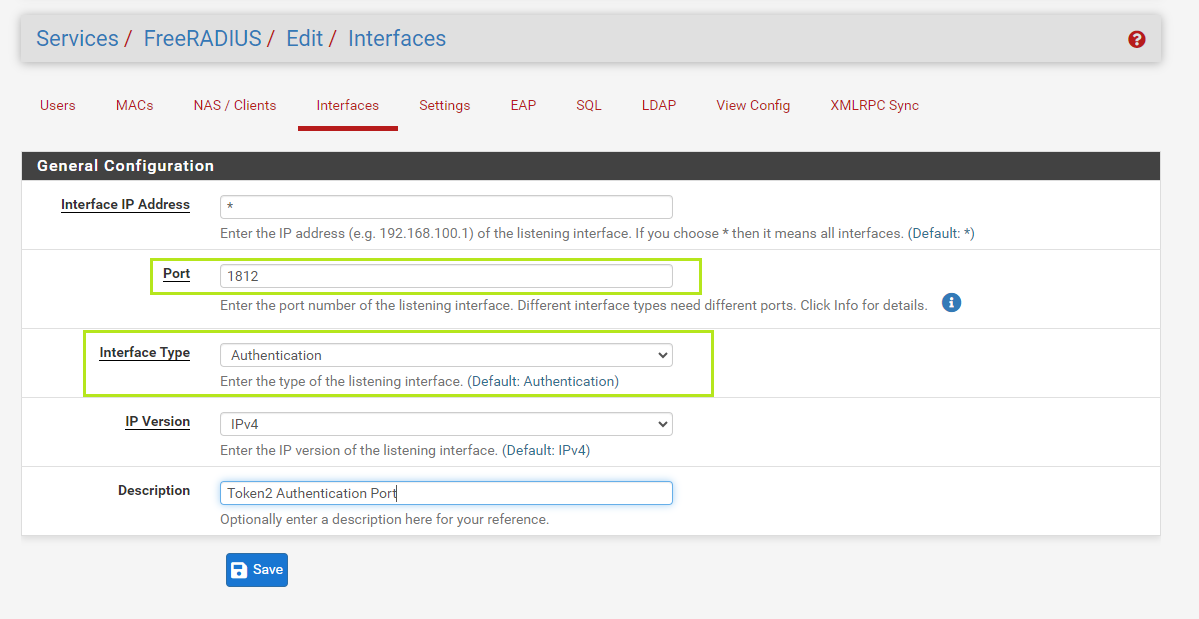
Give values as below:
• Port: 1812
• Interface Type: Authentication
Click "Save" to save the configuration.
4) Then go to Services/FreeRADIUS/NAS / Clients, click "Add".
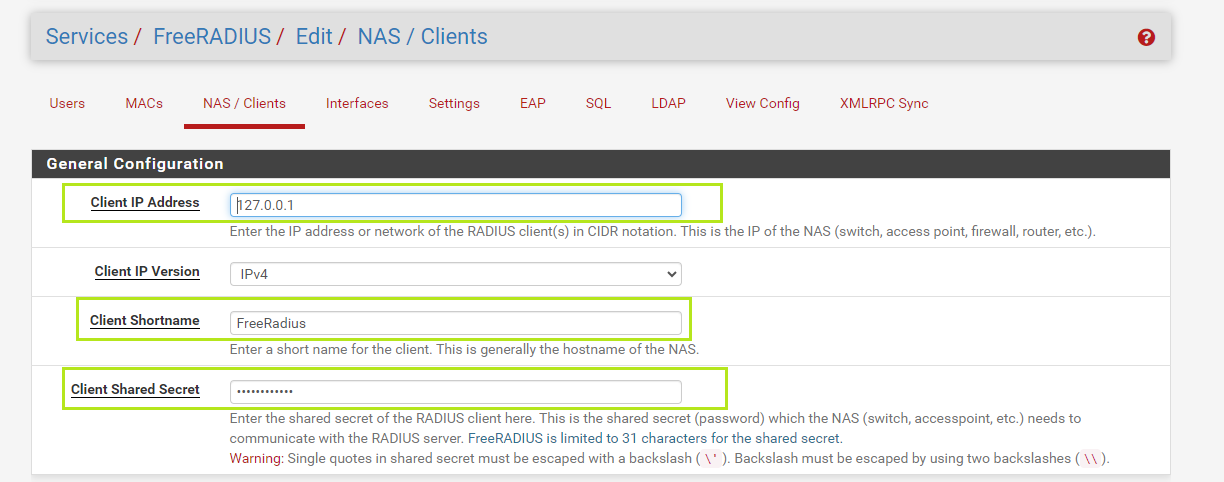
Give values as below:
• Client IP Address: 127.0.0.1
• Client Shortname: FreeRadius(for example)
• Client Shared Secret: ***********( some password). This is the shared secret (password) which other devices need to communicate with the RADIUS server.
Click "Save" to save the configuration.
5) Next, go to SystemUser/ManagerAuthentication/Servers click on "Add".
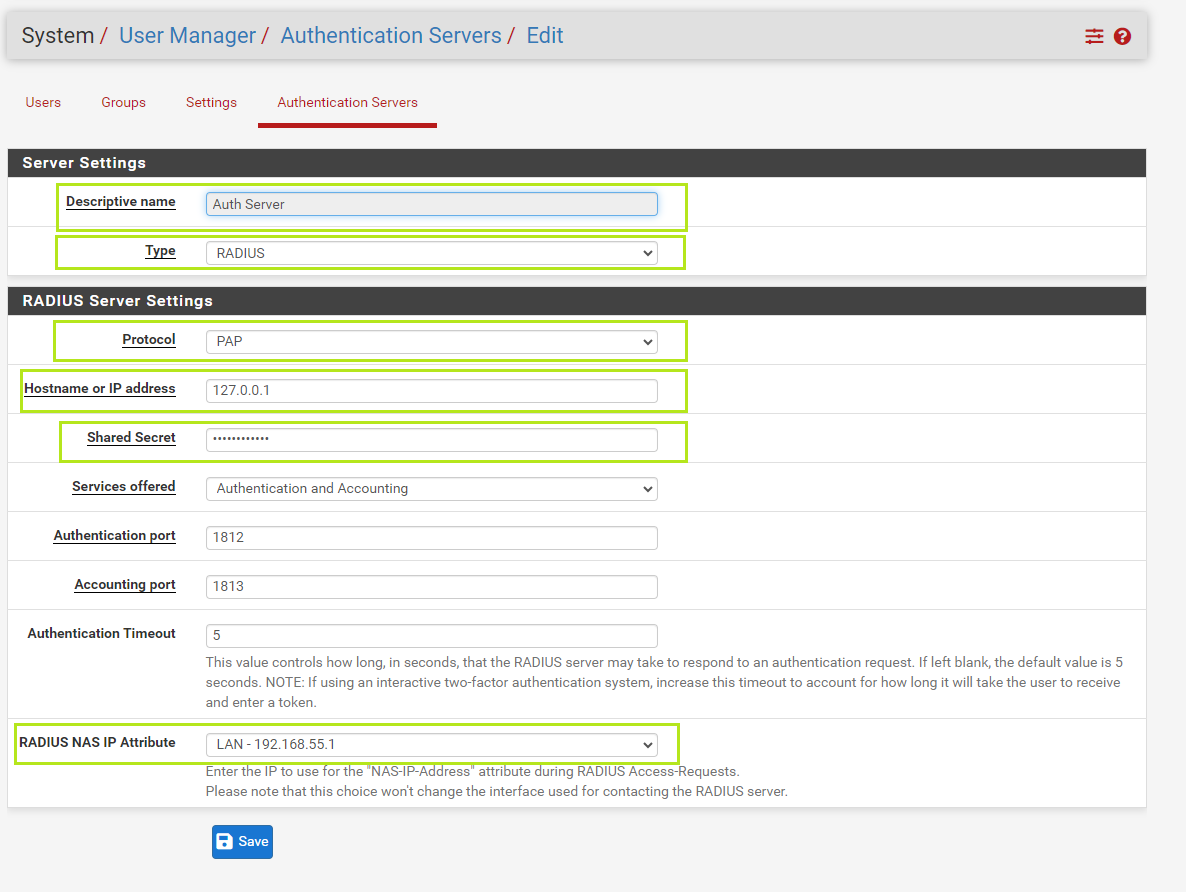
Give values as below:
• Descriptive name: Auth Server(for example)
• Type: RADIUS
• Protocol: PAP
• Hostname or IP address: 127.0.0.1
• Shared Secret: ************ Use the Client Shared Secret.
• RADIUS NAS IP Attribute: Select your local network.
Click "Save" to save the configuration.
6)Then go to VPN/OpenVPN/Servers and edit the active OpenVPN server profile settings.
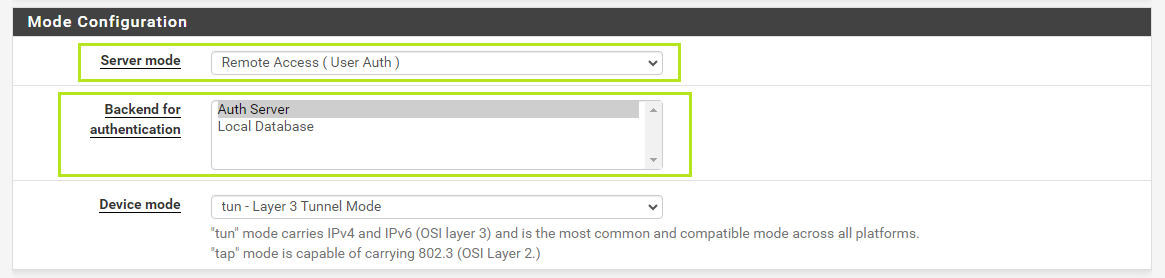
Give values as below:
• Server mode: Remote Access(User Auth)
• Backend for authentication: Auth Server(was created in previously)
Click "Save" to save the configuration.
7) Then we need to create a user with 2FA. Go to Services/FreeRADIUS/Usersand click "Add".
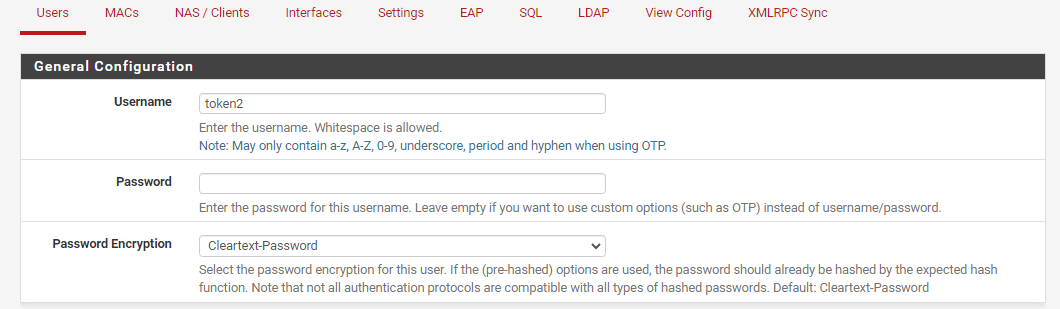
There is no need to give a password value because, with 2FA enabled, the password will be replaced with a PIN. Next, set up the one-Time Password Configuration.
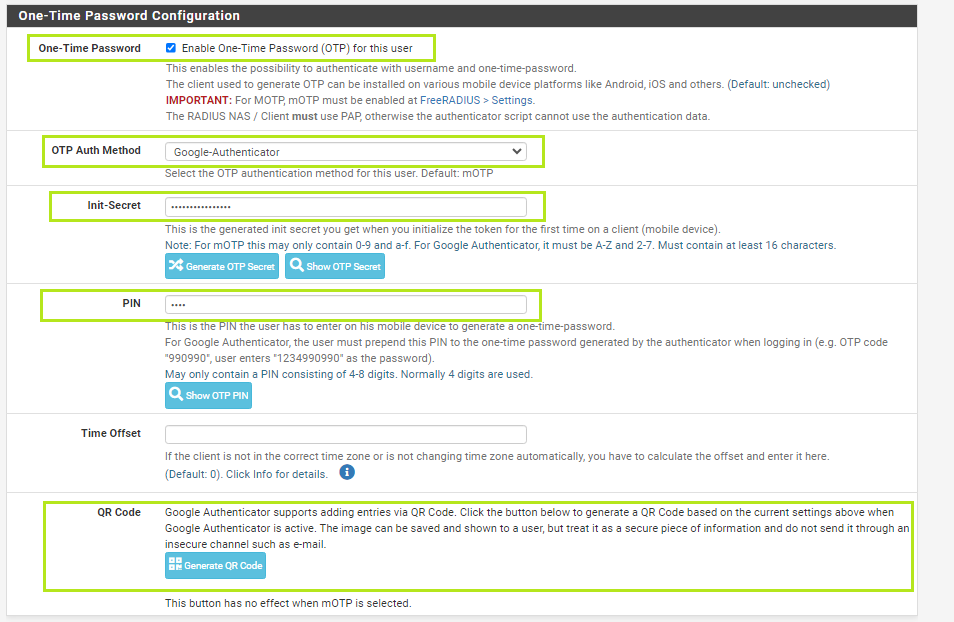
• Enable One-Time Password (OTP) for this user.
• Change the OTP Auth Method value to Google-Authenticator.
• Give some digit value to "PIN". May only contain a PIN consisting of 4–8 digits. Normally, four digits are used. A pin will be added before the OTP when connecting to OpenVPN.
• Depending on Init-Secret value we can use 2 types of hardware tokens : Classic or Programmable.
a)If you are going to use a classic token, you can request the seed for the token from us. Paste the seed (in base32 format) into the Init-Secret textbox, and that's all. There is no need for the Provision the token step.
b)If you are going to use a a programmable token, click Generate OTP Secret near to Init-Secret and then Generate QR Code for this secret
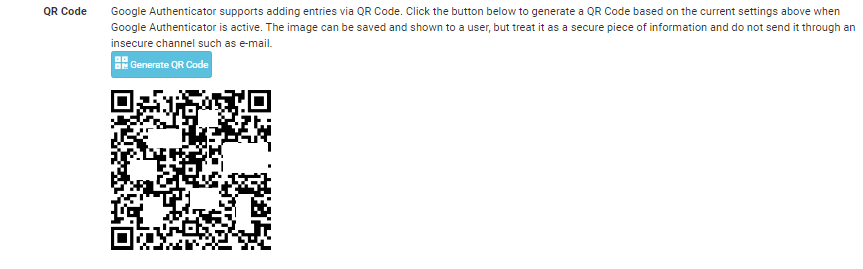
This will show a QR code that you will scan using one of the provisioning tools in the next step.
Step 2. Provision the token
- Launch the NFC burner app on your Android device and hit the "QR" button
- Point the camera to the QR code shown on the account page. Upon a successful QR scan, the camera window should disappear
- Turn on the token and touch it with your phone (make sure it is overlapped by the NFC antenna) and click "Connect" on the app
- Upon successful connection, click the "Burn seed" button (the button will become active only if NFC link is established).
- A message box similar to the one below will be shown upon successful completion
Follow the steps below to perform setting the seed for your token using Windows App.
1. Launch the exe file, then select the NFC device from the drop-down list and click on "Connect". You should see a message box notifying about a successful operation.
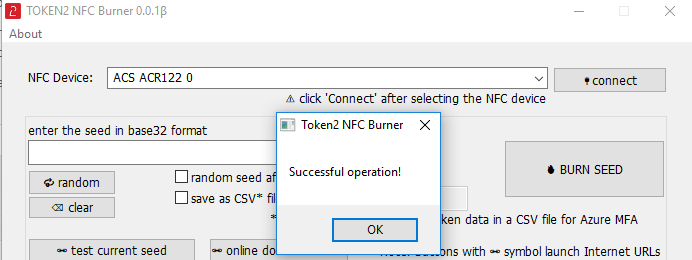
2. Enter or paste the seed in base32 format, or use one of the QR scanning methods to populate this field
3. Place the token onto the NFC module and wait for its serial number to appear.

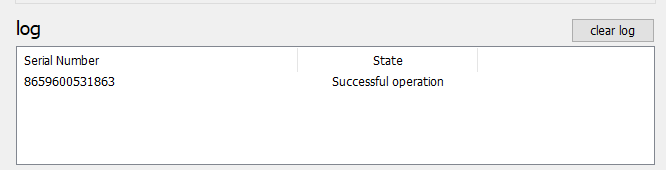
4. Click on "Burn seed" button. A log entry with the serial number and "Successful operation" text will be logged in the log window.
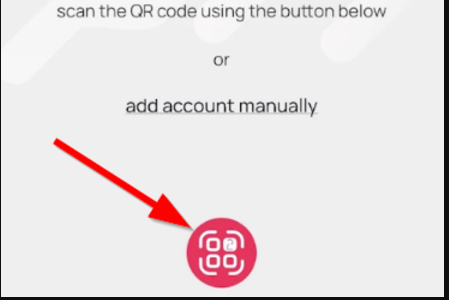
- Launch the NFC burner app on your iPhone device and hit the "scan QR" button
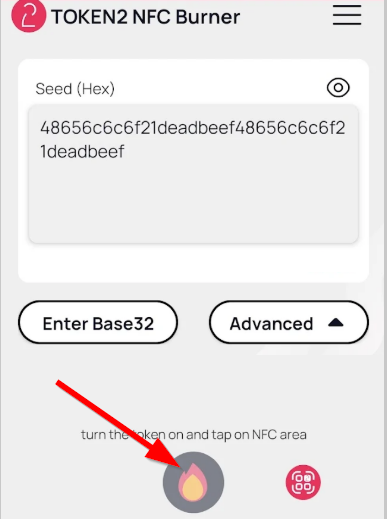
- Point the camera to the QR code shown on the account page. Upon a successful QR scan, the camera window should disappear and the seed field will be populated with the hex value of the seed. Touch the Burn button to continue.
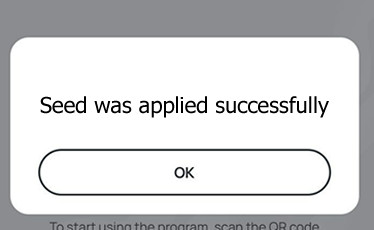
- When an NFC prompt similar to the one below is shown, turn on the token and touch the top of your iPhone with the token.
- A message box similar to the one below will be shown upon successful completion
Please note that the procedures above are shown only as examples and are valid to single profile TOTP tokens only. The procedure for multi-profile and USB-programmable devices are similar but slightly different
Step 3. Connect using 2FA
Go to VPN/OpenVPN/Servers/Client Export,scroll down to the OpenVPN Clients area, and download the OpenVPN client setup bundle with configuration.
pfSende can provide bundles for different OSes; in our guide, we will download for Windows 10.
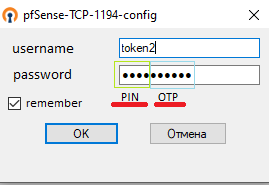
In the password field, we will use PIN(use PIN set for the user) +OTP(generated by the hardware token).
Then you will be successfully connected to OpenVPN.
Subscribe to our mailing list
Want to keep up-to-date with the latest Token2 news, projects and events? Join our mailing list!