
TOTPRadius - Installation and initial configuration
TOTPRadius is deployed as a software-based virtual appliance that runs on two hypervisors: VMWare ESXi and Microsoft Hyper-V. Upon request, virtual appliances for other hypervisors can be provided. It is free to use with up to 5 users. You need to obtain a license to increase the number of allowed users.Download
Download one of the versions from the download page. The appliance is available in 2 versions:
- VMware OVA format. In addition to VMware vSphere (ESXi), OVA format can also be imported and used with Oracle VirtualBox
- HyperV Appliance. A zip file with the virtual machine exported from a Hyper-V host. Requires Hyper-V v.10 or higher (Win10 or Win2016/2019). For earlier versions, create the VM manually with default settings and connect the IDE0 to the VHDX file in the archive. No further configuration changes are required
Installation
Import OVF to VMWare or VirtualBox
TOTPRadius is deployed in standard OVF format. Follow usual OVF import procedures to install the appliance.
Import VM to Hyper-V
TOTPRadius has been tested on standard Windows 2012 R2 and Windows 2016 and 2019 based Hyper-V hosts and has been exported using Hyper-V manager. To import, unzip the downloaded archive to a location visible from Hyper-V manager and import the appliance. Initial configuration of the appliance Power on the virtual machine and open its console.
XenServer
While there is no official image released for XenServer, a number of clients managed to import and use the VMWare image by editing the grub options in the boot menu to make the root file system /dev/xvda1 (what XenServer looks for) instead of /dev/sda1 (what VMware presents).
RAM and vCPU
The exact parameters of the VM instance depends on the hypervisor and the planned load. We recommend having at least 2 vCPU and 1GB of RAM assigned.Initial configuration
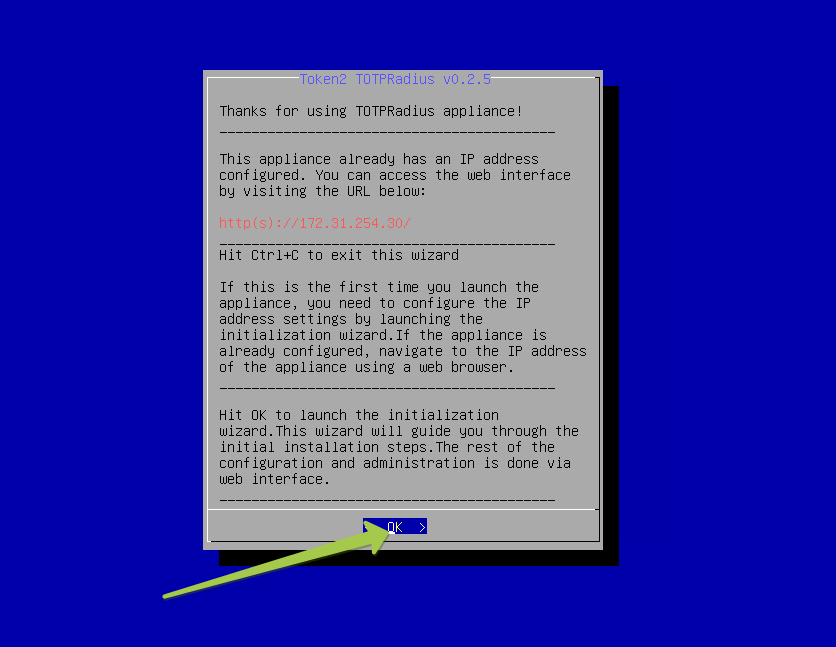
Once imported and started, the appliance will boot and launch the initial configuration wizard. Please note that this wizard is only available from the console and allows changing the appliance's IP address. If the network is configured with DHCP available, the appliance will show the assigned address. You can open the IP in a web browser to access the web admin panel.
Complete the configuration by filling the requested information, such as hostname, IP, Subnet and DNS servers.
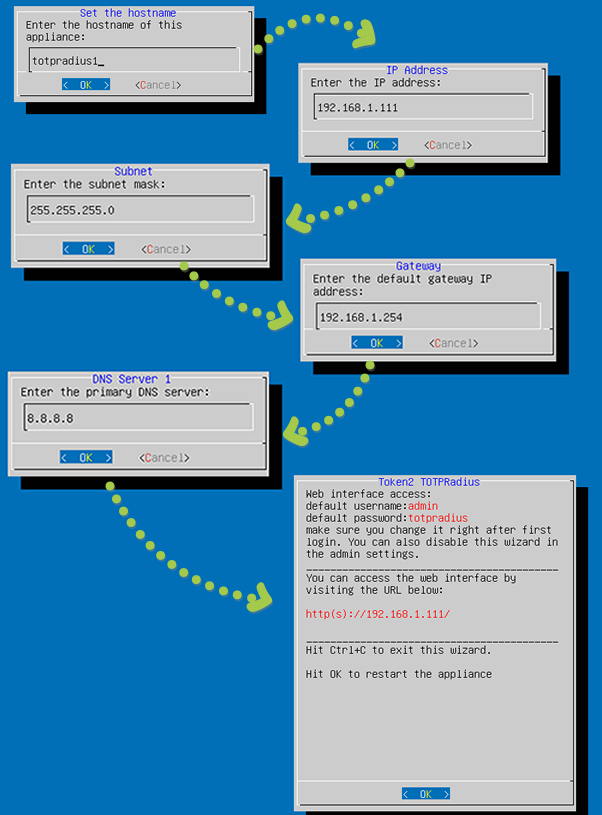
Hit "OK" at the last window to complete the process. The appliance will restart to apply the new network configuration. If there was a mistyped address during the configuration, you can always rerun the wizard again - it will be available from the hypervisor console unless disabled in the Web interface. You can press "Ctrl+C" to exit the wizard and proceed to regular Linux login prompt.
Admin Web Interface - first login
Once the configuration is completed, navigate to the IP address set during the initial configuration (or assigned by DHCP) and log in using default admin credentials (default username : admin, default password : totpradius).
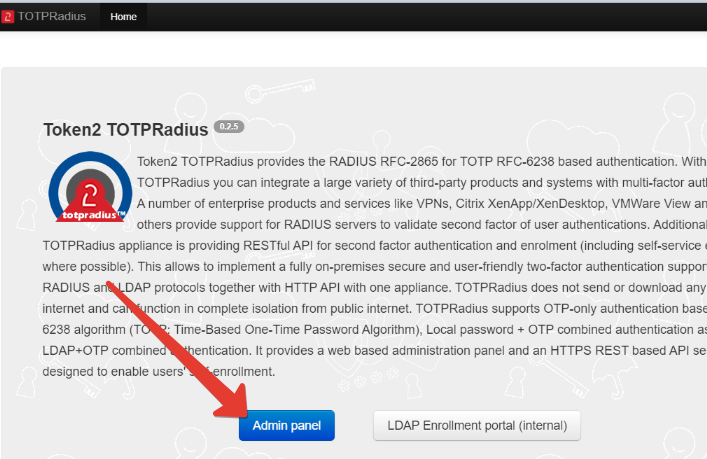
Upon initial login, the system will ask you to change the Web admin and console (ssh) password. Once this is done, you can proceed with the configuration by clicking on "Settings".
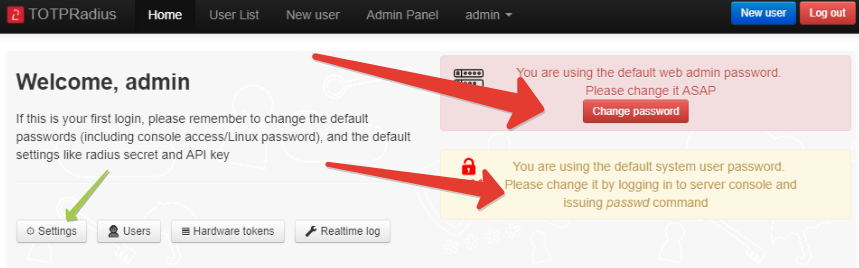
You can change the Web admin password directly on the admin panel by clicking on "Change password" button.
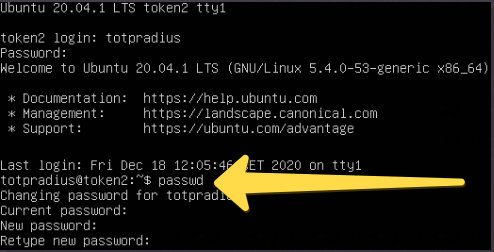
The system password should be changed from the console:
- Open the console and close the configuration wizard by pressing Ctrl+C
- Log in using default credentials (username: totpradius, password: totpradius)
- Issue passwd command and enter the new password
Important: installing any additional service or application is not permitted nor supported!
Admin panel - overview of the important settings
All TOTPRadius appliance settings, except IP and console password, can be configured through the admin web interface. Clicking the question mark icon next to a setting displays its description, as illustrated in the TOTP Skew example below.

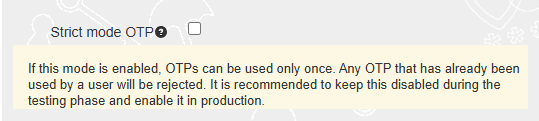
Strict OTP mode (available starting from version 0.3.2) is another important setting to pay attention to. It is disabled by default. If enabled, OTPs can be used only once, and any OTP that has already been used by a user will be rejected. It is recommended to keep this disabled during the testing phase and enable it in production.
In this section, we will bring your attention to only some of the settings that are important and need to be adjusted before you start using the appliance in production.
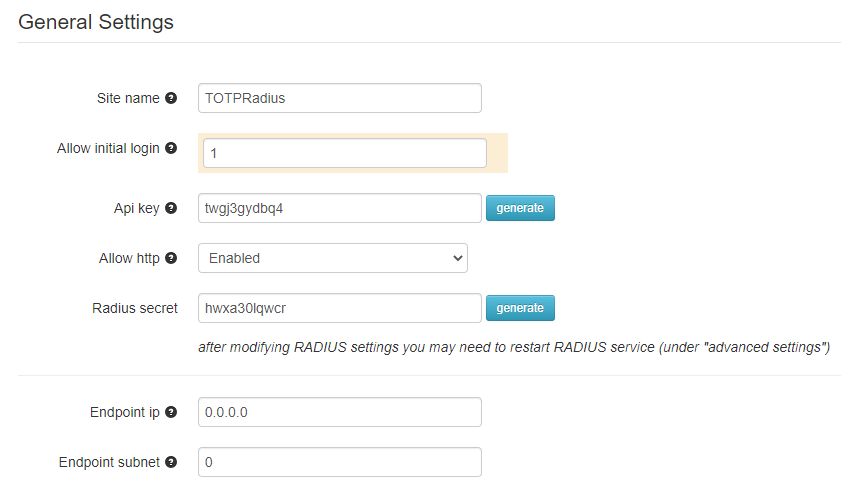
Allow initial login
Pay attention to "Allow initial login" value. If set to a non-zero value, first n RADIUS attempts will be accepted even if the password or OTP provided as a password is wrong. This is needed for allowing users to log in for the first time and enroll their second factor independently without using the public web portal (i.e. via Citrix XenApp with Netscaler configuration). If such self-service methods are not planned to be used, keep this value as zero.
API Key and Allow HTTP
API key is used to access the API interface to check or enable 2FA as well as to allow user database replication from this host to slave appliances. This key is used for different integrations, including ADFS credential provider and WordPress 2FA. If you have already configured the web certificate for your appliance, you can set Allow HTTP as "Disabled" - this will ensure the API endpoint is accessed via secure HTTPS protocol only.
RADIUS Secret
This is the "shared secret" parameter used as a part of RADIUS authentication scheme and is required to set up the endpoints that will authenticate users against TOTPRadius. The RADIUS Server reads the shared secret and ensures that the Access-Request message is from an authorized Client.
Endpoint IP and Subnet
If you want to further restrict access to RADIUS authentication, you can set the Endpoint IP and subnet to a range that you expect the authentication messages to come from (i.e. your VPN Server/ Meraki MX / FortiGate etc.). Having these values as 0.0.0.0 (IP) and 0 (subnet) will allow any connection as its source.
Start testing
Important: The appliance come with no users (only sample hardware tokens exist, but no users), so you need to manually create your users (if you are not using API or self-enrollment portal) to start testing as described below.Testing the authentication
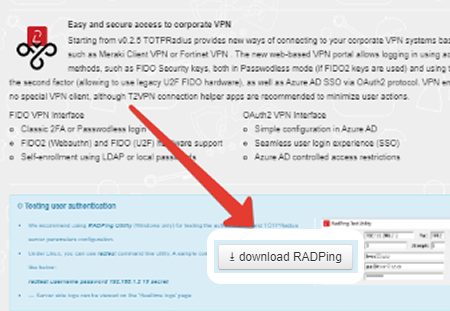
After the virtual appliance has been installed and configured we recommend testing the authentication using the included RadPing utility. RadPing can be downloaded from the index page of TOTPRadius web interface.
Follow the steps below to test the appliance using RADPing:
- Log in to TOTPRadius Web interface and make sure the system is configured in OTP-only mode (no Local Passwords or LDAP Proxy is activated). This is needed only for the test scenario we describe below and can be changed later if needed.
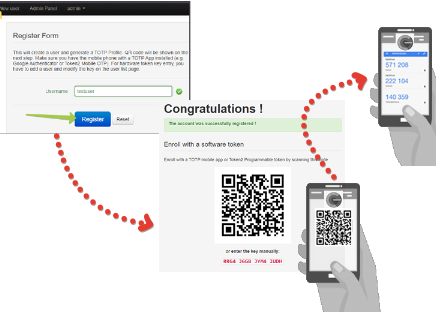
- Create a new user in TOTPRadius Web interface (click on New User button and enter a username)
- A QR code will be shown right after the user has been created : scan it with your TOTP app (for example Google Authenticator or Microsoft Authenticator)
- Launch RADPing utility and fill the values as shown in the example below:
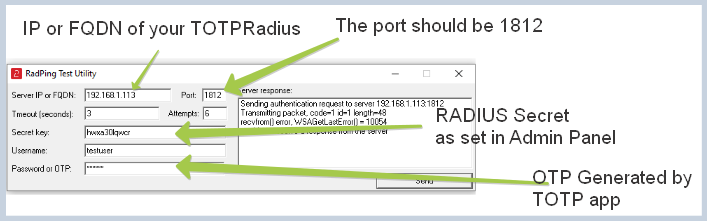
- After filling the fields, click on "Send" button to start the test
- If the "Allow initial login" parameter in the admin panel is left as 0, the response should be "Answer-Reject" if wrong OTP is entered and "Answer-Accept" if OTP is correct
What to do if OTP is not accepted?
If you are constantly getting a "Reject" response in most of the cases the reason is related to time synchronization. The current server time is shown on the footer of the web interface (and is updated dynamically).
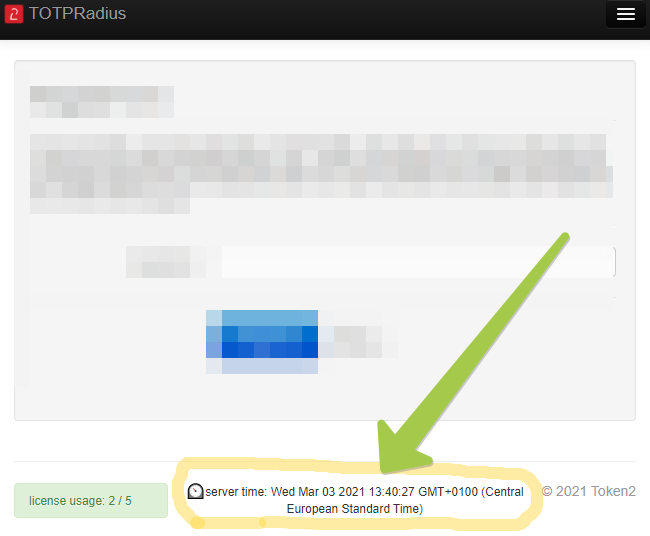
If the date, time or the time zone you see in the footer is inaccurate, you need to correct this in the server settings :
- Log in to TOTPRadius Web Admin portal and navigate to Admin Panel (General Settings) page
- Click on Advanced Settings part and scroll down to Server timezone form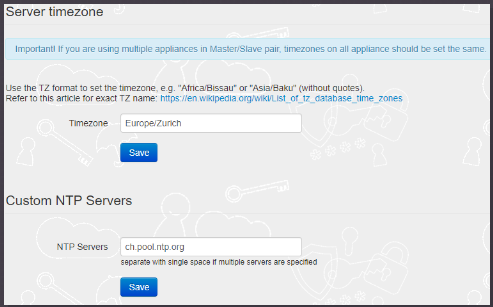
- Set the timezone name (it is set to Swiss timezone by default) according to tz database names as listed here
- You can also set a custom NTP server (normally this is not needed if your hypervisor is configured to sync time on virtual machines)
About
Installation and configuration
- Installation and initial configuration
- Network configuration
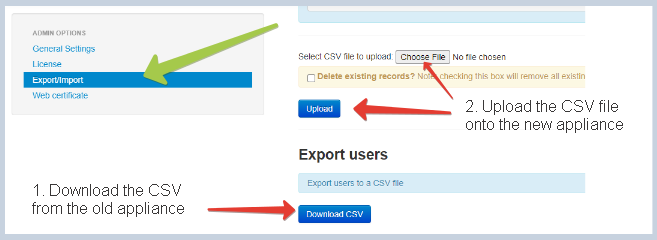
- Migrating from older versions
- LDAP Configuration
- Azure AD Configuration
- Self-service enrollment portal
- Web and LDAPS Certificates
- Syslog configuration
- Single-factor authentication exceptions
- Slave appliance mode
- Dynamic RADIUS Attributes
Integration guides
Blog
04-04-2026
Understanding FIDO User Verification Modes and the always_uv Setting
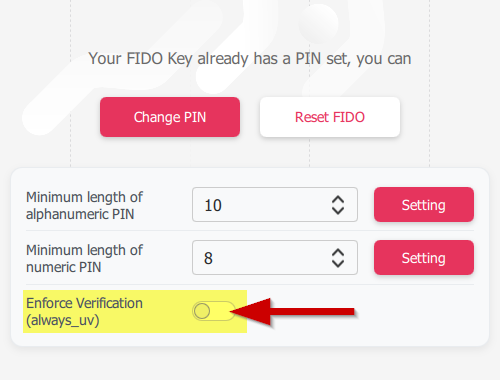 Token2 R3.3 and later FIDO2 keys enforce user verification by default with always_uv = true, improving security, though some platforms and apps like Windows 10, macOS, and certain legacy clients may fail to handle this override correctly.
05-03-2026
Introducing TOTPVault — self-hosted TOTP management for teams
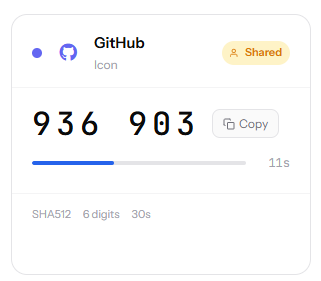 Most TOTP apps work by distributing copies of the secret to every person who needs access — fine for personal accounts, but for shared service accounts it means MFA secrets scattered across people's phones with no clean way to revoke access when someone leaves.
21-12-2025
Android, NFC, and the Missing Piece of WebAuthn
 For years, Android users have faced a frustrating limitation—Android does not support CTAP2 over NFC. This means no PIN verification and no discoverable credentials (passkeys) when using NFC, and therefore limited to simple U2F-style flows without user verification. That said, there finally seems to be a solution.