TOTPRadius – Administrator guide
Last updated 2026-11-17
Token2 TOTPRadius is an on-premises RADIUS server that adds a one-time code (TOTP or HOTP) – from an authenticator app, a Token2 hardware token or a key with HID-HOTP – to the logins of VPN gateways, firewalls, Citrix, VMware Horizon, SSH servers and any other system that can ask a RADIUS server. It runs as a virtual appliance with a web admin console, self-service enrolment portals, FIDO2 and Entra ID / OIDC VPN portals and an HTTP API.
This page collects all TOTPRadius administrator guides in reading order: installation, authentication configuration, tokens, VPN portals, appliance administration, the Web API and device integrations. It replaces the separate TOTPRadius 0.3.x guide pages; their old addresses lead to the matching section below. Use the contents list to jump to a guide; every guide ends with a link back here.
Contents
- Part I · Introduction and installation
- Token2 TOTPRadius Virtual appliance
- TOTPRadius Virtual Appliance - Download
- Installing TOTPRadius 0.4 on Hyper-V
- Installing TOTPRadius 0.4 on VMware ESXi / vSphere, Workstation, Fusion
- Installing TOTPRadius 0.4 on VirtualBox
- TOTPRadius - Installation and initial configuration
- TOTPRadius 0.4 Quick setup (the 0.3.x General settings page)
- Part II · Authentication: modes, directories and policies
- Part III · Tokens and self-service enrolment
- Part IV · VPN portals
- Part V · Testing, network, certificates and logging
- Part VI · Appliance administration
- Part VII · Web API
- Part VIII · Device integration guides
- Hardware tokens for two-factor authentication with FortiGate
- Token2 hardware tokens for two-factor authentication with Palo Alto NGFW
- TOTPRadius - Cisco Meraki Client VPN
- TOTPRadius Two-factor authentication for Citrix Storefront with self-enrolment
- How to Set Up 2-Factor Authentication in VMware Horizon View with TOTPRadius
- Using TOTPRadius with Barracuda CloudGen Firewall
- Hardware tokens for PPTP VPN on Windows Server using TOTPRadius
- TOTPRadius : MFA for SSH access to Cisco switches
- TOTPRadius : MFA-protected SSH access to Ubuntu servers with LDAP or Entra ID credentials and hardware or software tokens
PART I · INTRODUCTION AND INSTALLATION
1. Token2 TOTPRadius Virtual appliance
download purchase integration guides
Token2 TOTPRadius is a RADIUS server (RFC 2865) that adds a one-time code (TOTP, RFC 6238, or HOTP) to the logins of VPN gateways, firewalls, Wi-Fi controllers, Citrix, VMware Horizon, SSH servers and any other system that can ask a RADIUS server. It runs on premises as a virtual appliance, with a web admin console, self-service enrolment portals and an HTTP API.
The device that asks for the login (the NAS) sends the user name and the password field to TOTPRadius. A policy decides what that field contains – only the code, or a password plus the code – where the password is checked (nowhere, a local password, LDAP / Active Directory or Entra ID), who may skip the code, and which RADIUS attributes go back to the device. Users get their codes from an authenticator app, a Token2 hardware token, a key with HID-HOTP, or temporary VPN credentials from the FIDO2 and Entra ID / OIDC VPN portals.
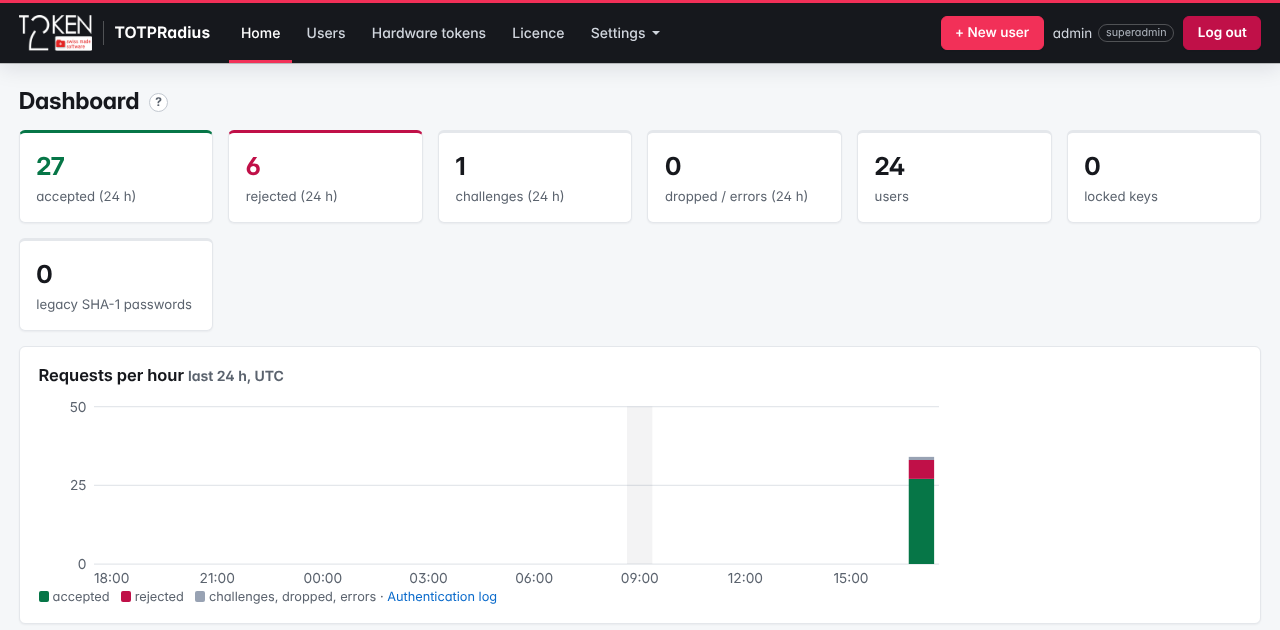
What's new in TOTPRadius 0.4
TOTPRadius 0.4 has been rewritten from scratch and runs on a read-only, signed system image.
- Policies per NAS client: several gateways with different rules on one appliance (for example AD password + code on the SSL VPN, code only on the switches). The 0.3.x single-page setup lives on as Quick setup.
- Several directories: LDAP / Active Directory over LDAPS or StartTLS, with Fetch certificate from server to trust the CA or pin the server certificate; Entra ID (legacy).
- Password and code entry: in one field (as in 0.3.x), as a second prompt (RADIUS Access-Challenge), or either; the code is checked before the directory password, so wrong codes never lock AD accounts.
- RADIUS methods: PAP, CHAP, MS-CHAPv1 and MS-CHAPv2 for codes (directory passwords need PAP); Message-Authenticator required by default (BlastRADIUS protection).
- Tokens: authenticator apps (SHA1 / SHA256, 6 or 8 digits, 30 or 60 s), Token2 hardware tokens with an inventory, CSV import, drift tool and self-association, and HOTP / HID-HOTP keys.
- Reply attributes by group: attribute sets and LDAP / local group mappings, nested groups supported – no more script.
- VPN portal as a separate process on its own listener: FIDO2 / passwordless, Entra ID / OIDC single sign-on (also generic OIDC), LDAP and local self-service enrolment.
- Administrators with roles (superadmin, admin, helpdesk, auditor), a second factor for administrators (security key or authenticator app; signing in without one is allowed by default – superadmins should forbid it under General settings → Admin console, see Installation), re-authentication for sensitive actions and settings, and a tamper-evident audit log.
- Test authentication in the console: a real RADIUS request with the reason for every step; RADPing for Windows downloadable from the dashboard.
- Appliance lifecycle: online updates with automatic rollback, encrypted backups, cluster of one primary and up to 8 replicas, a VM console that can be protected by a PIN.
- APIs: API v1 (
/simpleapi,/validate,/createuser) stays compatible for Citrix StoreFront and existing scripts; the new API v2 uses bearer tokens with scopes. See Web API. - Import from 0.3.x: a one-time migration of users, tokens, NAS clients and settings into a new 0.4 appliance. See Upgrading from 0.3.x to 0.4.
What changed for 0.3.x users
| 0.3.x | TOTPRadius 0.4 |
|---|---|
| LDAP Proxy (password + OTP in one field) | Policy with Password checked against = LDAP / Active Directory and How the user enters password and code = In one field; or Quick setup with LDAP password + code in one field. See LDAP configuration. |
| Azure AD Proxy | Directory type Entra ID (legacy password check, ROPC); for new set-ups we recommend the Entra ID / OIDC VPN portal. See Entra ID (legacy password check). |
LDAP Enroll web interface (/ldap-enroll) | Still /ldap-enroll on the admin console, plus /vpn/ldap/ and /vpn/local/ on the portal (Settings → General settings → Portals). See Self-service enrolment methods. |
| Slave mode (users-only replication) | Cluster: one primary and up to 8 replicas with full replication. See Cluster. |
Default logins admin / totpradius (web) and totpradius / totpradius (SSH) | Gone: a one-time setup code on the VM console creates the first administrator, who sets up a second factor. No root or sudo access; optional key-only SSH support access. |
| Strict OTP mode (optional) | Codes are always single use. |
| Hypervisors: VMware ESXi and Hyper-V | VMware (OVA), Hyper-V (VHDX + script), VirtualBox (own OVA) and qcow2 for Proxmox VE / KVM / Nutanix AHV. |
/fetchusers API | Removed (replication is part of the cluster). |
Self-service enrolment and the VPN portal
Users can enrol their own authenticator app or associate a Token2 hardware token: on the LDAP enrolment page inside your network (/ldap-enroll), on the external portal pages, or through API v1 integrations such as Citrix StoreFront. The VPN portal also issues temporary VPN credentials after a FIDO2 security key or an Entra ID / OIDC sign-in, so users of these methods do not type a code at all.
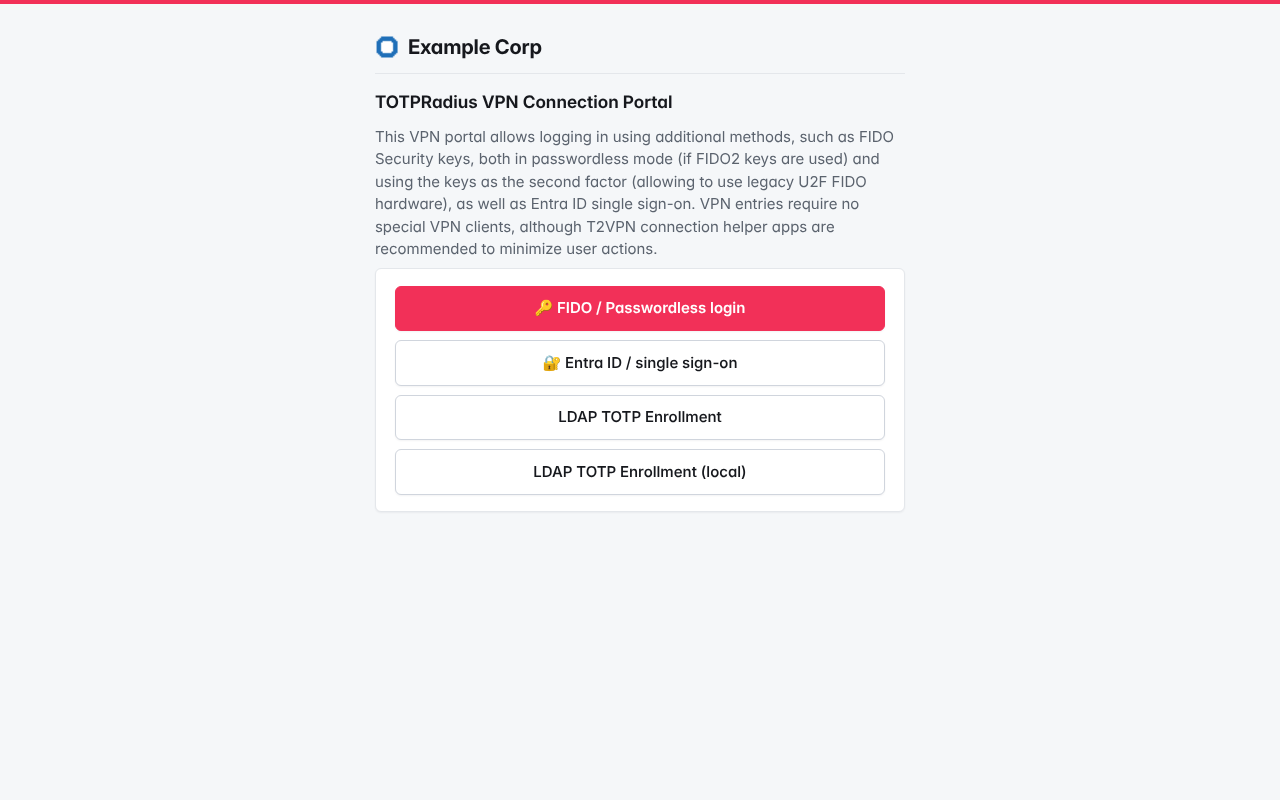
More: VPN portal overview.
Download & install
TOTPRadius is a virtual appliance for VMware ESXi / vSphere, Workstation and Fusion, Microsoft Hyper-V and Oracle VirtualBox; a qcow2 image is available for Proxmox VE, KVM / libvirt and Nutanix AHV. One vCPU and 1 GB RAM are enough for up to about 3 000 users. It is free to use with up to 5 users; licences for more users are per user and do not expire.
- Download
- Installation and initial configuration
- Upgrading from 0.3.x to 0.4
- Integration guides (FortiGate, Palo Alto, Meraki, Citrix, VMware Horizon, SSH …)
2. TOTPRadius Virtual Appliance - Download
TOTPRadius is a ready-made virtual appliance. There is one image per hypervisor; each one contains the same signed system. The appliance is free to use with up to 5 users.
Downloads
Version: 0.4.4 · Released: 17/11/2026
| Hypervisor | File | Size | Install guide |
|---|---|---|---|
| VMware ESXi / vSphere, Workstation, Fusion | totpradius_0.4.4.ova | 175MB | VMware |
| Microsoft Hyper-V | totpradius_0.4.4.vhdx (with the script Create-TOTPRadiusVM.ps1 below) | 392MB | Hyper-V |
| Oracle VirtualBox | totpradius_0.4.4-virtualbox.ova | 175MB | VirtualBox |
| Proxmox VE, KVM / libvirt, Nutanix AHV | totpradius_0.4.4.qcow2 | 178MB | Other hypervisors |
| Update bundle | For | Size | Described in |
|---|---|---|---|
totpradius_0.4.4.t2upd (signed offline update: appliance and OS) | Appliances on 0.4.0 or later, without Internet access (others: Settings → System → Updates → Check now) | 406MB | Updating the appliance |
Sample deployment scripts
Optional scripts that create the virtual machine with the right settings. They are published here, next to the images:
| Hypervisor | Script | Described in |
|---|---|---|
| Microsoft Hyper-V | Create-TOTPRadiusVM.ps1 (PowerShell) | Installing on Hyper-V |
| VMware ESXi / vCenter | deploy-ovftool.sh (ovftool, Linux / macOS) | Installing on VMware |
| Oracle VirtualBox | create-totpradius-vm.sh (Linux / macOS)create-totpradius-vm.ps1 (Windows) | Installing on VirtualBox |
Click a script name to show its content. Save it under the name shown (or use the Download link), with the file in the same folder as the downloaded appliance image.
Create-TOTPRadiusVM.ps1 (PowerShell) – show script
Download Create-TOTPRadiusVM.ps1
<#
.SYNOPSIS
    Creates a Hyper-V virtual machine for the TOTPRadius 0.4 appliance from the downloaded VHDX.

.DESCRIPTION
    Sample script by Token2. Put it in the same folder as the TOTPRadius .vhdx and run it in an
    elevated PowerShell (Run as administrator) on a Hyper-V host (Windows Server 2016 or later,
    Windows 10/11 Pro or Enterprise with Hyper-V enabled).

    It creates a Generation 2 VM with 1 vCPU, 1 GB fixed memory, Secure Boot off (the appliance is
    signed by Token2, not by Microsoft; its system disk is still verified at every boot), no
    checkpoints, and automatic start with the host. The disk is copied into the VM folder, so the
    downloaded VHDX stays untouched and can be used for more VMs.

    After the start, the VM console shows the appliance's IP address and the first-boot setup code.
    Browse to https://<that address>/admin/ to finish the setup.

.EXAMPLE
    .\Create-TOTPRadiusVM.ps1
    Asks for the virtual switch and uses the defaults for everything else.

.EXAMPLE
    .\Create-TOTPRadiusVM.ps1 -Name TOTPRadius-2 -Switch "LAN" -VlanId 20 -DiskGB 16 -MemoryMB 2048 -Cpus 2
#>
#Requires -RunAsAdministrator
#Requires -Modules Hyper-V
[CmdletBinding()]
param(
    # The TOTPRadius disk image. Default: the only .vhdx file in the script's folder.
    [string]$Vhdx,
    # Name of the new VM (must not exist yet).
    [string]$Name = "TOTPRadius",
    # Virtual switch for the network adapter. Default: ask (or the only switch, if there is one).
    [string]$Switch,
    # Folder for the VM. Default: the Hyper-V host's default virtual machine folder.
    [string]$Path,
    # Fixed memory. 1024 MB is enough for several thousand users; see the sizing notes.
    [ValidateRange(512, 65536)][int]$MemoryMB = 1024,
    [ValidateRange(1, 16)][int]$Cpus = 1,
    # Virtual disk size. The image is 8 GB; a larger value grows the disk and the appliance
    # grows its data partition into the new space at boot.
    [ValidateRange(8, 2048)][int]$DiskGB = 8,
    # Optional VLAN ID for the network adapter (access mode).
    [ValidateRange(1, 4094)][int]$VlanId,
    # Optional fixed MAC address (e.g. 00155D010203) for a DHCP reservation. Default: dynamic.
    [string]$StaticMac,
    # Create the VM but do not start it.
    [switch]$NoStart
)
$ErrorActionPreference = "Stop"

# --- the disk image
if (-not $Vhdx) {
    $found = @(Get-ChildItem -Path $PSScriptRoot -Filter *.vhdx -File)
    if ($found.Count -ne 1) {
        throw "Put exactly one TOTPRadius .vhdx next to this script, or pass -Vhdx <path> (found $($found.Count))."
    }
    $Vhdx = $found[0].FullName
}
if (-not (Test-Path -LiteralPath $Vhdx -PathType Leaf)) { throw "VHDX not found: $Vhdx" }
if ($Vhdx -like "\\wsl*") { throw "Hyper-V cannot use a disk inside WSL. Copy the .vhdx to a Windows folder first." }

# --- the VM must be new
if (Get-VM -Name $Name -ErrorAction SilentlyContinue) {
    throw "A VM named '$Name' already exists. Choose another name with -Name."
}

# --- the virtual switch
$switches = @(Get-VMSwitch)
if (-not $switches) { throw "This host has no virtual switch. Create one in Hyper-V Manager (Virtual Switch Manager) first." }
if (-not $Switch) {
    if ($switches.Count -eq 1) {
        $Switch = $switches[0].Name
    } else {
        Write-Host "Virtual switches on this host:"
        for ($i = 0; $i -lt $switches.Count; $i++) {
            Write-Host ("  [{0}] {1} ({2})" -f ($i + 1), $switches[$i].Name, $switches[$i].SwitchType)
        }
        do { $pick = Read-Host "Network for the appliance (1-$($switches.Count))" } until ($pick -match '^\d+$' -and [int]$pick -ge 1 -and [int]$pick -le $switches.Count)
        $Switch = $switches[[int]$pick - 1].Name
    }
} elseif (-not ($switches | Where-Object Name -eq $Switch)) {
    throw "Virtual switch '$Switch' not found. Available: $(($switches | ForEach-Object Name) -join ', ')"
}
if (($switches | Where-Object Name -eq $Switch).SwitchType -ne "External") {
    Write-Warning "Switch '$Switch' is not an External switch: RADIUS clients on your network may not reach the appliance."
}

# --- copy the disk into the VM folder
if (-not $Path) { $Path = (Get-VMHost).VirtualMachinePath }
$diskDir = Join-Path $Path "$Name\Virtual Hard Disks"
$disk = Join-Path $diskDir "$Name.vhdx"
if (Test-Path -LiteralPath $disk) { throw "Disk already exists: $disk (remove it or choose another -Name)." }
New-Item -ItemType Directory -Path $diskDir -Force | Out-Null
Write-Host "Copying the disk to $disk ..."
Copy-Item -LiteralPath $Vhdx -Destination $disk
Unblock-File -LiteralPath $disk -ErrorAction SilentlyContinue
$sizeBytes = [int64]$DiskGB * 1GB
if ((Get-VHD -Path $disk).Size -lt $sizeBytes) { Resize-VHD -Path $disk -SizeBytes $sizeBytes }

# --- the VM
Write-Host "Creating VM '$Name' ..."
$vm = New-VM -Name $Name -Generation 2 -Path $Path -MemoryStartupBytes ([int64]$MemoryMB * 1MB) -VHDPath $disk -SwitchName $Switch
Set-VMProcessor -VM $vm -Count $Cpus
Set-VMMemory -VM $vm -DynamicMemoryEnabled $false
# Secure Boot off: Hyper-V only trusts Microsoft-signed boot loaders for Linux.
Set-VMFirmware -VM $vm -EnableSecureBoot Off -FirstBootDevice (Get-VMHardDiskDrive -VM $vm)
# Checkpoints off: restoring an old checkpoint would roll back users, tokens and replay protection.
Set-VM -VM $vm -CheckpointType Disabled -AutomaticCheckpointsEnabled $false `
    -AutomaticStartAction Start -AutomaticStartDelay 0 -AutomaticStopAction ShutDown `
    -Notes "TOTPRadius appliance (Token2). Disk: $disk"
$nic = Get-VMNetworkAdapter -VM $vm
if ($StaticMac) { Set-VMNetworkAdapter -VMNetworkAdapter $nic -StaticMacAddress ($StaticMac -replace '[-:]', '') }
if ($VlanId) { Set-VMNetworkAdapterVlan -VMNetworkAdapter $nic -Access -VlanId $VlanId }

if ($NoStart) {
    Write-Host "VM '$Name' created (not started). Start it with:  Start-VM -Name '$Name'"
    return
}
Start-VM -VM $vm
Write-Host ""
Write-Host "VM '$Name' is starting. Its console shows the appliance's IP address and the first-boot setup code."
Write-Host "Then browse to https://<that address>/admin/ (the certificate is self-signed until you install your own)."
Start-Process -FilePath "vmconnect.exe" -ArgumentList "localhost", "`"$Name`"" -ErrorAction SilentlyContinue
deploy-ovftool.sh (ovftool, Linux / macOS) – show script
#!/bin/sh
# Sample script by Token2: deploy the TOTPRadius 0.4 OVA to ESXi or vCenter with VMware OVF Tool
# (ovftool 4.x, Linux / macOS; on Windows run the same ovftool command in PowerShell).
#
#   OVA=totpradius_0.4.0.ova TARGET='vi://[email protected]/' DATASTORE=datastore1 \
#   NETWORK='RADIUS LAN' ./deploy-ovftool.sh
#
#   TARGET for vCenter: 'vi://administrator%[email protected]/Datacenter/host/Cluster/'
#   (write "@" inside the user name as %40). ovftool asks for the password.
#
# Optional: NAME (TOTPRadius), CPUS, MEMORY_MB (default: the OVA's 1 vCPU / 1024 MB),
# NO_SSL_VERIFY=1 (host or vCenter with a self-signed certificate), NO_POWER_ON=1.
# The OVA sets EFI firmware with Secure Boot off, PVSCSI, VMXNET3 and an 8 GB thin disk.
set -eu

command -v ovftool >/dev/null 2>&1 || { echo "error: ovftool not found (VMware OVF Tool 4.x)" >&2; exit 1; }

if [ -z "${OVA:-}" ]; then
    set --
    for f in totpradius_*.ova; do
        case "$f" in *-virtualbox.ova) ;; *) [ ! -f "$f" ] || set -- "$@" "$f" ;; esac
    done
    if [ "$#" -ne 1 ]; then
        echo "error: put exactly one totpradius_*.ova in this folder, or set OVA=<file>" >&2; exit 1
    fi
    OVA=$1
fi
[ -f "$OVA" ] || { echo "error: $OVA not found" >&2; exit 1; }
: "${TARGET:?set TARGET, e.g. vi://[email protected]/}"
: "${DATASTORE:?set DATASTORE, e.g. datastore1}"
NAME=${NAME:-TOTPRadius}
NETWORK=${NETWORK:-VM Network}

set -- --acceptAllEulas "--name=$NAME" "--datastore=$DATASTORE" --diskMode=thin \
       "--net:management=$NETWORK"
[ -n "${CPUS:-}" ] && set -- "$@" "--numberOfCpus:*=$CPUS"
[ -n "${MEMORY_MB:-}" ] && set -- "$@" "--memorySize:*=$MEMORY_MB"
[ "${NO_SSL_VERIFY:-}" = 1 ] && set -- "$@" --noSSLVerify
[ "${NO_POWER_ON:-}" = 1 ] || set -- "$@" --powerOn

echo "Deploying $OVA as '$NAME' to $TARGET (datastore $DATASTORE, network '$NETWORK') ..."
ovftool "$@" "$OVA" "$TARGET"

cat <<EOF

Done. Open the VM console: it shows the appliance's IP address and the first-boot setup code.
Then browse to https://<that address>/admin/ (the certificate is self-signed until you install your own).
EOF
create-totpradius-vm.sh (Linux / macOS) – show script
Download create-totpradius-vm.sh
#!/bin/sh
# Sample script by Token2: create a VirtualBox VM for the TOTPRadius 0.4 appliance, for tests and
# evaluation (VirtualBox 7.0 or later on Linux or macOS; Windows: create-totpradius-vm.ps1).
#
#   ./create-totpradius-vm.sh [options] [totpradius_<version>.ova | disk.vmdk | disk.vdi]
#
#   --name NAME          VM name (default TOTPRadius; must not exist yet)
#   --bridge IFACE       host network interface for the bridged adapter (default: the first one
#                        VirtualBox lists; `VBoxManage list bridgedifs` shows them)
#   --nat                NAT instead of bridged (only this PC can reach the appliance)
#   --nic-type TYPE      82540EM (default, Intel PRO/1000 MT Desktop) or virtio
#   --memory MB          default 1024
#   --cpus N             default 1
#   --disk-gb GB         default 8 (the image size); larger grows the disk, and the appliance
#                        grows its data partition at boot
#   --basefolder DIR     where the VM is created (default: VirtualBox's default machine folder)
#   --no-start           create the VM without starting it
#
# Without a file argument the only totpradius_*.ova in the current folder is used.
#
# The VM gets what the appliance needs and has drivers for: EFI firmware with Secure Boot off,
# ICH9 chipset, the disk on a SATA (AHCI) controller, an Intel PRO/1000 or virtio-net adapter,
# VMSVGA graphics, RTC in UTC. Importing the OVA instead (File > Import Appliance) gives a BIOS VM
# with the disk on an LsiLogic SCSI controller; see install-virtualbox.md for the changes it needs.
set -eu

NAME=TOTPRadius; BRIDGE=; NAT=; NICTYPE=82540EM; MEMORY=1024; CPUS=1; DISKGB=8; BASE=; START=1; SRC=
die() { echo "error: $*" >&2; exit 1; }
while [ "$#" -gt 0 ]; do
    case "$1" in
        --name) NAME=${2:?}; shift 2 ;;
        --bridge) BRIDGE=${2:?}; shift 2 ;;
        --nat) NAT=1; shift ;;
        --nic-type) NICTYPE=${2:?}; shift 2 ;;
        --memory) MEMORY=${2:?}; shift 2 ;;
        --cpus) CPUS=${2:?}; shift 2 ;;
        --disk-gb) DISKGB=${2:?}; shift 2 ;;
        --basefolder) BASE=${2:?}; shift 2 ;;
        --no-start) START=; shift ;;
        -h|--help) sed -n '2,25p' "$0"; exit 0 ;;
        -*) die "unknown option $1 (see --help)" ;;
        *) [ -z "$SRC" ] || die "only one image file"; SRC=$1; shift ;;
    esac
done
case "$NICTYPE" in 82540EM|virtio) ;; *) die "--nic-type must be 82540EM or virtio" ;; esac
for n in "$MEMORY" "$CPUS" "$DISKGB"; do case "$n" in ''|*[!0-9]*) die "not a number: $n" ;; esac; done
[ "$MEMORY" -ge 512 ] || die "--memory must be at least 512"
[ "$DISKGB" -ge 8 ] || die "--disk-gb must be at least 8"

command -v VBoxManage >/dev/null 2>&1 || die "VBoxManage not found (install VirtualBox 7)"
if [ -z "$SRC" ]; then
    set -- totpradius_*.ova
    { [ "$#" -eq 1 ] && [ -f "$1" ]; } || die "put exactly one totpradius_*.ova in this folder, or pass the image file"
    SRC=$1
fi
[ -f "$SRC" ] || die "$SRC not found"
VBoxManage showvminfo "$NAME" >/dev/null 2>&1 && die "a VM named '$NAME' already exists (choose another --name)"

if [ -z "$NAT" ] && [ -z "$BRIDGE" ]; then
    BRIDGE=$(VBoxManage list bridgedifs | sed -n 's/^Name: *//p' | head -n 1)
    [ -n "$BRIDGE" ] || die "no host interface for bridging found; pass --bridge IFACE or --nat"
    echo "Bridged adapter on host interface '$BRIDGE' (choose another with --bridge)."
fi

# --- the VM (its folder holds the disk too)
if [ -n "$BASE" ]; then
    VBoxManage createvm --name "$NAME" --ostype Ubuntu_64 --register --basefolder "$BASE" >/dev/null
else
    VBoxManage createvm --name "$NAME" --ostype Ubuntu_64 --register >/dev/null
fi
CFG=$(VBoxManage showvminfo "$NAME" --machinereadable | sed -n 's/^CfgFile="\(.*\)"$/\1/p')
DIR=$(dirname "$CFG")
DISK="$DIR/$NAME.vdi"

# --- the disk: a converted copy, the download stays untouched
TMP=
cleanup() { if [ -n "$TMP" ]; then rm -rf "$TMP"; fi; }
trap cleanup EXIT
case "$SRC" in
    *.ova|*.OVA)
        TMP=$(mktemp -d)
        VMDK=$(tar -tf "$SRC" | grep -i '\.vmdk$' | head -n 1)
        [ -n "$VMDK" ] || die "no .vmdk disk inside $SRC"
        echo "Extracting $VMDK ..."
        tar -xf "$SRC" -C "$TMP" "$VMDK"
        IN="$TMP/$VMDK" ;;
    *) IN=$SRC ;;
esac
echo "Converting the disk to $DISK ..."
VBoxManage clonemedium disk "$IN" "$DISK" --format VDI >/dev/null
if [ "$DISKGB" -gt 8 ]; then
    VBoxManage modifymedium disk "$DISK" --resize $((DISKGB * 1024)) >/dev/null
fi

# --- hardware. EFI is required (the appliance boots only with UEFI). Secure Boot stays off (it is
# not enabled on a VM created this way): the appliance is signed by Token2, not by Microsoft or
# Oracle. Its system disk is still verified at every boot (signed dm-verity).
if [ -n "$NAT" ]; then NET="--nic1=nat"; else NET="--nic1=bridged"; fi
VBoxManage modifyvm "$NAME" --firmware=efi --chipset=ich9 --ioapic=on \
    --memory="$MEMORY" --cpus="$CPUS" --rtc-use-utc=on \
    --graphicscontroller=vmsvga --vram=16 --audio-enabled=off --usb-ohci=off --usb-ehci=off --usb-xhci=off \
    "$NET" --nic-type1="$NICTYPE" --boot1=disk --boot2=none --boot3=none --boot4=none \
    --description="TOTPRadius appliance (Token2). For tests and evaluation."
if [ -z "$NAT" ]; then VBoxManage modifyvm "$NAME" --bridge-adapter1="$BRIDGE"; fi
VBoxManage storagectl "$NAME" --name SATA --add sata --controller IntelAhci --portcount 1 --bootable on
VBoxManage storageattach "$NAME" --storagectl SATA --port 0 --device 0 --type hdd --medium "$DISK"

if [ -z "$START" ]; then
    echo "VM '$NAME' created (not started). Start it with:  VBoxManage startvm \"$NAME\""
    exit 0
fi
VBoxManage startvm "$NAME" --type gui
cat <<EOF

VM '$NAME' is starting. Its console shows the appliance's IP address and the first-boot setup code.
Then browse to https://<that address>/admin/ (the certificate is self-signed until you install your own).
EOF
create-totpradius-vm.ps1 (Windows) – show script
Download create-totpradius-vm.ps1
<#
.SYNOPSIS
    Creates a VirtualBox VM for the TOTPRadius 0.4 appliance (tests and evaluation) on Windows.

.DESCRIPTION
    Sample script by Token2, the Windows twin of create-totpradius-vm.sh. Needs VirtualBox 7.0 or
    later. Put it next to the TOTPRadius .ova and run it in PowerShell (no administrator rights needed).

    The VM gets what the appliance needs and has drivers for: EFI firmware with Secure Boot off,
    ICH9 chipset, the disk on a SATA (AHCI) controller, an Intel PRO/1000 (82540EM) or virtio-net
    adapter, VMSVGA graphics, RTC in UTC. The disk is extracted from the OVA and converted to a VDI
    in the VM folder, so the download stays untouched.

.EXAMPLE
    .\create-totpradius-vm.ps1
    Uses the only totpradius_*.ova in the script's folder and bridges to the first host adapter.

.EXAMPLE
    .\create-totpradius-vm.ps1 -Name TOTPRadius-2 -Bridge "Intel(R) Ethernet Connection I219-LM" -DiskGB 16
#>
[CmdletBinding()]
param(
    # The TOTPRadius .ova (or a .vmdk / .vdi disk). Default: the only .ova in the script's folder.
    [string]$Image,
    # Name of the new VM (must not exist yet).
    [string]$Name = "TOTPRadius",
    # Host network adapter for the bridged adapter. Default: the first one VirtualBox lists
    # (VBoxManage list bridgedifs).
    [string]$Bridge,
    # NAT instead of bridged: only this PC can reach the appliance.
    [switch]$Nat,
    [ValidateSet("82540EM", "virtio")][string]$NicType = "82540EM",
    [ValidateRange(512, 65536)][int]$MemoryMB = 1024,
    [ValidateRange(1, 16)][int]$Cpus = 1,
    # Larger than 8 grows the disk; the appliance grows its data partition at boot.
    [ValidateRange(8, 2048)][int]$DiskGB = 8,
    # Folder for the VM. Default: VirtualBox's default machine folder.
    [string]$BaseFolder,
    [switch]$NoStart
)
$ErrorActionPreference = "Stop"

$vbm = Join-Path $env:ProgramFiles "Oracle\VirtualBox\VBoxManage.exe"
if (-not (Test-Path -LiteralPath $vbm)) { $vbm = (Get-Command VBoxManage.exe -ErrorAction SilentlyContinue).Source }
if (-not $vbm) { throw "VBoxManage.exe not found. Install VirtualBox 7 first." }
# Windows PowerShell 5.1 turns anything a native program writes to stderr (VBoxManage's progress
# and "not found" messages) into an error that "Stop" makes fatal: run native commands with
# "Continue" and judge them by their exit code only.
function VBox {
    $ErrorActionPreference = "Continue"
    & $vbm @args
    if ($LASTEXITCODE -ne 0) { throw "VBoxManage $($args[0]) failed (exit $LASTEXITCODE)" }
}

if (-not $Image) {
    $found = @(Get-ChildItem -Path $PSScriptRoot -Filter "totpradius_*.ova" -File)
    if ($found.Count -ne 1) { throw "Put exactly one totpradius_*.ova next to this script, or pass -Image <path> (found $($found.Count))." }
    $Image = $found[0].FullName
}
if (-not (Test-Path -LiteralPath $Image -PathType Leaf)) { throw "Image not found: $Image" }
$existing = @(& $vbm list vms) | Where-Object { $_ -match ('^"' + [regex]::Escape($Name) + '" \{') }
if ($existing) { throw "A VM named '$Name' already exists. Choose another name with -Name." }

if (-not $Nat -and -not $Bridge) {
    $Bridge = (& $vbm list bridgedifs | Where-Object { $_ -match '^Name:\s+' } | Select-Object -First 1) -replace '^Name:\s+', ''
    if (-not $Bridge) { throw "No host adapter for bridging found. Pass -Bridge <adapter> or -Nat." }
    Write-Host "Bridged adapter on host adapter '$Bridge' (choose another with -Bridge)."
}

# --- the VM (its folder holds the disk too)
if ($BaseFolder) { VBox createvm --name $Name --ostype Ubuntu_64 --register --basefolder $BaseFolder | Out-Null }
else { VBox createvm --name $Name --ostype Ubuntu_64 --register | Out-Null }
$cfg = (& $vbm showvminfo $Name --machinereadable | Where-Object { $_ -like 'CfgFile=*' }) -replace '^CfgFile="(.*)"$', '$1'
$disk = Join-Path (Split-Path -Parent $cfg) "$Name.vdi"

# --- the disk: extract the VMDK from the OVA (a tar file; tar.exe ships with Windows 10 1803+)
$tmp = $null
try {
    $in = $Image
    if ($Image -match '\.ova$') {
        $tmp = Join-Path ([IO.Path]::GetTempPath()) ("totpradius-" + [guid]::NewGuid())
        New-Item -ItemType Directory -Path $tmp | Out-Null
        $vmdk = & tar.exe -tf $Image | Where-Object { $_ -match '\.vmdk$' } | Select-Object -First 1
        if (-not $vmdk) { throw "No .vmdk disk inside $Image" }
        Write-Host "Extracting $vmdk ..."
        $ErrorActionPreference = "Continue"
        & tar.exe -xf $Image -C $tmp $vmdk
        $ErrorActionPreference = "Stop"
        if ($LASTEXITCODE -ne 0) { throw "tar.exe could not extract $vmdk" }
        $in = Join-Path $tmp $vmdk
    }
    Write-Host "Converting the disk to $disk ..."
    VBox clonemedium disk $in $disk --format VDI | Out-Null
} finally {
    if ($tmp) { Remove-Item -LiteralPath $tmp -Recurse -Force -ErrorAction SilentlyContinue }
}
if ($DiskGB -gt 8) { VBox modifymedium disk $disk --resize ($DiskGB * 1024) | Out-Null }

# --- hardware. EFI is required. Secure Boot stays off (it is not enabled on a VM created this way):
# the appliance is signed by Token2, not by Microsoft or Oracle; its system disk is still verified
# at every boot (signed dm-verity).
$net = if ($Nat) { "--nic1=nat" } else { "--nic1=bridged" }
VBox modifyvm $Name --firmware=efi --chipset=ich9 --ioapic=on --memory=$MemoryMB --cpus=$Cpus --rtc-use-utc=on `
    --graphicscontroller=vmsvga --vram=16 --audio-enabled=off --usb-ohci=off --usb-ehci=off --usb-xhci=off `
    $net --nic-type1=$NicType --boot1=disk --boot2=none --boot3=none --boot4=none `
    "--description=TOTPRadius appliance (Token2). For tests and evaluation."
if (-not $Nat) { VBox modifyvm $Name "--bridge-adapter1=$Bridge" }
VBox storagectl $Name --name SATA --add sata --controller IntelAhci --portcount 1 --bootable on
VBox storageattach $Name --storagectl SATA --port 0 --device 0 --type hdd --medium $disk

if ($NoStart) {
    Write-Host "VM '$Name' created (not started). Start it in VirtualBox Manager or with: VBoxManage startvm `"$Name`""
    return
}
VBox startvm $Name --type gui
Write-Host ""
Write-Host "VM '$Name' is starting. Its console shows the appliance's IP address and the first-boot setup code."
Write-Host "Then browse to https://<that address>/admin/ (the certificate is self-signed until you install your own)."
Minimum VM settings
Every image needs these virtual machine settings:
| Setting | Value |
|---|---|
| Firmware | UEFI (no legacy BIOS boot) |
| Secure Boot | off – the appliance is signed by Token2, while hypervisors trust Microsoft's keys by default; the system disk is still verified at every boot |
| CPU / memory | 1 vCPU, 1 GB RAM, fixed memory (no ballooning / dynamic memory) |
| Disk | 8 GB |
| Network | one adapter on a network your RADIUS clients can reach |
The VMware, VirtualBox and Hyper-V (script) images set these values for you. 1 vCPU and 1 GB are enough for up to about 3 000 users; for about 10 000 users use 2 vCPU, 2 GB RAM and a 16 GB disk (see Installation and initial configuration).
After the download
- Deploy the image with the guide for your hypervisor (table above).
- Follow Installation and initial configuration: the VM console shows the IP address and a one-time setup code; you create the first administrator in the browser.
- Upgrading from 0.3.x? There is no in-place upgrade: install 0.4 next to the old appliance and import its data, see Upgrading from 0.3.x to 0.4.
- Already running 0.4? You do not need a new image: updates are installed from the System page, online or as a signed
.t2updfile for appliances without Internet access (download), see Online updates.
For hypervisors or deployment scenarios not listed here, please contact us.
3. Installing TOTPRadius 0.4 on Hyper-V
This guide installs the TOTPRadius 0.4 virtual appliance on Microsoft Hyper-V. The Hyper-V download is a VHDX disk image; a short PowerShell script creates the virtual machine with the right settings. Other hypervisors: VMware, VirtualBox, and the overview in Installation and initial configuration.
Requirements
- Windows Server 2016 or later, or Windows 10/11 Pro or Enterprise with Hyper-V enabled.
- An External virtual switch, so that your RADIUS clients (VPN gateway, firewall, Wi-Fi controller …) can reach the appliance. Internal and private switches, and the Default Switch, work for tests only.
- 1 vCPU, 1 GB RAM and 8 GB of disk for up to about 3000 users (see the sizing table in Installation and initial configuration).
- From the download page: the TOTPRadius
.vhdxand the scriptCreate-TOTPRadiusVM.ps1.
Step 1. Create the VM with the script
- Put the
.vhdxandCreate-TOTPRadiusVM.ps1in the same folder, for exampleC:\TOTPRadius. - Open PowerShell as administrator and run:
If PowerShell refuses to run scripts, allow it for this window only:cd C:\TOTPRadius Unblock-File .\Create-TOTPRadiusVM.ps1 .\Create-TOTPRadiusVM.ps1Set-ExecutionPolicy -Scope Process Bypass. - Choose the virtual switch when the script asks. The script copies the disk into the Hyper-V VM folder, creates the VM, starts it and opens its console.
The script accepts these optional parameters:
| Parameter | Default | Meaning |
|---|---|---|
-Name | TOTPRadius | VM name (must be new; run the script again with another name for a second node) |
-Switch | asks | virtual switch name |
-Path | Hyper-V default folder | where the VM and its disk are stored |
-MemoryMB | 1024 | fixed memory |
-Cpus | 1 | virtual processors |
-DiskGB | 8 | grows the virtual disk; the appliance grows its data partition at boot |
-VlanId | none | VLAN ID for the network adapter (access mode) |
-StaticMac | dynamic | fixed MAC address, for a DHCP reservation |
-Vhdx | the .vhdx next to the script | disk image to use |
-NoStart | create the VM without starting it |
Example, a second node on VLAN 20 with a 16 GB disk: .\Create-TOTPRadiusVM.ps1 -Name TOTPRadius-2 -Switch LAN -VlanId 20 -DiskGB 16
What the script sets, and why
► Generation 2, Secure Boot off – Hyper-V only trusts Microsoft-signed boot loaders for Linux; the appliance is signed by Token2. Its system disk is still verified at every boot (signed dm-verity), so a modified system does not start.
► Fixed memory – no dynamic memory.
► Checkpoints off – going back to an old checkpoint would also bring back old users, tokens and already used one-time codes. Use the appliance's own backups instead (see Backups and disaster recovery).
► Automatic start and clean shutdown with the host.
► The downloaded VHDX is copied, never changed, so it can be used for more VMs.
Alternative: create the VM in Hyper-V Manager
- Copy the
.vhdxto the folder where the VM should live (keep the download as it is). - In Hyper-V Manager choose New → Virtual Machine: Generation 2; Startup memory
1024MB with Use Dynamic Memory unticked; connect the external switch; Use an existing virtual hard disk → the copy of the VHDX. - Before the first start, open the VM's Settings → Security and untick Enable Secure Boot.
- Under Settings → Checkpoints, untick Enable checkpoints.
- Start the VM and connect to its console.
Step 2. First boot
The console shows the appliance's IP address (from DHCP). Press Enter to keep it, or N to set a static address. The next screen shows the one-time setup code.

Continue with Installation and initial configuration: browse to https://<IP address>/admin/, enter the setup code and create the first administrator.
Later: updates and a larger disk
- Updates replace the system inside the VM (online, or by uploading a
.t2updfile on the System page); the VM and its settings stay as they are. See Online updates. - To grow the disk: shut the VM down, run
Resize-VHD -Path <disk> -SizeBytes 16GB, start it again. The appliance grows its data partition at boot.
4. Installing TOTPRadius 0.4 on VMware ESXi / vSphere, Workstation, Fusion
This guide installs the TOTPRadius 0.4 virtual appliance on VMware ESXi / vSphere, VMware Workstation or VMware Fusion. The VMware download is an OVA: one file with the VM description (OVF) and its disk. Every VMware product deploys it directly; nothing has to be set by hand. Other hypervisors: Hyper-V, VirtualBox, and the overview in Installation and initial configuration.
Requirements
- ESXi / vCenter 6.7 Update 2 or later, Workstation 15 or later, or Fusion 11 or later (the OVA uses virtual hardware version 15).
- A port group (vSphere) or a bridged network (Workstation / Fusion) that your RADIUS clients (VPN gateway, firewall, Wi-Fi controller …) can reach. NAT and host-only networks work for tests only.
- 1 vCPU, 1 GB RAM and 8 GB of disk for up to about 3000 users.
- The file
totpradius_<version>.ovafrom the download page.
What the OVA sets
| Setting | Value | Why |
|---|---|---|
| Virtual hardware | version 15 (vmx-15) | runs on ESXi 6.7 U2+ and every newer VMware product |
| Guest OS | Ubuntu Linux (64-bit) | |
| Firmware | EFI, Secure Boot off | VMware VMs only trust Microsoft's keys; the appliance is signed by Token2. Its system disk is still verified at every boot (signed dm-verity), so a modified system does not start. |
| CPU / memory | 1 vCPU, 1024 MB | enough for several thousand users |
| Disk | 8 GB, Paravirtual SCSI (PVSCSI), thin | the appliance creates and grows its data partition at boot |
| Network | one VMXNET3 adapter on the OVF network management | mapped to your port group when you deploy |
The appliance includes open-vm-tools: vSphere shows its IP address and host name, and Shut Down Guest / Restart Guest work. vSphere lists the tools as "Guest managed"; there is nothing to install or upgrade.
Option A. vSphere Client (vCenter)
- Right-click a cluster, host or folder → Deploy OVF Template…
- Local file → upload
totpradius_<version>.ova→ Next. - Enter the VM name, for example
TOTPRadius, choose its folder, then the compute resource. - Review the details → Select storage: pick the datastore and Thin Provision.
- Select networks: map the source network
managementto the port group your RADIUS clients reach. - Finish. When the deployment task completes, power the VM on and open its web console.
Option B. ESXi Host Client (no vCenter)
- Virtual Machines → Create / Register VM → Deploy a virtual machine from an OVF or OVA file.
- Enter the name and drop the
.ovafile into the window. - Choose the datastore. Under Deployment options: map
managementto the port group, disk provisioning Thin, and tick Power on automatically if you like. - Finish, then open the VM's console once it runs.
Option C. VMware Workstation / Fusion
- Workstation: File → Open… and select the
.ova. Fusion: File → Import… - Enter a name and folder → Import.
- Before the first start, open VM Settings → Network Adapter and choose Bridged, so that other machines can reach the appliance (NAT is fine for a test on your own PC).
- Check VM Settings → Options → Advanced (Fusion: Settings → Advanced): firmware UEFI, Enable secure boot unticked. The OVA sets both; if they show otherwise, set them.
- Power on.
Option D. Scripted deployment with ovftool
VMware OVF Tool 4.x (Windows, Linux, macOS) deploys the OVA in one command:
ovftool --acceptAllEulas --name=TOTPRadius \
        --datastore=datastore1 --diskMode=thin \
        --net:management="VM Network" \
        --powerOn \
        totpradius_0.4.1.ova \
"vi://administrator%[email protected]/Datacenter/host/Cluster/"- Target:
vi://[email protected]/for a single ESXi host, orvi://<user>@<vcenter>/<datacenter>/host/<cluster or host>/for vCenter. Write@inside the user name as%40; ovftool asks for the password. --net:management=maps the OVA's network to your port group.- Add
--noSSLVerifyif the host or vCenter still has its self-signed certificate. - More resources:
--numberOfCpus:'*'=2 --memorySize:'*'=2048. A larger disk is set after the deployment (see below).
Token2's sample script deploy-ovftool.sh (on the download page) wraps the same call and takes the values as environment variables:
OVA=totpradius_0.4.1.ova TARGET='vi://[email protected]/' DATASTORE=datastore1 \
NETWORK='RADIUS LAN' NAME=TOTPRadius ./deploy-ovftool.sh| Variable | Default | Meaning |
|---|---|---|
OVA | the only totpradius_*.ova in the current folder | the OVA to deploy |
TARGET | (required) | vi:// locator of the ESXi host or vCenter cluster/host |
NAME | TOTPRadius | VM name |
DATASTORE | (required) | datastore name |
NETWORK | VM Network | port group for the appliance |
CPUS / MEMORY_MB | 1 / 1024 | changed only when set |
NO_SSL_VERIFY | 1 passes --noSSLVerify | |
NO_POWER_ON | 1 leaves the VM off |
First boot
The console shows the appliance's IP address (from DHCP). Press Enter to keep it, or N to set a static address. The next screen shows the one-time setup code.
Continue with Installation and initial configuration: browse to https://<IP address>/admin/, enter the setup code and create the first administrator.
Snapshots
A short snapshot right before a change, deleted again afterwards, is fine. Image-level backup tools that take a snapshot only while copying the disk are fine too, but restore them only to rebuild a lost appliance.
Later: updates and a larger disk
- Updates replace the system inside the VM (online, or by uploading a
.t2updfile on the System page); the VM and its settings stay as they are, so the OVA is only needed for new installations. See Online updates. - To grow the disk: shut the VM down (delete any snapshots first; VMware does not resize a disk that has snapshots), Edit Settings → Hard disk 1 → the new size, for example
16GB, then power it on. The appliance grows its data partition into the new space at boot.
5. Installing TOTPRadius 0.4 on VirtualBox
VirtualBox is fine for trying TOTPRadius on a desktop or laptop. For production, use a server hypervisor (VMware, Hyper-V or the other hypervisors).
Use the VirtualBox OVA, totpradius_<version>-virtualbox.ova. It carries VirtualBox's own VM settings (EFI, SATA disk, Intel network adapter), so it imports and boots as it is.
totpradius_<version>.ova is the VMware image. VirtualBox ignores its settings and creates a BIOS VM that does not boot ("No bootable medium found"). See Only if you use the VMware OVA below.Requirements
- VirtualBox 7.0 or later on an Intel/AMD (x86-64) host: Windows, Linux or an Intel Mac. The appliance is an x86-64 VM, which VirtualBox cannot run on Apple-silicon Macs.
- 1 vCPU, 1 GB RAM and 8 GB of disk.
- A bridged adapter if other machines (your VPN or Wi-Fi test setup) should reach the appliance; NAT is enough when only this PC talks to it.
Step 1. Import and start
- Double-click
totpradius_<version>-virtualbox.ova(or File → Import Appliance… → the file) → Finish. Keep the proposed settings; change the name or the base folder if you like. Tick Import hard drives as VDI if you may want to grow the disk later (VirtualBox resizes VDI disks only). - Optional, for RADIUS clients on your network: select the new VM → Settings → Network → Adapter 1 → Attached to: Bridged Adapter, Name: your LAN or Wi-Fi adapter → OK. This is also possible later, with the VM powered off.
- Start.
After the import the network adapter is on NAT, with a port forward from https://127.0.0.1:8443 on this PC to the appliance's admin page. NAT works on every host as it is; a bridged adapter has to name one of your host's adapters, which a downloaded file cannot know.
Every import gets its own VM UUID, disk UUID and MAC address, so the same file can be imported more than once.
The same with VBoxManage
VBoxManage import totpradius_0.4.1-virtualbox.ova --vsys 0 --vmname TOTPRadius --options importtovdi
VBoxManage list bridgedifs                                                   # the host adapter names
VBoxManage modifyvm TOTPRadius --nic1=bridged --bridge-adapter1="<adapter>"   # optional
VBoxManage startvm TOTPRadius
What the VirtualBox OVA sets
| Setting | Value | Why |
|---|---|---|
| Firmware | EFI (System → Motherboard → Enable EFI) | required: the appliance boots only with UEFI |
| Secure Boot | off (Enable Secure Boot unticked) | the appliance is signed by Token2, not by Microsoft or Oracle; its system disk is still verified at every boot (signed dm-verity) |
| Chipset | ICH9 | PIIX3 works too |
| Disk controller | SATA (AHCI) | VirtualBox's default |
| Network adapter | Intel PRO/1000 MT Desktop (82540EM) | Paravirtualized Network (virtio-net) works too |
| Graphics | VMSVGA | the console uses the plain EFI framebuffer |
| RTC | UTC | the appliance keeps its clock in UTC |
There are no VirtualBox Guest Additions in the appliance, and none are needed.
Step 2. First boot
The first boot takes a minute or two (it creates the data partition and the keys). The console then opens the First-boot setup screen with the appliance's IP address. Press Enter to continue; the next screen shows the one-time setup code.
- NAT (the default of the VirtualBox OVA): the address on the console, for example
10.0.2.15, is VirtualBox's internal one. Browse tohttps://127.0.0.1:8443/admin/instead (the OVA's port forward). If port 8443 is taken on your PC, change it under Settings → Network → Adapter 1 → Port Forwarding (under Advanced). - Bridged: browse to
https://<IP address on the console>/admin/.
Accept the certificate warning (the certificate is self-signed), enter the setup code and create the first administrator as described in Installation and initial configuration.
Only if you use the VMware OVA
Importing the VMware totpradius_<version>.ova as it is does not give a working VM. Prefer the VirtualBox OVA. If you only have the VMware OVA, let Token2's sample script create the VM, or import it and change it by hand.
With the sample script
Download create-totpradius-vm.sh (Linux / macOS) or create-totpradius-vm.ps1 (Windows) from the download page, put it next to the .ova and run it. The script extracts the disk from the OVA, converts it to a VDI in the VM folder (the download stays untouched) and creates the VM with the settings above.
./create-totpradius-vm.sh                       # bridged to the first host adapter
./create-totpradius-vm.sh --bridge en0          # macOS Wi-Fi / Ethernet, see: VBoxManage list bridgedifs
./create-totpradius-vm.sh --nat --no-start
Set-ExecutionPolicy -Scope Process Bypass
.\create-totpradius-vm.ps1
.\create-totpradius-vm.ps1 -Bridge "Intel(R) Ethernet Connection I219-LM" -DiskGB 16.sh option | .ps1 parameter | Default | Meaning |
|---|---|---|---|
--name | -Name | TOTPRadius | VM name (must be new) |
--bridge | -Bridge | first adapter VirtualBox lists | host adapter for the bridged network |
--nat | -Nat | NAT instead of bridged | |
--nic-type | -NicType | 82540EM | 82540EM (Intel PRO/1000 MT Desktop) or virtio |
--memory | -MemoryMB | 1024 | |
--cpus | -Cpus | 1 | |
--disk-gb | -DiskGB | 8 | grows the disk; the appliance grows its data partition at boot |
--basefolder | -BaseFolder | VirtualBox default | where the VM is created |
--no-start | -NoStart | create the VM without starting it | |
| file argument | -Image | the only totpradius_*.ova there | an .ova, .vmdk or .vdi |
Without the script
- File → Import Appliance… → the
.ova. Set MAC Address Policy to "Generate new MAC addresses for all network adapters" → Finish. - Open the new VM's Settings before the first start:
- System → Motherboard: tick Enable EFI (special OSes only); set Chipset to ICH9; leave Enable Secure Boot unticked.
- Storage: add a SATA controller (Add Controller → AHCI), move the disk from the SCSI controller to it (remove it from SCSI, then Add Hard Disk → Choose existing) and remove the empty SCSI controller.
- Network → Adapter 1: Attached to: Bridged Adapter (your LAN adapter), Adapter Type: Intel PRO/1000 MT Desktop or Paravirtualized Network.
- Display: Graphics Controller VMSVGA.
- Start the VM. On NAT, add the port forward first (VM powered off):
VBoxManage modifyvm TOTPRadius --nat-pf1 "admin,tcp,127.0.0.1,8443,,443".
Snapshots
Restoring a snapshot brings back old users, tokens and the record of used one-time codes. That is fine for experiments; for anything you want to keep, use the appliance's own backups.
Later: updates and a larger disk
- Updates replace the system inside the VM (online, or by uploading a
.t2updfile on the System page). See Online updates. - To grow the disk: power the VM off, run
VBoxManage modifymedium disk "<path>.vdi" --resize 16384(MB), start it again. The appliance grows its data partition at boot. - VirtualBox resizes VDI disks only. A VM imported without Import hard drives as VDI has a
.vmdk: convert it first (VBoxManage clonemedium disk "<path>.vmdk" "<path>.vdi" --format VDI), then attach the.vdiin its place under Settings → Storage.
6. TOTPRadius - Installation and initial configuration
TOTPRadius is a ready-made virtual appliance. This guide covers the whole path from the download to a first successful test login: choosing the image for your hypervisor, the first boot on the VM console, creating the first administrator, and the first settings to check.
Step 1. Download and deploy the appliance
Pick the image for your hypervisor on the download page and follow its guide:
| Hypervisor | Download | Guide |
|---|---|---|
| Microsoft Hyper-V (Windows Server 2016+, Windows 10/11 Pro) | .vhdx + PowerShell script | Installing on Hyper-V |
| VMware ESXi / vSphere, Workstation, Fusion | .ova | Installing on VMware |
| Oracle VirtualBox (tests and evaluation) | -virtualbox.ova | Installing on VirtualBox |
| Proxmox VE, KVM / libvirt, Nutanix AHV | .qcow2 | Other hypervisors below |
Minimum VM settings (all hypervisors)
| Setting | Value |
|---|---|
| Firmware | UEFI (no legacy BIOS boot) |
| Secure Boot | off |
| CPU / memory | 1 vCPU, 1 GB RAM, fixed (no ballooning / dynamic memory) |
| Disk | the 8 GB image; a larger virtual disk is used automatically (the data partition grows at boot) |
| Network | one adapter on a network your RADIUS clients (VPN gateway, firewall, Wi-Fi controller …) can reach |
Secure Boot is off on every hypervisor because hypervisors trust Microsoft's keys by default, while the appliance is signed by Token2. The read-only system partition is still verified at every boot (dm-verity, root hash signed by Token2), so a modified system does not start.
Sizing
| Users | vCPU | RAM | Disk |
|---|---|---|---|
| up to 3 000 | 1 | 1 GB | 8 GB (the default image) |
| up to 10 000 | 2 | 2 GB | 16 GB |
The request rate matters more than the number of users: even 10 000 users all signing in within one minute is about 170 requests per second, which one vCPU handled at about 20 % CPU in Token2's load test. The second vCPU and the extra RAM for 10 000 users are headroom for backups, the admin console, portal sessions and LDAP over TLS.
Other hypervisors (qcow2)
Use the .qcow2 image (8 GB virtual disk, thin). The appliance has virtio drivers (disk, SCSI, network) and includes the QEMU guest agent.
► Proxmox VE – Machine q35, BIOS OVMF (UEFI), an EFI disk without pre-enrolled keys (GUI: untick Pre-Enroll keys; CLI: --efidisk0 <storage>:1,efitype=4m,pre-enrolled-keys=0), SCSI controller VirtIO SCSI single, the qcow2 imported as scsi0 (qm importdisk <vmid> totpradius_<version>.qcow2 <storage>, then attach it and make it the boot disk), network VirtIO on your bridge, 1 core, 1024 MB with ballooning off, QEMU Guest Agent on, OS type Linux.
► KVM / libvirt – UEFI firmware without Secure Boot (virt-install: --boot uefi,firmware.feature0.name=secure-boot,firmware.feature0.enabled=no), q35, a copy of the qcow2 as a virtio disk, a virtio network adapter on a bridge to your LAN, 1 vCPU, 1024 MB.
► Nutanix AHV – upload the qcow2 in Prism as a Disk image; create the VM with UEFI boot and Secure Boot off, 1 vCPU, 1 GB, a disk cloned from the image (SCSI) and a NIC on the right subnet / VLAN.
Step 2. First boot on the VM console
Start the VM and open its console in the hypervisor. The first boot takes a minute or two (it creates the data partition and the keys). The console then opens the First-boot setup screen with the address the appliance got from DHCP.
- Press Enter to keep the DHCP address and continue to the web setup.
- Press N to set a static address. The form has the fields Interface, Address/prefix (e.g.
10.0.0.20/24), Gateway (10.0.0.1; it must lie inside the network of Address/prefix, so mind the prefix), DNS (comma separated) (10.0.0.2, 10.0.0.3) and Hostname (radius); F2 toggles DHCP / static, Tab moves, Enter applies. The console then asks you to press Y to keep the new settings; without it they are rolled back automatically. - If no DHCP server answered, the screen says so: press N and enter a static address.
After Enter, the console shows the address of the admin console and a one-time setup code:
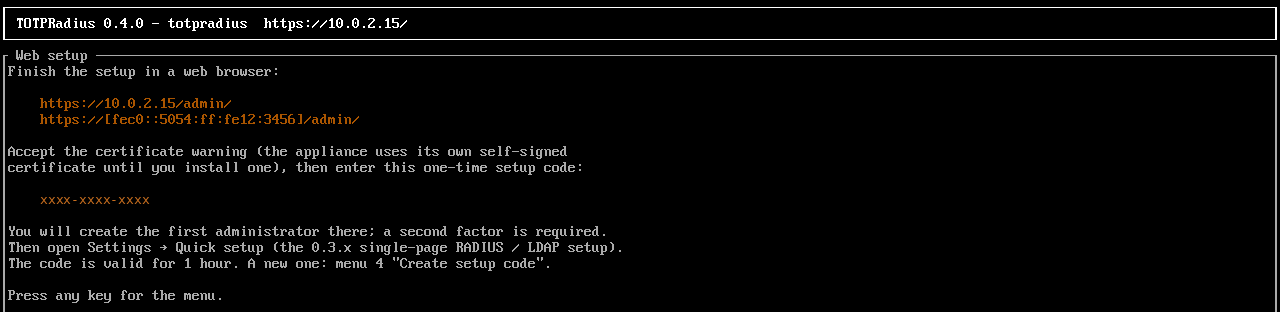
The setup code is valid for 1 hour. If it expired, create a new one with menu 4. Create setup code on the console.
totpradius / totpradius). 0.4 has no Linux login and no root shell on the console: the system is a read-only, verified image. The console menu (network, administrator reset, setup code, restore from backup, SSH support access, reboot, service restarts) is described in The VM console and console PIN.Step 3. Create the first administrator
- Browse to
https://<IP address>/admin/, for examplehttps://10.0.0.20/admin/. Accept the certificate warning: the appliance uses its own self-signed certificate until you install one. - The Welcome to TOTPRadius page opens. Enter the Setup code from the console, for example
xxxx-xxxx-xxxx(three groups of four characters). - Username: keep
adminor choose another name. - Password and Repeat password: a long password (the form warns when it is shorter than 12 characters, a common password or only digits).
- Press Create administrator.
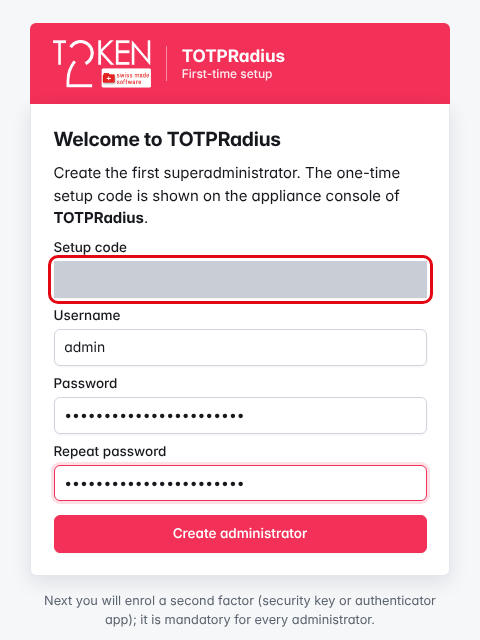
admin / totpradius. 0.4 has no default password: only someone who can see the VM console (and thus the setup code) can create the first administrator.Step 4. Enrol your second factor
Every administrator should sign in with a second factor. After the setup, the Security page opens with the notice "Finish securing your account"; the rest of the console is available only after you enrol a second factor (or explicitly continue without one, see the note below).
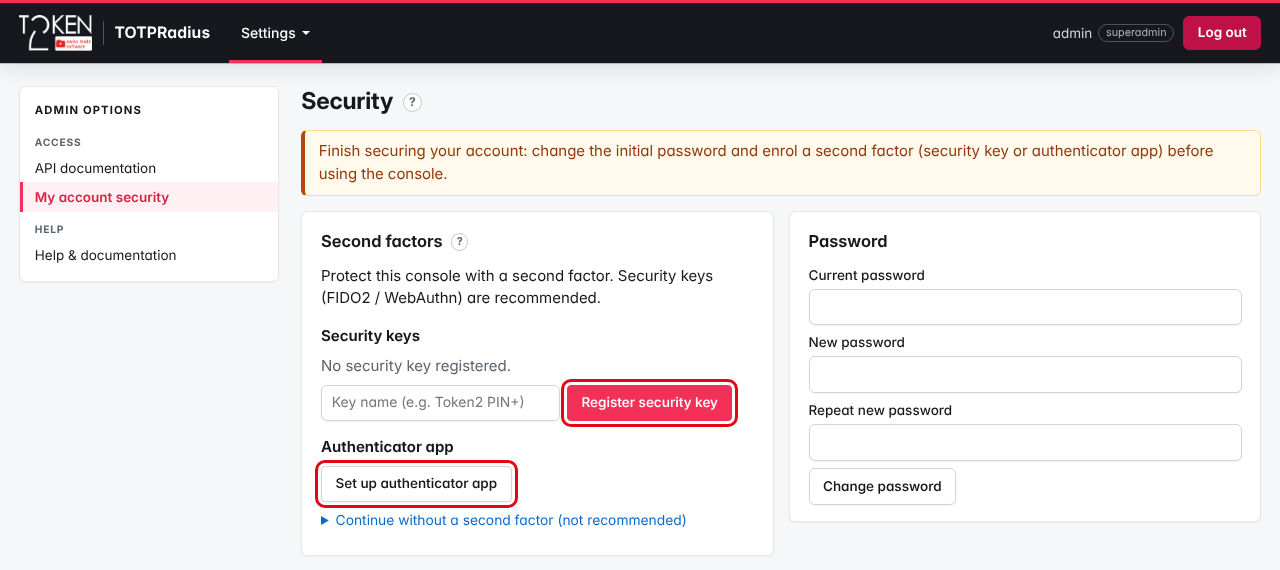
- Security key (recommended): type a name in Key name, for example
Token2 PIN+, press Register security key and touch the key. Register a second key as a spare later. - Authenticator app: press Set up authenticator app, scan the QR code with the app, type the 6-digit code it shows and press Confirm.
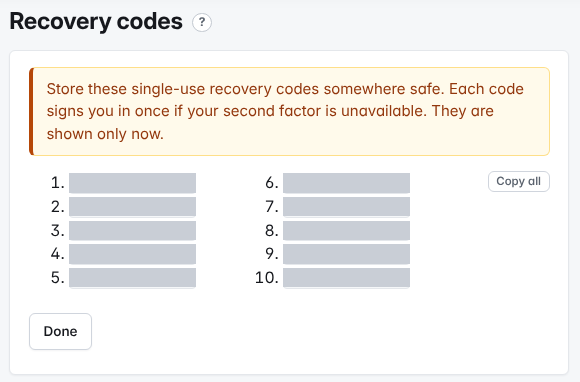
The console then shows 10 single-use recovery codes, only once. Store them offline (print them or keep them in a password manager) and press Done.
Re-authentication for sensitive actions
Some actions need a recent re-authentication: your password again (and a current code when you use an authenticator app). Use Re-authenticate on the Security page (top right, Settings → My account security). Without it the action is refused with "Re-authentication required: confirm your password on the Security page (top right) and retry."
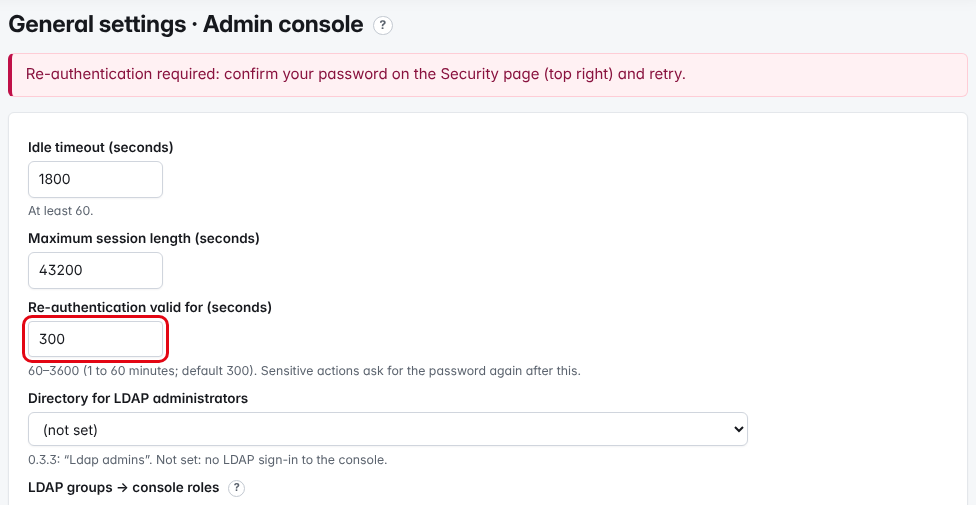
► Re-authentication valid for (seconds) – under Settings → General settings → Admin console: how long a re-authentication counts, from 60 to 3600 (1 to 60 minutes; default 300 = 5 minutes).
A re-authentication is needed for:
- revealing token seeds, managing administrators and API keys, installing a licence, certificates, network, firewall, SSH and power changes, the console PIN, backups and restores, cluster operations, applying a 0.3.x import and OIDC account linking;
- saving these settings (Settings → General settings):
- Admin console: Administrators may sign in without a second factor, the re-authentication validity, idle timeout and maximum session length, Web Admin Access IP range, the LDAP administrator directory and role groups, the console host name, the number of recovery codes;
- API: the whole section (API v1 / v2 on or off, API v1 over plain HTTP, QR link lifetime);
- Lockout: the whole section;
- RADIUS: the default policy; OTP: automatic drift adjustment, the HOTP look-ahead and resync windows, the hardware-token drift scan;
- Users: minimum local password length, tokens per user, the "for new users" portal and re-enrolment defaults;
- Portals: switching any portal on or off, the portal host name, the T2VPN legacy mode, re-enrolment (Allow ldap key change, Allow re-enrolment on the external portal), enrolment after a removed token, hardware-token self-association, temporary-credential classes and reversible storage, the FIDO2 first-key rule, user verification, accepted keys and attestation options, the Entra ID / OIDC client, tenant, issuer, group and account-linking options;
- Notifications: fallback code lifetime, sends and attempts;
- any value in the Secrets box;
- Quick setup, when it changes the default policy or the LDAP enrolment portal.
Other changes (texts, languages, RADIUS look-up timeouts, disk thresholds and so on) are saved without it.
Step 5. Check the time
TOTP codes are only as good as the clock. Open Settings → General settings → System (or the Time card on Settings → System):
► NTP Servers – one per line, at most 8. The default is 0.ch.pool.ntp.org … 3.ch.pool.ntp.org. When the appliance cannot reach the Internet, use internal servers such as your domain controllers, e.g. dc1.example.com. Outbound UDP 123 must be allowed.
► Timezone – IANA name, for example Europe/Zurich or UTC.
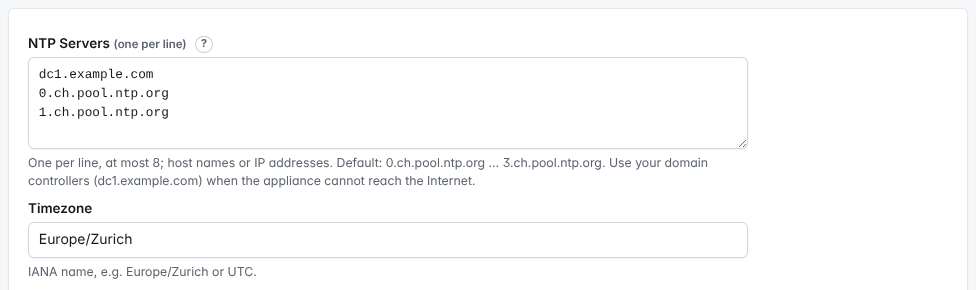
A new time zone is applied at once, without a restart: the dashboard clock, the time stamps sent to syslog servers and the update maintenance window use it. The authentication and audit logs in the console stay in UTC.
The dashboard shows a warning when the clock is not synchronised.
Step 6. Configure authentication
The dashboard of a new appliance is empty: no users, no NAS clients and no hardware tokens (0.3.x shipped sample hardware tokens; 0.4 does not).
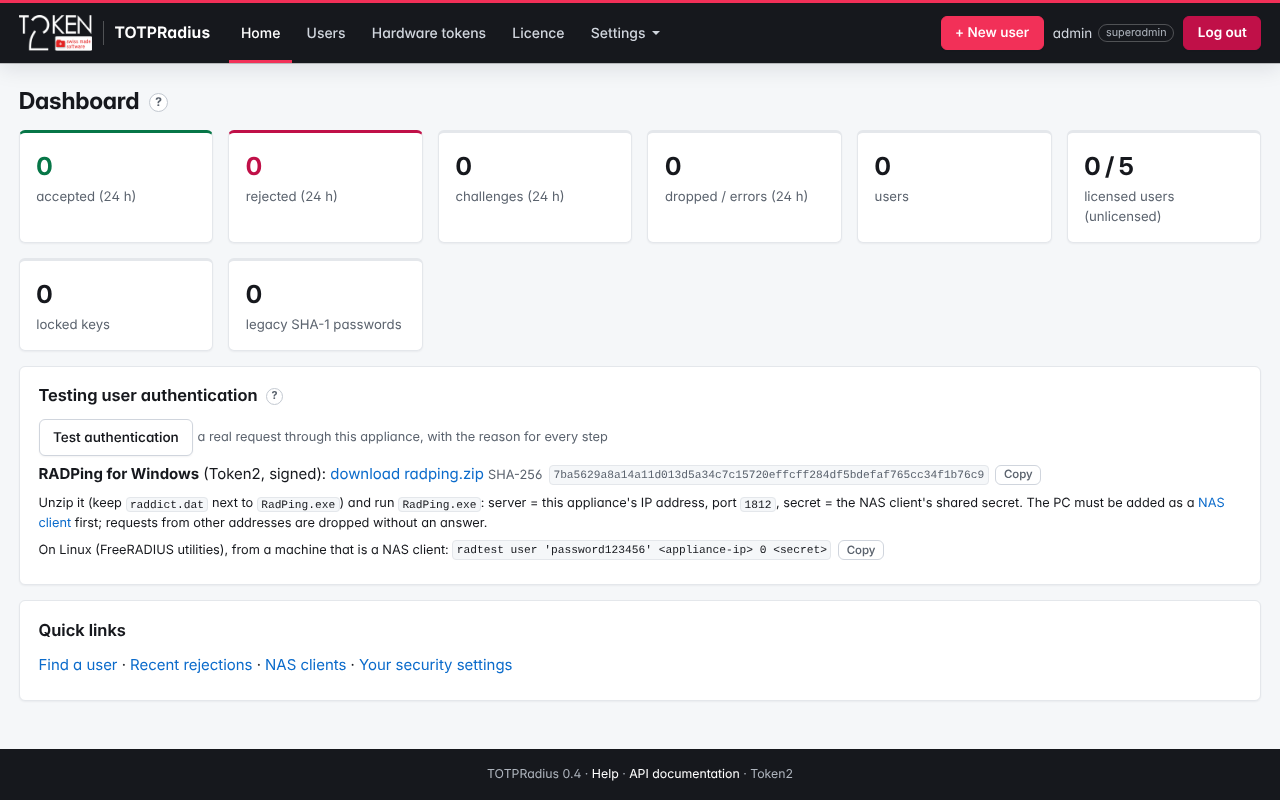
Continue in this order:
- Coming from 0.3.x? Use Settings → Import from 0.3.x before anything else: it needs an empty appliance and creates users, tokens, NAS clients and a "Migrated" policy. See Upgrading from 0.3.x to 0.4.
- One gateway, 0.3.x-style setup: open Settings → Quick setup. It has the familiar 0.3.x fields (RADIUS secret, Endpoint IP and subnet, LDAP, Allow initial login) on one page. See Quick setup.
- Several gateways or rules: create a Directory (if passwords live in Active Directory or OpenLDAP), a Policy and the NAS clients one by one. See Authentication modes and methods and LDAP configuration. Without any policy the built-in default is OTP only (the user types just the code).
- Create a user: + New user, user name
jdoe, Enrol a token now: authenticator app, and scan the QR code shown after saving. - Test before you touch the VPN device (next step).
Settings you knew from 0.3.x
| 0.3.x (General settings) | TOTPRadius 0.4 |
|---|---|
| RADIUS secret, Endpoint IP and subnet | Settings → NAS clients: Shared secret, Source addresses (one NAS client per device; addresses, CIDR networks or the 0.3.x form address + subnet mask such as 10.0.0.0 255.255.255.0) – or Settings → Quick setup → 1. RADIUS |
| Allow initial login | Policy option Allow initial login (the password is still checked) – or Quick setup |
| TOTP skew | Policy option Totp skew (accepted clock difference in 30-second steps; 1 = ±30 s) |
| Strict OTP mode | Gone: codes are always single use. (The policy option "Strict mode OTP across a cluster" is something else: see Cluster.) |
| API key, Allow HTTP | Settings → API keys; Settings → General settings → API (API v1 is served over HTTPS only) |
| Server timezone, NTP | Settings → General settings → System or Settings → System → Time |
| Web admin password, SSH password | Your own account under Settings → My account security; no SSH password (optional key-only SSH support access on Settings → System) |
Step 7. Test
Open Settings → Test authentication. Choose the NAS client in Act as NAS client, enter the User-Name (jdoe) and the current code from the app in Code (with an OTP-only policy leave Password empty), then press Test. The appliance sends a real RADIUS request to itself and lists every step; the result must be Access-Accept.
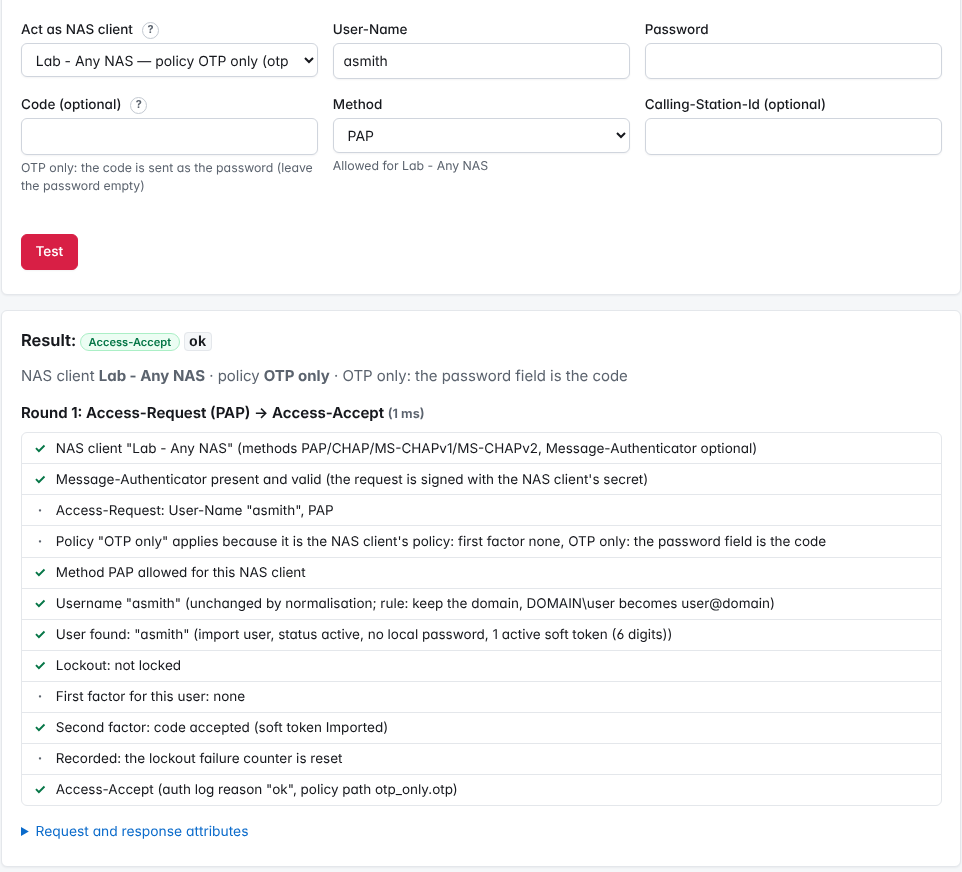
To test from another machine, download RADPing for Windows from the dashboard (download radping.zip) or use radtest on Linux; the testing machine must be added as a NAS client first (for RADPing, untick require Message-Authenticator on that NAS client: RADPing does not send it). Details: Testing TOTPRadius authentication.
If codes are rejected (otp_invalid in Settings → Authentication log), check the appliance time (Step 5) and the time of the phone.
Next steps
- Install a trusted certificate for the admin console: Web server certificates.
- Restrict the admin console and RADIUS to your networks (Settings → System → Firewall allow-lists): Network configuration.
- Set a console PIN: The VM console and console PIN.
- Configure backups and an age recipient: Backups and disaster recovery.
- Choose an update mode: Online updates.
- Add licences for more than 5 users: Purchasing and adding user licenses.
- Device guides: integration guides.
7. TOTPRadius 0.4 Quick setup (the 0.3.x General settings page)
Quick setup is the single-page configuration of TOTPRadius 0.4 for the most common case: one VPN gateway or firewall, one Active Directory / LDAP domain and one rule for all users. It uses the 0.3.x field names and order, so the Token2 integration guides (FortiGate, Palo Alto, Barracuda, PPTP, Cisco Meraki …) can be followed step by step.
What Quick setup creates
In 0.4 the 0.3.x "General settings" are split into three kinds of objects. Quick setup creates or updates exactly one of each, all named Quick setup:
| 0.3.x (General settings) | 0.4 object | 0.4 field |
|---|---|---|
| RADIUS secret | NAS client "Quick setup" | Shared secret |
| Endpoint IP and subnet | NAS client "Quick setup" | Source addresses (0.0.0.0 = any) |
| — (new in 0.4) | NAS client "Quick setup" | Allowed methods, require Message-Authenticator |
| LDAP enabled (password and code in one field, "LDAP proxy") | Policy "Quick setup" | Password checked against the directory, entered in one field |
| Allow initial login | Policy "Quick setup" | Allow initial login |
| LDAP Group | Policy "Quick setup" | LDAP group restriction (exact name) |
| LDAP server, Username format, LDAP search string, LDAPS certificate | Directory "Quick setup" | LDAP server, bind template, search base, CA certificate |
| Allow LDAP enrollment, re-enrollment, intro text | Settings → General settings → Portals | LDAP enrolment portal (/ldap-enroll/) |
The Quick-setup policy becomes the default policy. Quick setup never deletes or changes any other NAS client, directory or policy, and saving the same values again changes nothing. Each save is written to the audit log as quick_setup.apply (without the secret), with what was done to the policy and every policy field Quick setup changed – including the MS-CHAPv2 accepted from rule. Saving needs a recent re-authentication when it changes the default policy or the LDAP enrolment portal (Settings → My account security → Re-authenticate, see re-authentication).
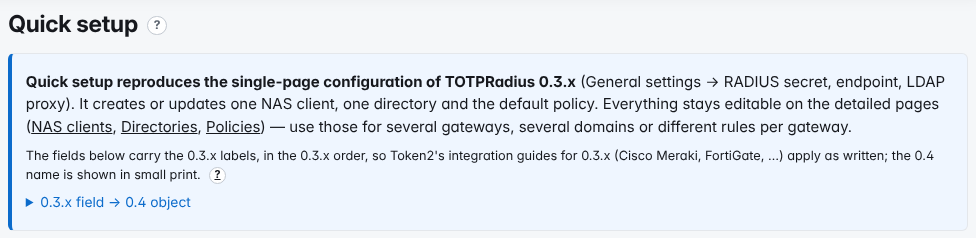
Before you start
- A TOTPRadius 0.4 appliance with an administrator account (see Installation and initial configuration)
- The address your VPN gateway sends RADIUS requests from, for example
192.0.2.1 - For LDAP: the domain controller's name (
dc1.example.com) and the user name format - Example values used in this guide: appliance
radius.example.com(10.0.0.20), domainexample.com, test userjdoe
Step 1. RADIUS
Open Settings → Quick setup. In section 1. RADIUS:
► RADIUS secret – choose Generate a strong one. The secret is shown once after saving; copy it into your gateway. You can also choose Use this secret and type your own (any non-empty secret is accepted, a weak one gets a hint).
► Endpoint IP and subnet – the address the gateway sends RADIUS from, one per line: 192.0.2.1, a network 10.0.0.0/24, or the 0.3.x form 10.0.0.0 255.255.255.0 (stored as 10.0.0.0/24; Settings → NAS clients accepts the same forms). Any (or 0.0.0.0) accepts every address, as in 0.3.x – restrict it with a firewall in that case. Requests from other addresses are dropped without an answer.
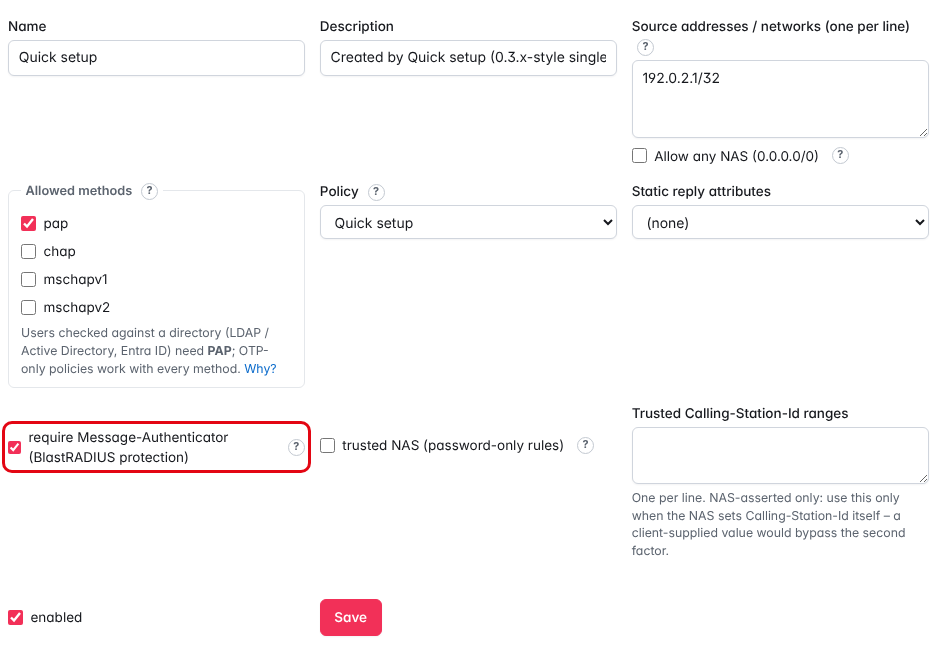
► Allowed methods – keep PAP. An LDAP password can only be checked with PAP; CHAP and MS-CHAP never send it. OTP only works with PAP, CHAP, MS-CHAPv1 and MS-CHAPv2; ticking MS-CHAPv2 here also allows it in the Quick-setup policy (MS-CHAPv2 accepted from).
► Require Message-Authenticator – keep it ticked (protection against the BlastRADIUS attack). Untick it only for a device that cannot send the attribute.
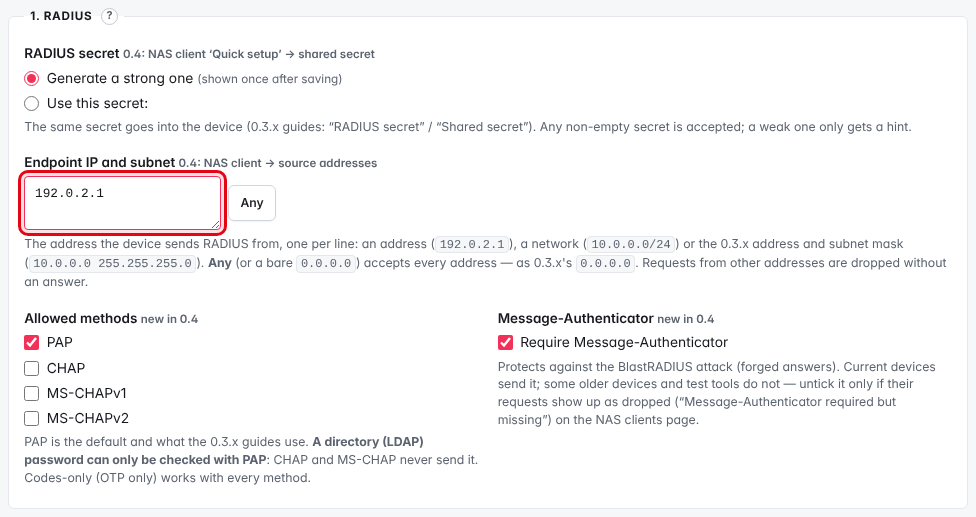
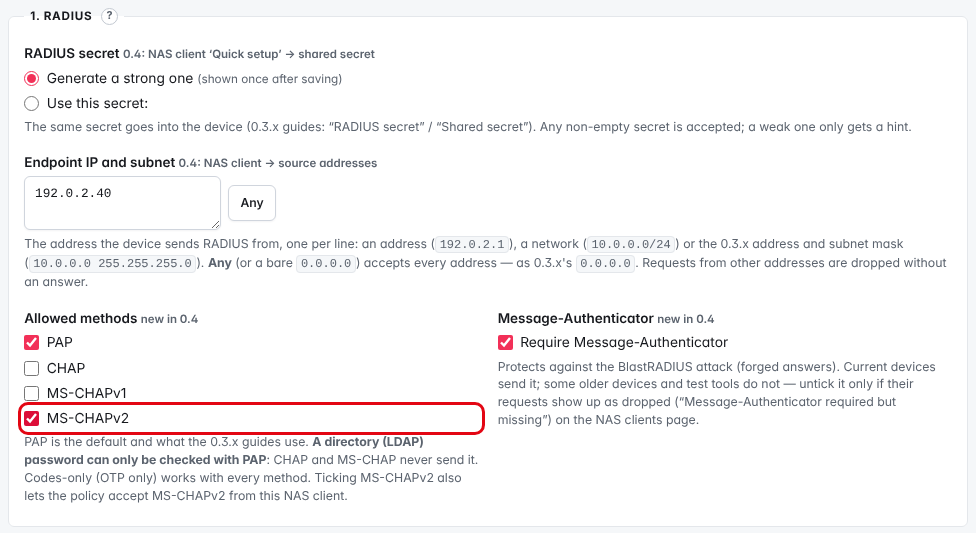
Step 2. Login mode
In section 2. Login mode, choose what users type into the password field of the VPN client:
| Login mode | User types | Notes |
|---|---|---|
| OTP only | 123456 | 0.3.x without LDAP. Works with every RADIUS method ticked under Allowed methods. |
| LDAP password + code in one field | Winter2026!123456 | 0.3.x "LDAP proxy". Default when LDAP is enabled. Needs PAP. |
| LDAP password, then code prompt | the password, then the code in a second prompt | The device must support RADIUS Access-Challenge. Needs PAP. |
| Either | one of the two above | Needs PAP. |
► Allow initial login – how many times a user who has no token yet may log in (for example to reach the enrolment page through the VPN). Enter 0 unless you need it.
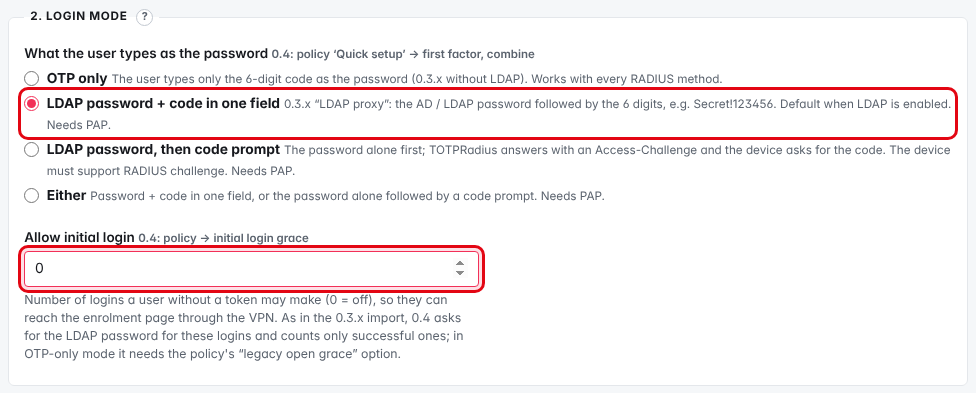
Step 3. LDAP
Skip this section for OTP only. Otherwise tick LDAP enabled in section 3. LDAP and fill in:
► LDAP server – ldaps://dc1.example.com (recommended), or a host name / address for plain LDAP on port 389. Several servers: one per line, or separated by spaces or commas (as on the Directories page); they are tried in order.
► Username format – %username%@example.com (UPN) or EXAMPLE\%username%. %username% is replaced by the name the user types.
► LDAP search string – for example DC=example,DC=com. Leave it empty to read it from the server, or press Detect.
► LDAP Group – optional: only members of this group (its name) may log in, for example VPN Users.
► Timeout (milliseconds) – per LDAP call, default 5000.
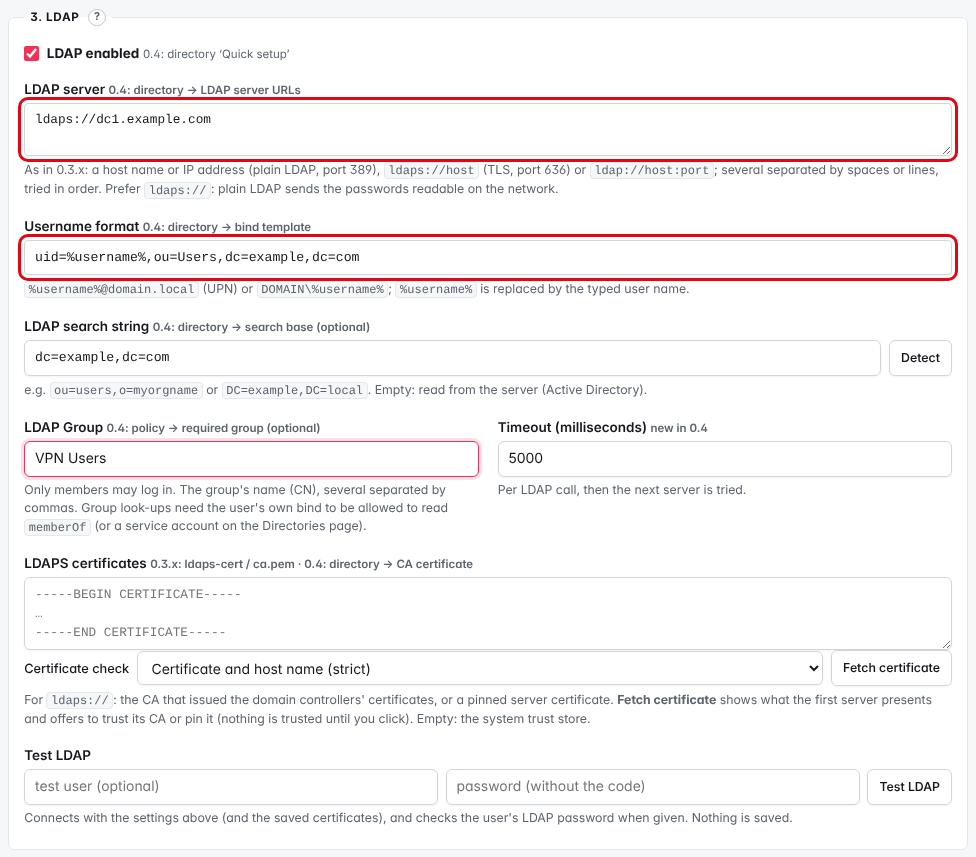
uid=%username%,ou=Users,dc=example,dc=com. For Active Directory use %username%@example.com.LDAPS certificate
With ldaps:// the appliance checks the domain controller's certificate before it sends any password. Press Fetch certificate: the page shows the certificates the server presented and, where it can find it, the issuing CA.
- Compare the SHA-1 thumbprint with the certificate on the domain controller (certlm.msc → Personal → Certificates → Details → Thumbprint).
- Press Trust this CA (recommended: it keeps working when the DC renews its certificate), or Trust this server certificate (pinned) when no CA can be found.
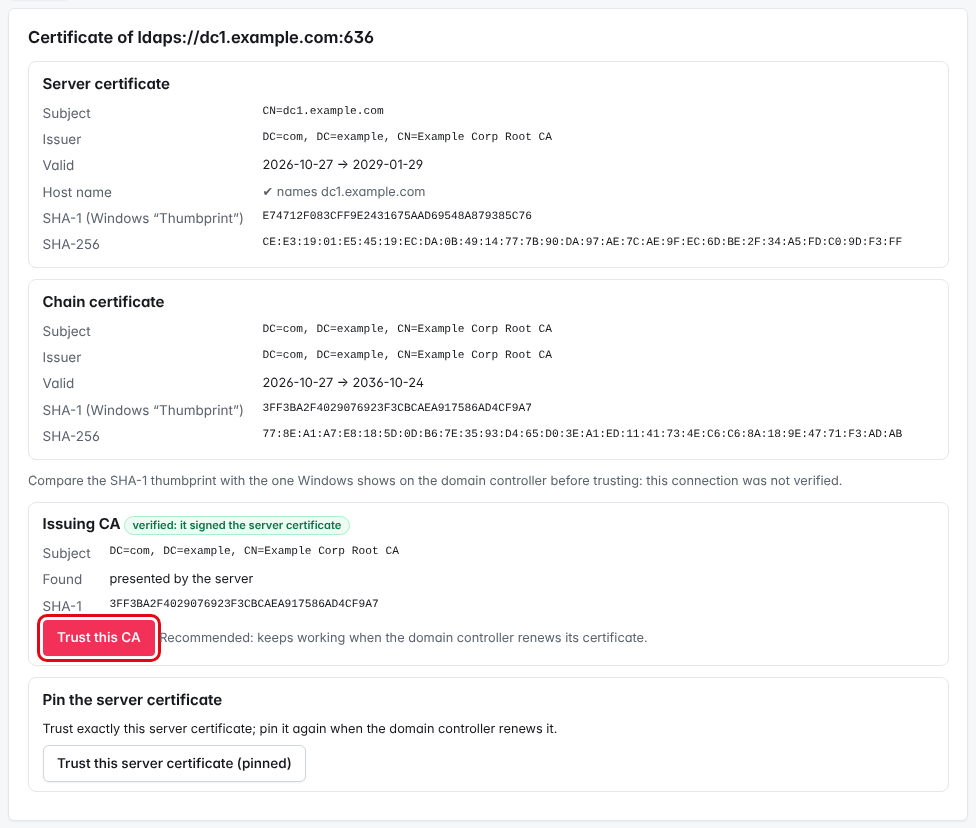
Test LDAP
Under Test LDAP enter a test user (jdoe) and that user's password without the code, then press Test LDAP. Nothing is saved.
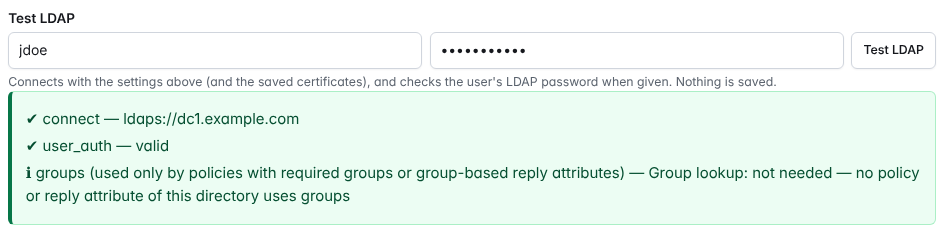
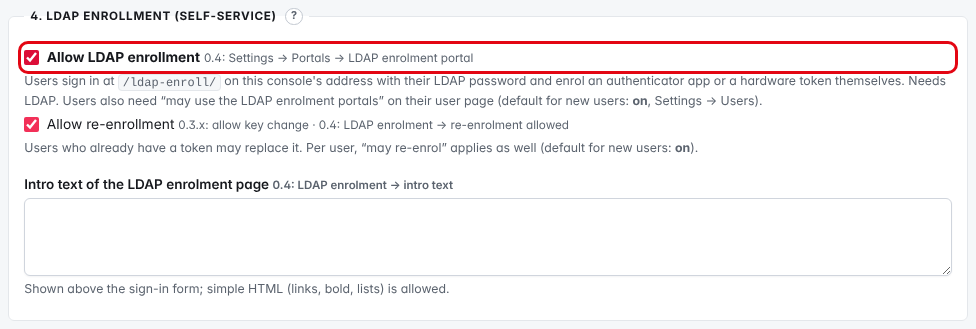
Step 4. LDAP enrollment (self-service)
To let users enrol their own authenticator app or hardware token with their LDAP password, tick Allow LDAP enrollment in section 4. LDAP enrollment (self-service). Allow re-enrollment lets users who already have a token replace it, and Intro text of the LDAP enrolment page is shown above the sign-in form. The page is https://radius.example.com/ldap-enroll/. Users also need may use the LDAP enrolment portals on their user page (on by default for new users).
The external self-service portal (/vpn/ldap/ on the portal address) is configured under Settings → General settings → Portals; see self-service enrolment methods.
Step 5. Save
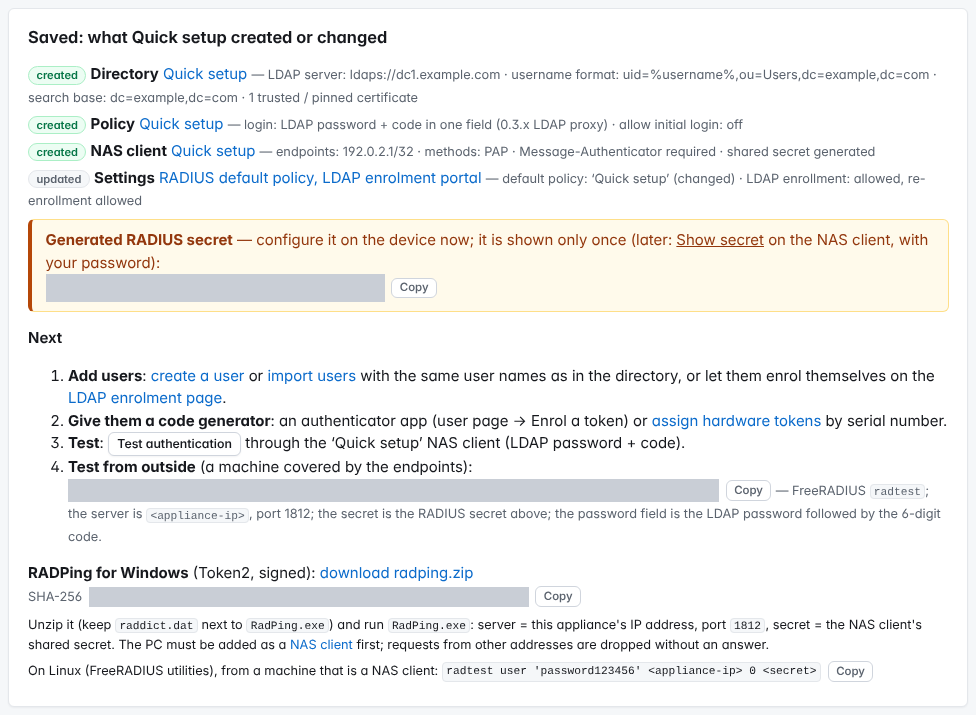
Press Save. The page lists what it created or changed and shows the Generated RADIUS secret once – copy it now and configure it on the device. You can show it again later on the NAS client page (Show secret, after entering your password).
The NAS client Quick setup now appears under Settings → NAS clients, with PAP and require Message-Authenticator:
Next steps
- Add users (+ New user, or Users → Import) with the same user names as in the directory, or let them enrol themselves on
/ldap-enroll/. - Give them a code generator: an authenticator app, a hardware token from the inventory (see Managing hardware tokens) or a key with HID-HOTP (see HOTP and HID-HOTP keys).
- Test with Settings → Test authentication, acting as the NAS client Quick setup, then from the device (see Testing TOTPRadius authentication).
When to use the detailed pages
Quick setup covers one gateway (or several that share one secret and one rule set), one domain and one rule for everybody. Use Settings → NAS clients, Directories (LDAP / AD) and Policies directly for several gateways with their own secrets or rules, several domains, local passwords, Entra ID, reply attributes or an LDAP service account. When the appliance has more objects than Quick setup can show, the page lists them at the top; Quick setup only ever changes its own objects. See Authentication modes and methods and LDAP configuration.
Troubleshooting
| Symptom / reason in the authentication log | What to check |
|---|---|
| The device times out, nothing in the log | Endpoint IP and subnet does not match the device's real source address, or the device sends no Message-Authenticator. See Settings → NAS clients → Dropped requests (last 24 h). |
ldap_chap_unsupported | The device uses CHAP or MS-CHAP; switch it to PAP. |
otp_missing | The user typed only the password in "one field" mode. |
first_factor_invalid | The code was right, the LDAP password wrong (or Username format does not match the directory). |
group_not_allowed | The user is not in the LDAP Group. |
directory_unavailable | The domain controller did not answer within the timeout; check the address, port 636 and the certificate (Test LDAP). |
PART II · AUTHENTICATION: MODES, DIRECTORIES AND POLICIES
8. Authentication modes and methods in Token2 TOTPRadius
TOTPRadius 0.3.x had one global authentication mode (OTP only, LDAP proxy, Azure AD proxy or local passwords) set on the General settings page. In 0.4 the mode is a policy, and every NAS client (VPN gateway, firewall …) uses one policy. Several gateways can therefore follow different rules on the same appliance. This page explains the policy options; step-by-step setup for one gateway is in Quick setup.
Policies
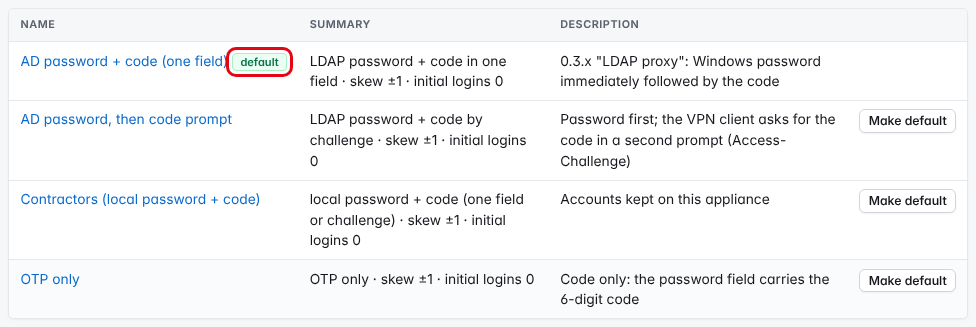
Open Settings → Policies. The list shows each policy with a summary; one is the default (badge) and applies to NAS clients without their own policy. Make default changes it; the default policy cannot be deleted. Without any policy the built-in default applies: OTP only, password and code in one field or by challenge, skew ±1.
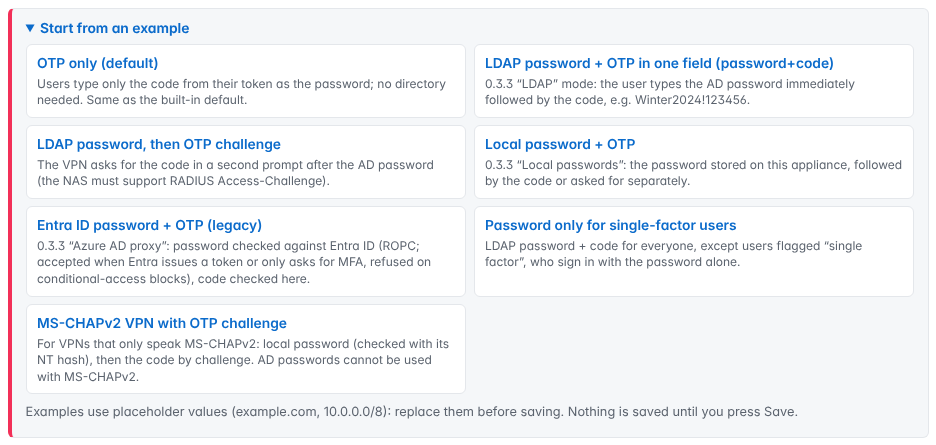
A new policy can start from an example (the form below the list, Start from an example). Presets only fill the form; nothing is saved until you press Create policy.
Which policy a gateway uses is set on its NAS client (Settings → NAS clients → the client → Policy).
Every request is checked in this order: allowed method → user name → temporary portal credential → user status → lockout → split password and code → code first → password → group restriction → exceptions → accept. Because the code is checked before any directory is contacted, wrong codes never cause Active Directory lockouts.
A code that matches is used up at once, before the password and the group restriction are checked. If the password then turns out to be wrong, the same code is rejected as replay on the next attempt: the user waits for the next code (or presses the HOTP key again). Codes are single use in every case.
0.3.x modes and their 0.4 equivalent
| 0.3.x | 0.4 policy setting |
|---|---|
| OTP Only (LDAP and Local Passwords disabled) | Password checked against = Nothing – OTP only (also the built-in default) |
| LDAP Proxy mode (password + OTP in one field) | Password checked against = LDAP / Active Directory password, How the user enters password and code = In one field, plus a directory |
| LDAP Group (with LDAP search string) | LDAP group restriction (exact group name or DN; (nested) supported) |
| Azure AD Proxy mode | Password checked against = Entra ID password (legacy), plus an Entra ID directory (see Entra ID (legacy) directory) |
Local Passwords mode; per-user ldap password | Local password stored on this appliance, or Local password when the user has one, otherwise LDAP |
| Allow initial login (General settings) | Allow initial login per policy (the password is still checked; not used by RADIUS in OTP-only policies) |
| Allow single factor (user), Trusted IP range, Enforce 2fa | Who may sign in with the password only (see single-factor options) |
| Fallback SMS (Twilio) / Email (SendGrid) | 2FA fallback options per policy; providers under Settings → General settings → Notifications |
| Strict mode OTP | Codes are always single use, also when the password that follows is wrong. The option Strict mode OTP across a cluster is something else: it lets only the primary node accept codes. |
Password (first factor)
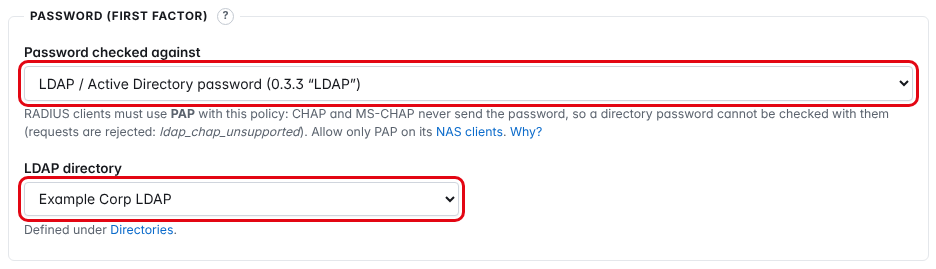
► Password checked against – where the password part of the login is checked:
| Option | Checks |
|---|---|
| Nothing – OTP only | No password: the whole password field is the code. No directory needed. Recommended when the gateway checks the password itself (for example Citrix NetScaler with LDAP as first factor and RADIUS as second). |
| LDAP / Active Directory password | A bind against the chosen LDAP directory. |
| Local password stored on this appliance | The user's local password (argon2id). Imported 0.3.x hashes are upgraded at the user's next login. |
| Local password when the user has one, otherwise LDAP | The 0.3.x per-user choice. |
| Entra ID password (legacy) | Microsoft's resource-owner password flow (ROPC). See Entra ID (legacy). |
| Local password when the user has one, otherwise Entra ID | As above with Entra ID. |
One-time code (second factor)
► Second factor – Code from the user's token (TOTP / HOTP), or None – password only for everyone (a single-factor policy; it needs a password source). A user may have several tokens; a code from any active token is accepted.
► How the user enters password and code – appears when a password is checked:
| Option | User types | Needs |
|---|---|---|
| In one field: password immediately followed by the code (0.3.3) | Winter2026!123456 | any NAS |
| Password first, then the code in a second prompt (Access-Challenge) | the password; the code when the VPN client asks for it | a NAS that supports Access-Challenge (most SSL VPNs) |
| Either: in one field, or the code in a second prompt (recommended) | one of the above | as above for the prompt |
The second prompt is valid for 120 seconds and only for the same user and NAS.
► Where the code starts in the password field – The last 6 (or 8) digits are the code (default; a password that itself ends in digits still works), or At a separator character, for example , → Winter2026!,123456.
► Totp skew – how many 30-second steps before and after the current time are accepted (0–10; 1 = ±30 seconds). The drift of each token is tracked separately.
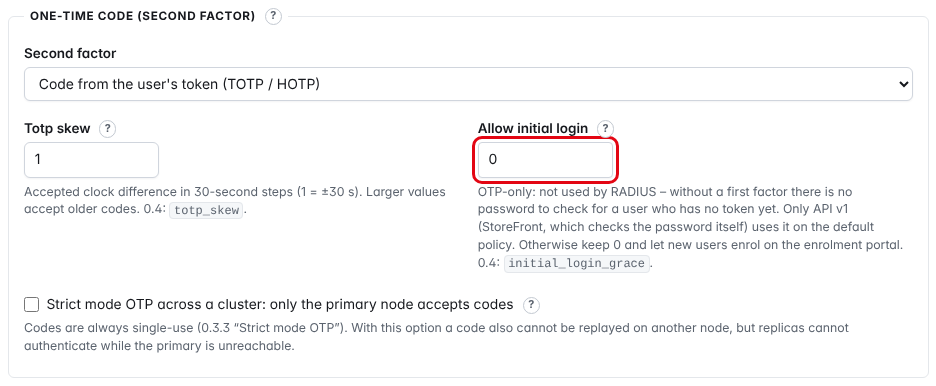
► Allow initial login – logins allowed for a user who has no token yet (0 = none), for example to reach the enrolment portal through the VPN. The password is still checked; only the code is not asked for. Users who have or ever had a token never get it. In an OTP-only policy RADIUS has no password to check, so the value is not used for RADIUS logins: the form says so below the field, and saving such a policy with a value above 0 shows a note. Only API v1 uses it on the default policy (Citrix StoreFront logins left / validate; StoreFront checks the password itself). Keep 0 in OTP-only policies otherwise.
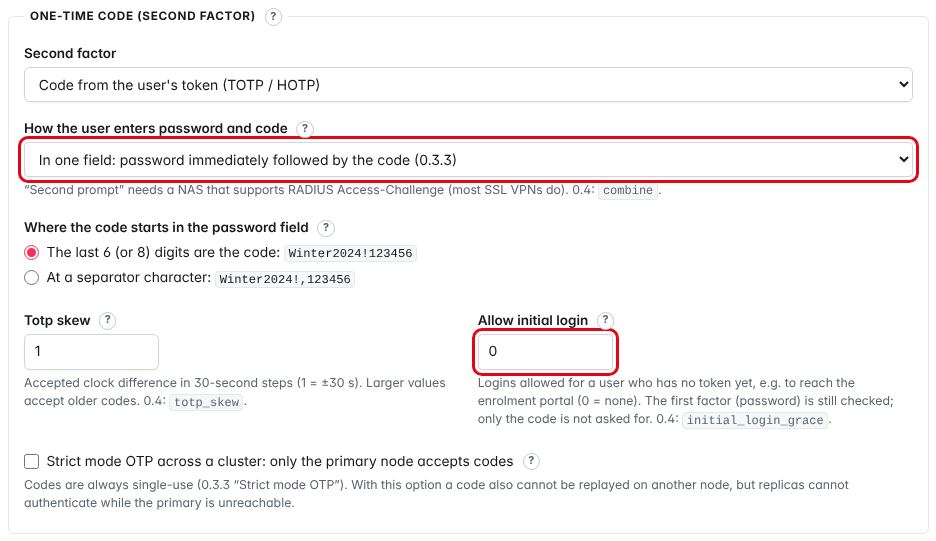
In an OTP-only policy the hint under Allow initial login explains that RADIUS does not use it:
Who may sign in with the password only
Exceptions to the second factor: users marked "single factor", requests through trusted NAS clients, or everyone. Details: Single factor authentication configuration options.
Group restriction and reply attributes
► LDAP group restriction – the user must be in one of the listed groups (one per line: a full DN, a group name, (nested) for nested groups, local:contractors for a group on this appliance). Empty = no restriction.
► Additional RADIUS attributes and RADIUS LDAP group mapping – attributes returned with an Accept; see Reply attributes based on group membership.
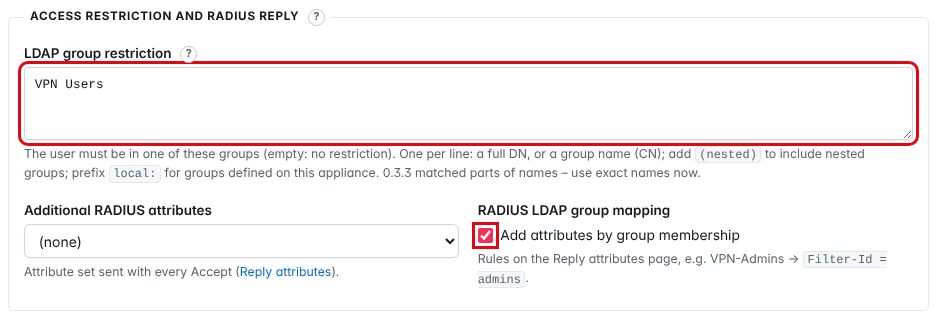
PAP, CHAP and MS-CHAP
A NAS client sends the login with one of four methods (its Allowed methods). With PAP the appliance receives what the user typed (encrypted with the shared secret) and can check anything. CHAP and MS-CHAP only send a response computed from the typed text, so the appliance can only check values it can compute itself:
| Password checked against | PAP | CHAP | MS-CHAPv1 / MS-CHAPv2 |
|---|---|---|---|
| Nothing – OTP only | ✔ | ✔ | ✔ (MS-CHAPv2: only when the policy accepts it from that NAS client) |
| LDAP / Active Directory | ✔ | ✘ ldap_chap_unsupported | ✘ ldap_chap_unsupported |
| Entra ID (legacy) | ✔ | ✘ ldap_chap_unsupported | ✘ ldap_chap_unsupported |
| Local password | ✔ | only with "Keep local passwords reversibly encrypted" | only with "Keep the NT hash" |
Codes work with every method because the appliance knows the token seeds. A directory password needs the password itself for the LDAP bind (or the Microsoft sign-in), which CHAP and MS-CHAP never send: allow only PAP on NAS clients whose policy checks LDAP or Entra ID passwords. The NAS clients page marks conflicting clients CHAP / MS-CHAP rejected.
MS-CHAPv2 is opt-in per NAS client: a captured MS-CHAPv2 exchange can be brute-forced offline for all 1,000,000 six-digit codes in seconds. It is refused unless the policy lists the NAS client under More options: portal credentials, MS-CHAP → MS-CHAPv2 accepted from (default: none ticked); otherwise requests are rejected with mschapv2_not_allowed. Quick setup does this for its own NAS client when you tick MS-CHAPv2 there:
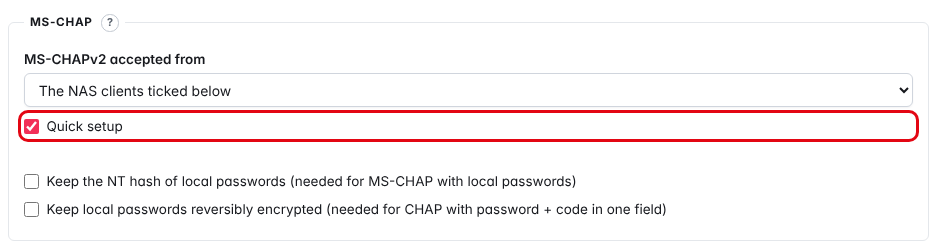
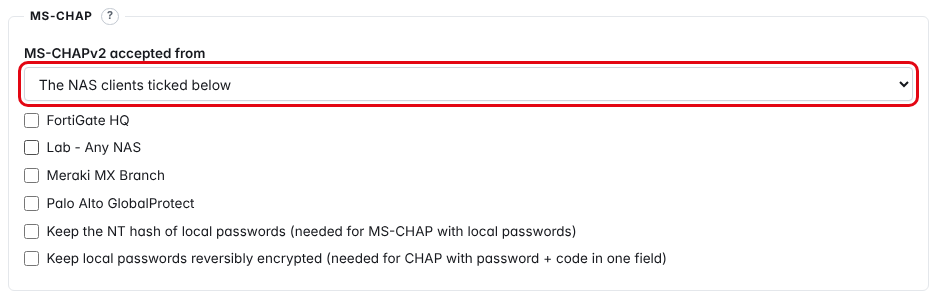
EAP and PEAP: not supported
TOTPRadius 0.4 answers PAP, CHAP, MS-CHAPv1 and MS-CHAPv2 only. EAP methods – PEAP, EAP-TTLS, EAP-TLS, EAP-MSCHAPv2 – are not supported. A request that carries EAP is rejected with the reason eap_not_supported (an EAP request without a Message-Authenticator is dropped without an answer, see Test authentication). This matters mainly for 802.1X Wi-Fi or wired network access, where clients usually use PEAP: configure such devices to send PAP (or MS-CHAPv2 with an OTP-only policy), or keep them on a RADIUS server that handles EAP.
Codes: TOTP and HOTP
- TOTP (RFC 6238): HMAC-SHA1 or HMAC-SHA256, 6 or 8 digits, 30 or 60 seconds. New authenticator apps use the defaults under Settings → General settings → OTP (SHA1, 6 digits, 30 s).
- HOTP (RFC 4226, counter-based): for keys that type their code, such as the HID-HOTP function of Token2 keys. See HOTP and HID-HOTP keys.
- Authenticator apps (Google Authenticator, Microsoft Authenticator, Token2 TOTP+ …) are enrolled by an administrator or by the users themselves (see self-service enrolment methods).
- Hardware tokens are kept in an inventory, imported from the vendor's seed file and assigned by serial number; see Managing hardware tokens.
2FA fallback: SMS and e-mail
At the code prompt a user without their token types sms or email and receives a separate random 6-digit code, valid 5 minutes, to type at the next prompt. Requirements:
- A policy with a password source and Password first, then the code in a second prompt or Either (not "In one field", not OTP only), with Code by SMS and/or Code by e-mail ticked under 2FA fallback options.
- A provider under Settings → General settings → Notifications: SendGrid, Twilio, SMTP or an HTTPS webhook.
- The user's mobile phone (
+41790000000) or e-mail address on the user page.
Limits: 3 codes per user per 15 minutes, 5 attempts per code.
sms or email at the code prompt.Other methods: FIDO2 and Entra ID / OIDC via the VPN portal
The VPN portals (/vpn/fido2/ and /vpn/oauth2/) issue temporary VPN credentials after a security-key or single-sign-on login. A policy accepts them with Accept credentials issued by the FIDO2 portal / by the Entra ID / OIDC portal (both on by default), or exclusively with Accept only these credentials. See the VPN portal overview.
Example combinations
| Goal | Policy settings |
|---|---|
| Codes only, no directory | Nothing – OTP only |
| 0.3.x "LDAP proxy" behaviour | LDAP; In one field; last 6 digits |
| SSL VPN with a second prompt, one field also accepted | LDAP; Either; skew 1–2 |
| Service accounts without a token | LDAP; Either; password only for users marked single factor |
| Internal Wi-Fi without code, VPN with code | Two NAS clients; the Wi-Fi client "trusted NAS"; policy option "Requests through trusted NAS clients" |
| MS-CHAPv2-only VPN | Local password; second prompt; Keep the NT hash; NAS client ticked under MS-CHAPv2 accepted from |
| VPN only through the FIDO2 portal | OTP only; accept FIDO2 credentials; accept only these credentials |
Test
Each policy page has a Simulate box that runs the decision without side effects. For a real request use Settings → Test authentication; see Testing TOTPRadius authentication.
Troubleshooting
| Reason in the authentication log | Meaning |
|---|---|
otp_missing | Password without code in one-field mode, or the NAS did not show the second prompt. |
otp_invalid, otp_malformed, replay | Wrong code, wrong number of digits, or a code used before. |
first_factor_invalid | The code was right, the password wrong. |
directory_unavailable, directory_rate_limited | The directory did not answer in time, or more than 3 password checks per user per minute in prompt mode. |
group_not_allowed | Not in a required group. |
ldap_chap_unsupported, mschapv2_not_allowed | Method conflict; see PAP, CHAP and MS-CHAP above. |
temp_only | The policy accepts only portal credentials. |
9. TOTPRadius LDAP Configuration
LDAP proxy
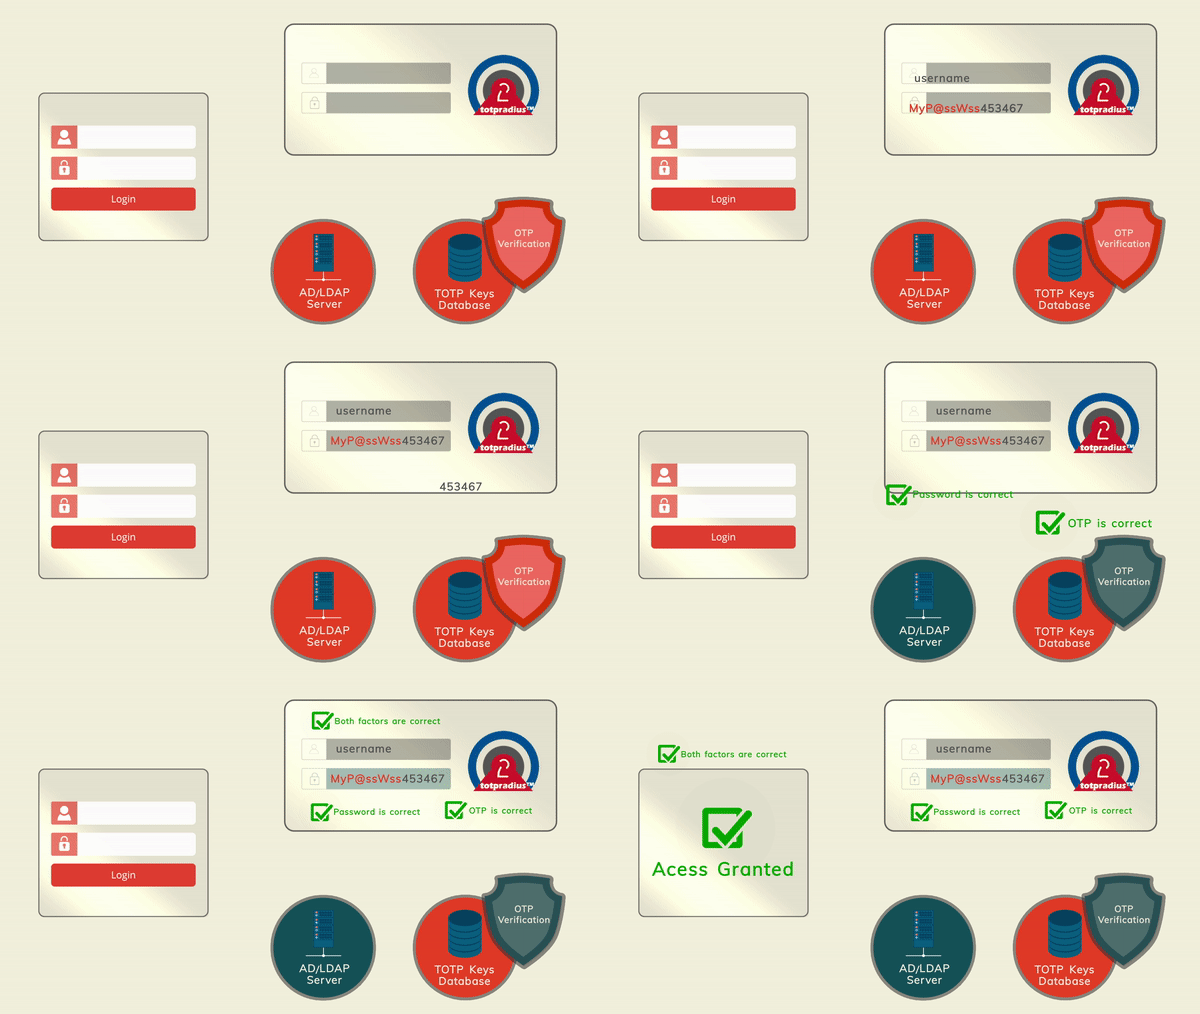
Users type their Active Directory or LDAP password together with the one-time code. TOTPRadius splits the field, checks the code first and only then checks the password against the directory. Wrong codes therefore never reach Active Directory and cannot lock accounts. This adds two-factor authentication to systems without native support, such as Cisco Meraki client VPN, FortiGate, Palo Alto or Cisco WLC.
In 0.4 the LDAP settings are split in two:
- a directory (Settings → Directories (LDAP / AD)): where and how passwords and groups are checked;
- a policy (Settings → Policies): Password checked against = LDAP / Active Directory password, how password and code are entered, and the group restriction.
For a single gateway, Quick setup creates both with the 0.3.x field names. This page describes the detailed directory settings.
Step 1. Create the directory
Open Settings → Directories (LDAP / AD). The list shows existing directories; the form below creates a new one. Pick an example under Start from an example – Active Directory (LDAPS, sAMAccountName, search-then-bind, nested groups) is recommended for AD – and replace the example names.

► Name – shown in policies and logs, for example Example Corp AD.
► Directory type – LDAP / Active Directory.
Server
► LDAP server – one per line, or several on a line separated by spaces or commas (the same rule as on Quick setup and in a 0.3.x import), tried in order: ldaps://dc1.example.com, ldaps://dc2.example.com. The AD global catalog listens on 3269 (LDAPS).
► Connection security – LDAPS (TLS, port 636) – recommended, StartTLS (port 389, upgraded to TLS) or None (passwords readable on the network; domain controllers that require LDAP signing refuse it).
► Certificate check – Certificate and host name (strict); choose Certificate chain only when the servers are addressed by IP address.
► Timeout (milliseconds) – per LDAP call, default 5000; then the next server is tried.
► CA certificate (PEM, optional) – the root (and intermediate) certificate of the CA that issued the domain controllers' certificates. Use Fetch certificate from server (Step 3) to get it.
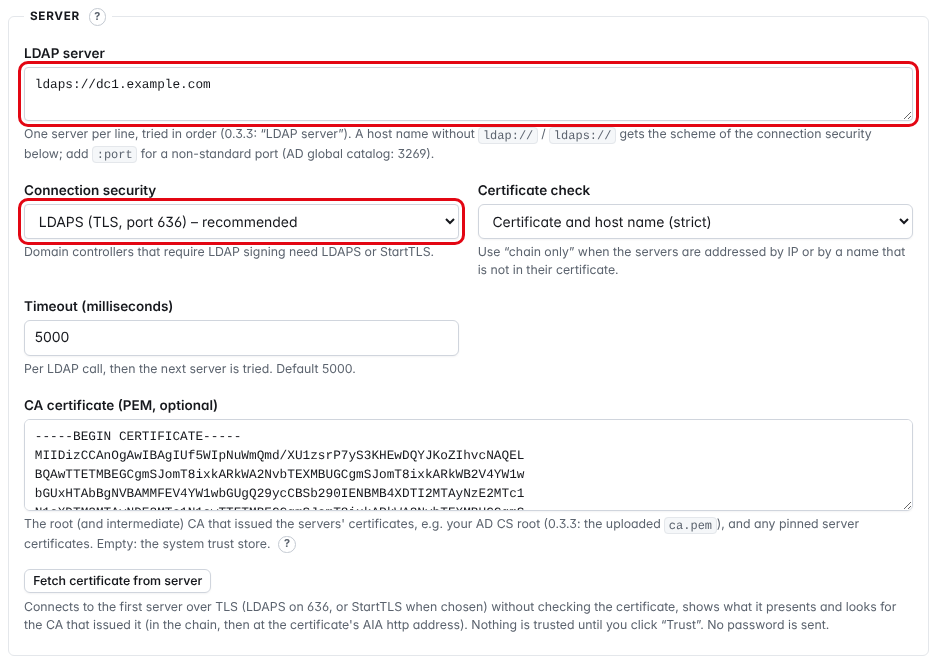
How passwords are checked
► Method – Search, then bind (recommended): a read-only service account finds the user, then the user's password is checked by a bind as that user. Bind template: bind directly with a name built from the typed user name (0.3.x behaviour, no service account).
For Search, then bind:
► LDAP search string (search base) – for example DC=example,DC=com, or an OU. Optional for Active Directory: empty = read from the server; Detect fills it in.
► User filter – (sAMAccountName={username}) for AD logon names, (userPrincipalName={username}) for UPNs, (uid={username}) for OpenLDAP / FreeIPA. To skip disabled AD accounts: (&(sAMAccountName={username})(!(userAccountControl:1.2.840.113556.1.4.803:=2))).
► Service account (bind DN) – for example CN=svc-totpradius,OU=Service Accounts,DC=example,DC=com (AD also accepts [email protected]). It needs read access to users and their group attribute only.
► Service account password – stored encrypted, never shown again.
► Group membership attribute – memberOf.
For Bind template:
► LDAP username format – %username%@example.com (UPN) or EXAMPLE\%username%.
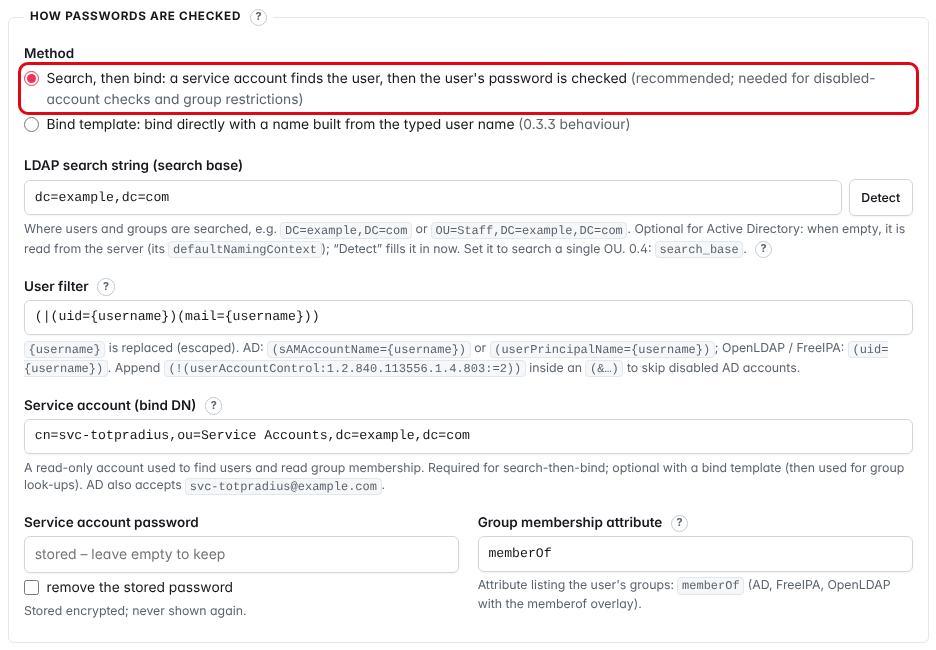
Press Create directory.
uid, memberOf overlay). For Active Directory use the AD values given in the text.sAMAccountName and the LDAP server field held space-separated URIs. In 0.4 any attribute can be used through the user filter; the server list still accepts space-separated URIs (and lines or commas).Which user name reaches the directory
The directory receives the canonical user name produced by the policy's user-name rules (User names (multidomain) in the policy), not the raw input. With the default rule Keep prefix and suffix, [email protected] stays [email protected] and EXAMPLE\jdoe becomes jdoe@example. Match the filter to it:
- users type plain logon names →
(sAMAccountName={username})or the template%username%@example.com; - users type UPNs →
(userPrincipalName={username}); - mixed input → set the policy to Strip and use
(sAMAccountName={username}).
Step 2. Test the connection
After saving, open the directory. Under Test connection enter a Test user (optional) (jdoe) and the user's Password – only the password, not the code – and press Run test. Each step (connect, service bind, user search, user bind, groups) is listed with ✔ or ✘. The test does not count toward the user's lockout.
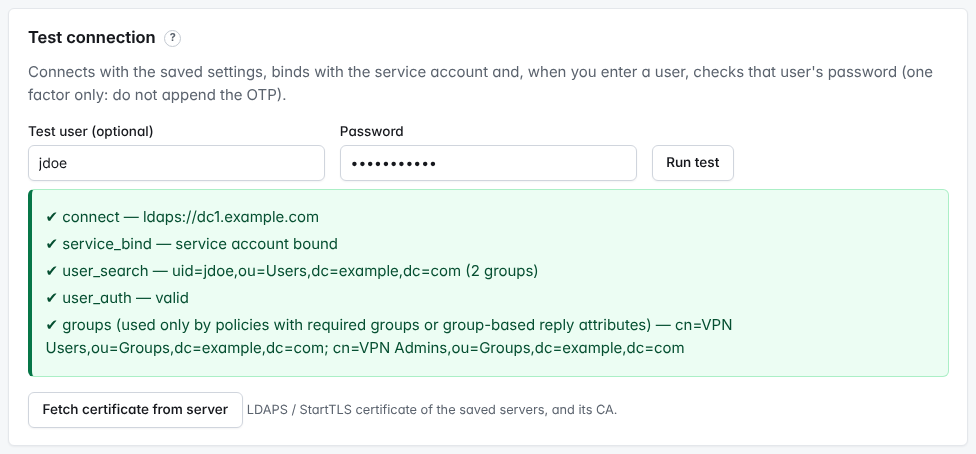
Step 3. LDAPS certificate
With LDAPS the appliance verifies the domain controller's certificate before sending any password. Active Directory sends only the DC's own certificate, not the CA that issued it, so the CA must be added to the directory:
- Press Fetch certificate from server (in the editor next to the CA field, or under Test connection on a saved directory). The appliance connects without checking the certificate, sends no password, and shows the certificates and the issuing CA if it can find it (in the chain or at the certificate's AIA
http://address). - Compare the SHA-1 thumbprint with the DC's certificate: on the DC open certlm.msc → Personal → Certificates → the certificate → Details → Thumbprint, or run
Get-ChildItem Cert:\LocalMachine\My | Format-List Subject, Thumbprint, NotAfter. - Press Trust this CA for this directory (recommended: it keeps working when the DC renews its certificate), or Trust this server certificate (pinned) when no CA certificate can be found.
The report looks the same in the directory editor and on the Quick setup page (shown here):
A pinned certificate stops working when the DC renews it; the dashboard warns 30 days before it expires. Better: export the CA once (certutil -ca.cert ca.cer on a domain member, or certlm.msc → Trusted Root Certification Authorities → export as Base-64) and paste it into CA certificate.
Step 4. Use the directory in a policy
- Open Settings → Policies, choose the example LDAP password + OTP in one field (password+code) or open an existing policy.
- ► Password checked against – LDAP / Active Directory password (0.3.3 "LDAP"); ► LDAP directory – your directory.
- ► How the user enters password and code – In one field (0.3.x behaviour) or Either.
- Optional: ► LDAP group restriction – for example
VPN UsersorCN=VPN Users,OU=Groups,DC=example,DC=com (nested). - Press Save (or Create policy), then select the policy on the NAS clients that should use it, and allow only PAP on them.
ldap_chap_unsupported, because those methods never send the password.(nested) includes groups inside groups (Active Directory).Self-service enrolment with the LDAP password
The 0.3.x enrolment settings are now under Settings → General settings → Portals:
| 0.3.x | 0.4 |
|---|---|
| Allow ldap enrollment | Allow ldap enrollment (internal page https://radius.example.com/ldap-enroll/) and its Directory |
| Allow ldap key change | Allow ldap key change |
| Allow ldap web enrollment | Allow ldap web enrollment (external portal https://vpn.example.com/vpn/ldap/; re-enrolment there only with Allow re-enrolment on the external portal) |
| Ldap intro text | Ldap intro text |
Users also need may use the LDAP enrolment portals on their user page. Details: self-service enrolment methods.
LDAP administrators
The 0.3.x "Ldap admins" field is replaced by Settings → General settings → Admin console: the directory for LDAP administrators and a mapping of LDAP groups to console roles (Helpdesk, Administrator, Superadmin, Auditor).
Test
Use Test connection on the directory (password only), then Settings → Test authentication with password and code (see Testing TOTPRadius authentication).
Troubleshooting
| Symptom | What to check |
|---|---|
connect fails | DNS name, port 636/389, firewall to the DC, scheme matches the connection security. |
| TLS error | CA certificate missing or wrong (Fetch certificate from server); host name not in the certificate (try Certificate chain only); pinned certificate renewed by the DC. |
| the search base does not exist on the server | Misspelt search base: clear it or press Detect. |
service_bind fails | Service account DN or password; account locked or expired. |
user_search finds nothing | Search base too narrow, wrong filter attribute, or the canonical name has a suffix the directory does not store. |
directory_unavailable in the authentication log | The directory did not answer within the timeout; the NAS timeout must be longer than the directory timeout. |
| AD accounts get locked | Wrong codes never reach AD; repeated wrong passwords do. In prompt mode password checks are limited to 3 per user and minute. |
10. TOTPRadius - Entra ID (legacy password check)
The 0.3.x Azure AD Proxy mode is called Entra ID (legacy) in TOTPRadius 0.4. It lets a VPN gateway check the user's Microsoft Entra ID (Azure AD) password through TOTPRadius when there is no on-premises domain controller, while the one-time code is checked by TOTPRadius itself. In 0.4 it is an Entra ID directory plus a policy that uses it.
Use cases
- No on-premises Active Directory, but a Cisco Meraki client VPN or FortiGate VPN that must check Entra ID passwords
- A remote office without a domain controller
- Entra ID as a backup password source next to on-premises AD (use separate NAS clients and policies)
How it works

The appliance needs outbound HTTPS access to login.microsoftonline.com. For each login:
- The VPN gateway sends user name and password field to TOTPRadius (PAP).
- TOTPRadius splits off the code and checks it locally first; a wrong code never reaches Entra ID.
- TOTPRadius sends the user name (with the configured domain appended if missing) and the password to the Entra token endpoint with
grant_type=password. - The answer decides the password check (see below); together with the valid code the login is accepted.

Which Entra answers count as a correct password
| Entra ID answer | TOTPRadius 0.4 |
|---|---|
| A token is issued (account without MFA) | Password accepted |
MFA required: interaction_required, AADSTS50076, 50079 or 50158 | Password accepted (TOTPRadius supplies the second factor) |
| AADSTS53003 (blocked by conditional access) | Rejected, reason directory_blocked |
| Anything else, e.g. AADSTS50126 (wrong password) | Rejected, reason first_factor_invalid |
local:name in the policy's group restriction).Restrictions
- Only the password is checked against Entra ID. The code comes from tokens stored on TOTPRadius (authenticator apps or hardware tokens); Entra push notifications are not used.
- Entra groups cannot be read in this mode: policy group restrictions and group-based reply attributes do not work with Entra ID users (use local groups,
local:name). - Entra ID passwords need PAP on the NAS client; CHAP and MS-CHAP requests are rejected with
ldap_chap_unsupported.
Step 1. Register an application in Entra ID
The steps on the Microsoft side are unchanged; the Azure portal is now called the Microsoft Entra admin center and menu names may differ slightly.
- Sign in to the Azure portal / Entra admin center and open App registrations → New registration.
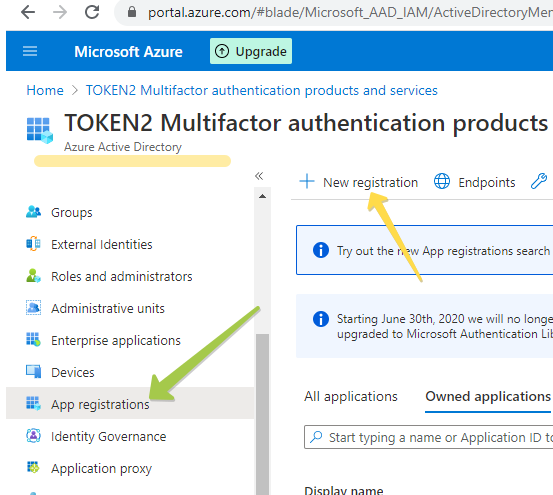
- Enter a name, choose Accounts in this organizational directory only and press Register.
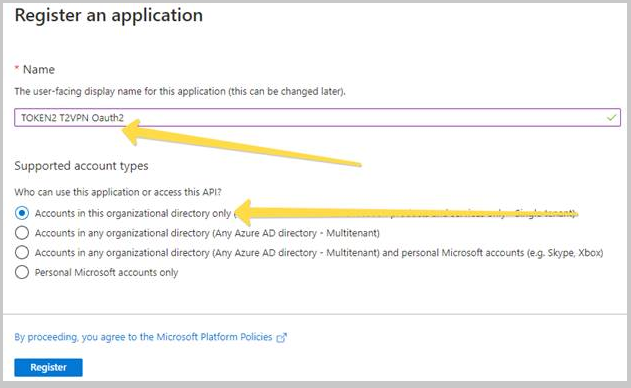
- On the Overview, note the Application (client) ID and the Directory (tenant) ID.
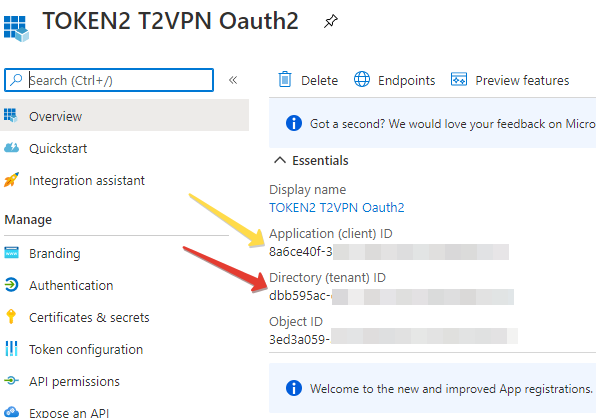
- Under Authentication, set Allow public client flows to Yes (required for the password flow).
Step 2. Create the Entra ID directory
- Open Settings → Directories (LDAP / AD). In the form below the list choose the example Entra ID (legacy ROPC), or set Directory type to Entra ID (legacy password check, ROPC).
- Fill in:
► Name –
Example Corp Entra ID.► Entra ID tenant id – the Directory (tenant) ID, or a verified domain such as
example.onmicrosoft.com.► Entra ID client (application) id – the Application (client) ID.
► Entra ID domain – appended to user names typed without a domain:
jdoe→[email protected].► Timeout (milliseconds) –
0uses the RADIUS default (8000 ms, Settings → General settings → RADIUS). - Press Create directory.
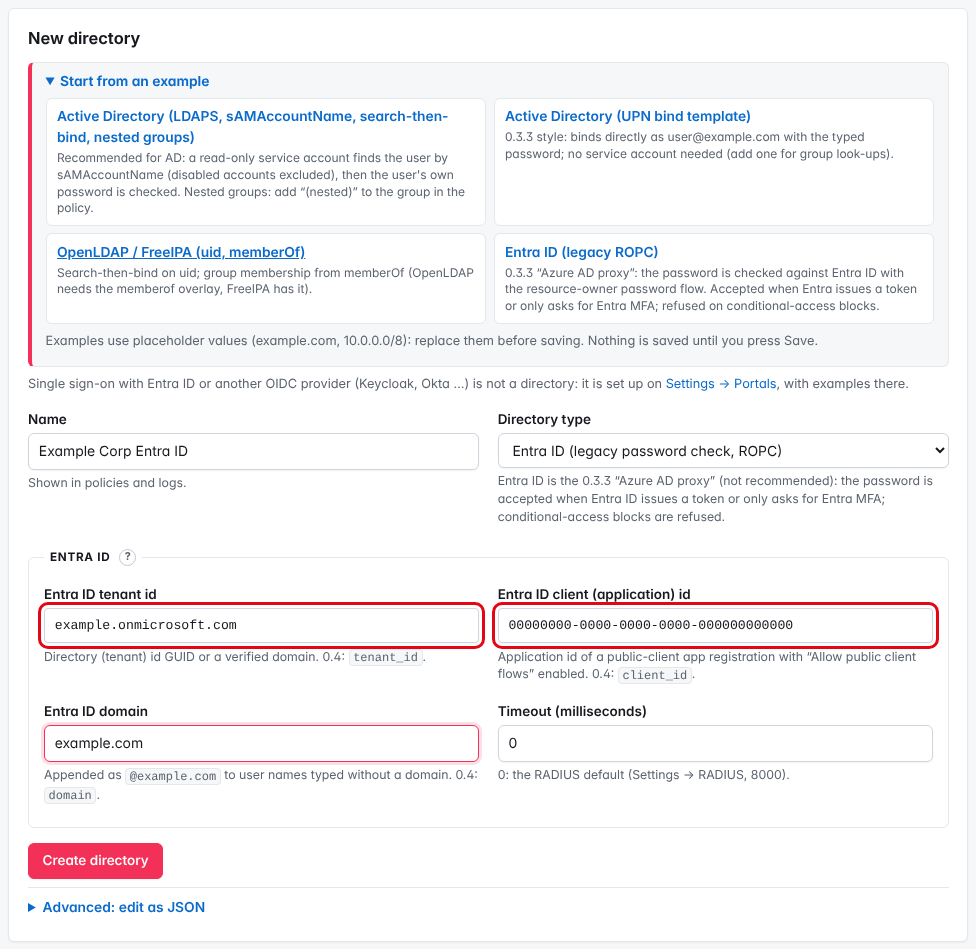
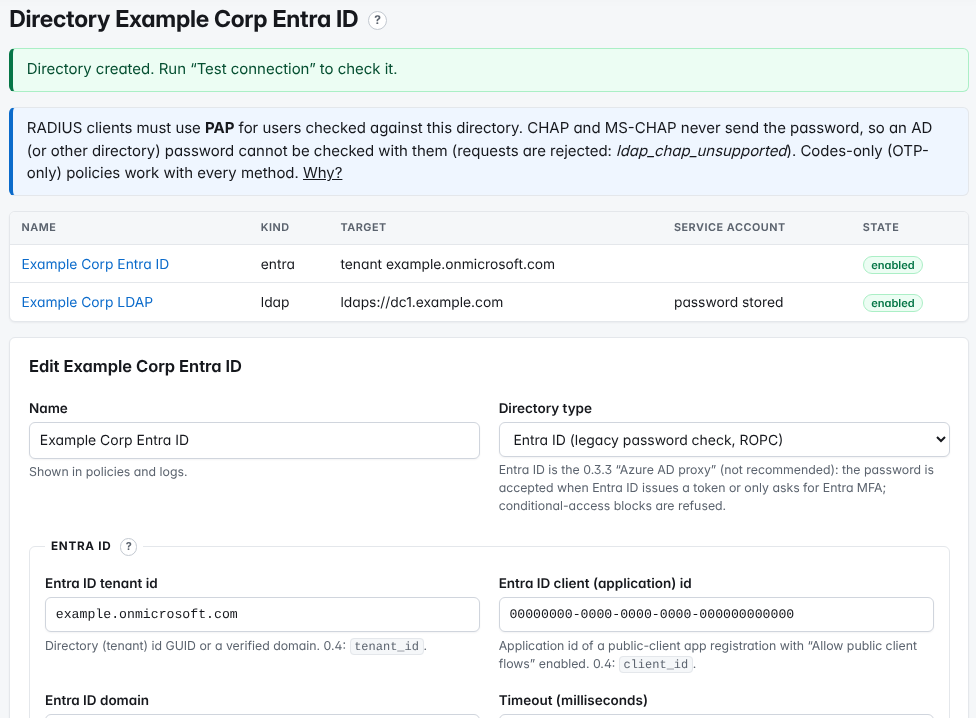
Step 3. Test the directory
On the saved directory, under Test connection, enter a Test user (optional) ([email protected]) and the user's Entra Password (without the code) and press Run test. Without a test user only the configuration is checked; Entra ID is contacted only for a test user. The 0.3.x "test Azure AD" button is replaced by this test.
Step 4. Create the policy
- Open Settings → Policies and choose the example Entra ID password + OTP (legacy).
- ► Password checked against – Entra ID password (0.3.3 "Azure AD proxy", legacy); ► Entra ID directory –
Example Corp Entra ID. - ► How the user enters password and code – In one field (as in 0.3.x) or Either.
- Press Create policy.
- Open Settings → NAS clients, select this policy for the gateway, allow only pap and press Save.
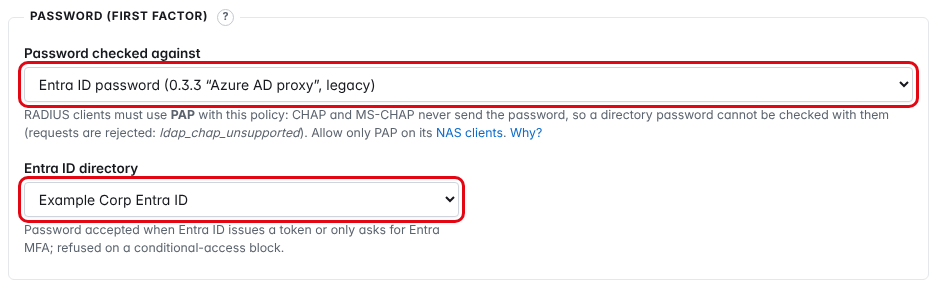
If the users also have on-premises local passwords on the appliance, Local password when the user has one, otherwise Entra ID is available.
Step 5. Provision the second factor
Create the users on TOTPRadius (+ New user, user name as typed at the VPN, for example [email protected]) and enrol an authenticator app or assign a hardware token (see Managing hardware tokens).
Reusing hardware tokens from Entra ID (Azure MFA)
If you use hardware OATH tokens in Entra ID, import the same CSV file so users can use one token for Microsoft 365 and the VPN: Users → Import, format Entra ID hardware-token CSV (Azure MFA format: upn,serial number,secret key,time interval,manufacturer,model) → users + tokens. Users named in upn are created when missing. Run a dry run first.
Test
Open Settings → Test authentication, choose the NAS client, enter [email protected], the Entra password and the current code, and press Test. The trace shows the code check and the Entra answer (for example password accepted (the directory asks for MFA, which TOTPRadius supplies)). See Testing TOTPRadius authentication.
Troubleshooting
| Reason in the authentication log | What to check |
|---|---|
first_factor_invalid | Wrong password; or wrong tenant / client id, or "Allow public client flows" not enabled. The Entra sign-in logs (Monitoring → Sign-in logs) show the AADSTS code. |
directory_blocked | Entra conditional access blocked the sign-in (AADSTS53003). |
directory_unavailable | No HTTPS access from the appliance to login.microsoftonline.com, or the timeout is too short. |
otp_invalid | Wrong code; the password was not sent to Entra ID. |
ldap_chap_unsupported | The gateway uses CHAP / MS-CHAP; switch it to PAP. |
11. TOTPRadius - Single factor authentication configuration options
When TOTPRadius checks a password (LDAP / Active Directory, Entra ID or a local password) and a code, some accounts may need to sign in with the password alone – for example service accounts used by scripts, which cannot type a code. In TOTPRadius 0.4 these exceptions are set per policy, in the section Who may sign in with the password only.
The three options
Open Settings → Policies and the policy used by the NAS client (for example AD password + code (one field)):
► Users marked "single factor" on their user page – only the flagged users may skip the code.
► Requests through trusted NAS clients – requests from NAS clients marked trusted NAS, or whose Calling-Station-Id lies in the client's trusted ranges, may skip the code (0.3.x "Trusted IP range").
► Everyone – the code becomes optional – 0.3.x "Enforce 2fa" = No. Not recommended.

All three options need a password source: in an OTP-only policy (Nothing – OTP only) only the first one is shown and it has no effect, because there is no password to check. A user covered by a rule may still type password + code. If the code part is valid but the password part is wrong, the whole field is tried once more as the password.
Press Save.
User level: mark the user
- Open Users, search for the account (for example
svc-backup) and open it. - Under Profile, tick single-factor (password only where the policy allows) and press Save.
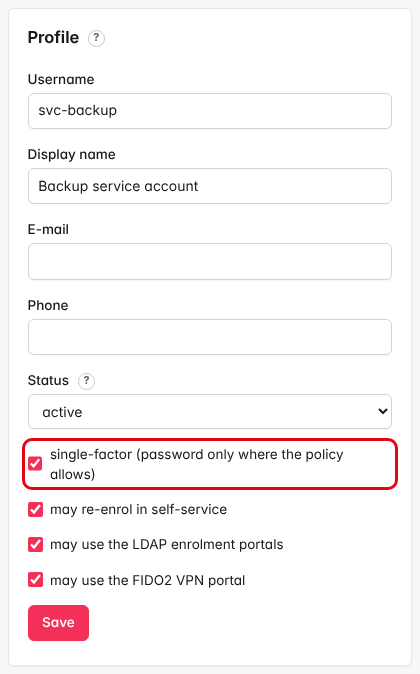
New users get the same check box (Single-factor user) on the + New user form.
Subnet / device level: trusted NAS clients
Use this, for example, for an internal Wi-Fi controller where users sign in with the password only, while the VPN gateway keeps two factors. Each device is a separate NAS client:
- Open Settings → NAS clients and the NAS client (or create a new one, for example
Wi-Fi controller,10.0.0.5). - Tick trusted NAS (password-only rules) – all requests from this device count as trusted; or
- enter Trusted Calling-Station-Id ranges, one per line (for example
10.20.0.0/24) – only requests whose Calling-Station-Id lies in these ranges count as trusted. - Press Save, and tick Requests through trusted NAS clients in the policy of this NAS client.
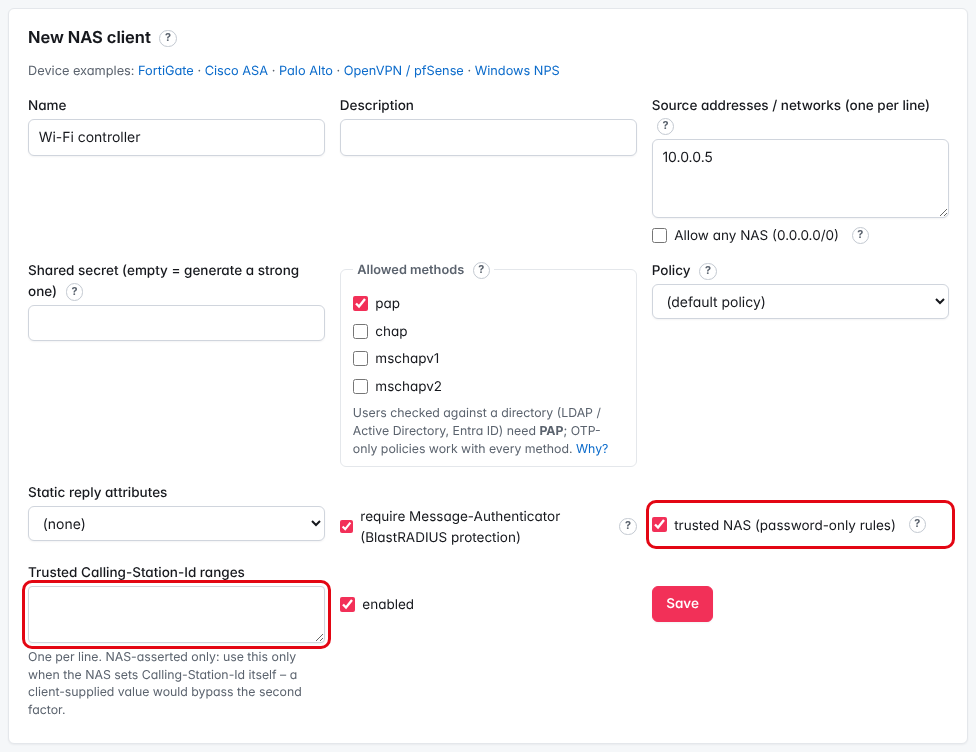
none to disable). In 0.4 it is set per NAS client; leave the field empty and the box unticked to disable it.Everyone
Ticking Everyone – the code becomes optional makes the code optional for all users of that policy. A safer alternative is a separate NAS client with its own policy for the systems that really need single-factor access.
Test
Open Settings → Test authentication, choose the NAS client, enter the user name and password without a code and press Test. The result lists each step and the final answer. See Testing TOTPRadius authentication.
Troubleshooting
| Reason in the authentication log | What to check |
|---|---|
otp_missing | The user is flagged but the policy does not tick Users marked "single factor" (or the NAS is not trusted / the policy does not tick Requests through trusted NAS clients). |
first_factor_invalid | The password is wrong. |
challenge | The policy asks for the code in a second prompt and no password-only rule applied. |
12. TOTPRadius - RADIUS Dynamic attribute response based on AD Group membership
Many gateways decide what a user may do from RADIUS attributes in the Access-Accept: a firewall group (Fortinet-Group-Name, Filter-Id), a VPN group policy (Class), a VLAN (Tunnel-Private-Group-Id) or a session limit. TOTPRadius 0.4 sends such attributes from attribute sets, statically or depending on the user's AD / LDAP group (or a local group). The 0.3.x ldap-group.php script is no longer used.
How attributes are chosen
Attributes are sent with an Access-Accept only (never with a Reject or Challenge), in this order:
- the NAS client's Static reply attributes,
- the policy's Additional RADIUS attributes,
- the sets of matching group mappings, when the policy ticks Add attributes by group membership.
For each attribute the first matching mapping (lowest priority number) wins.
Step 1. Create an attribute set
Open Settings → Reply attributes & groups. Under Reply attribute sets → New set:
► Name – for example FortiGate VPN admins.
► Attributes, one per line – Name = value adds an attribute, Name := value replaces values of the same attribute from an earlier set, Name:1 sets a tag; lines starting with # are comments. Example:
Fortinet-Group-Name = VPN-Admins
Session-Timeout = 28800
Press Create. Repeat for every value you need, for example a set FortiGate VPN users with Fortinet-Group-Name = VPN-Users.
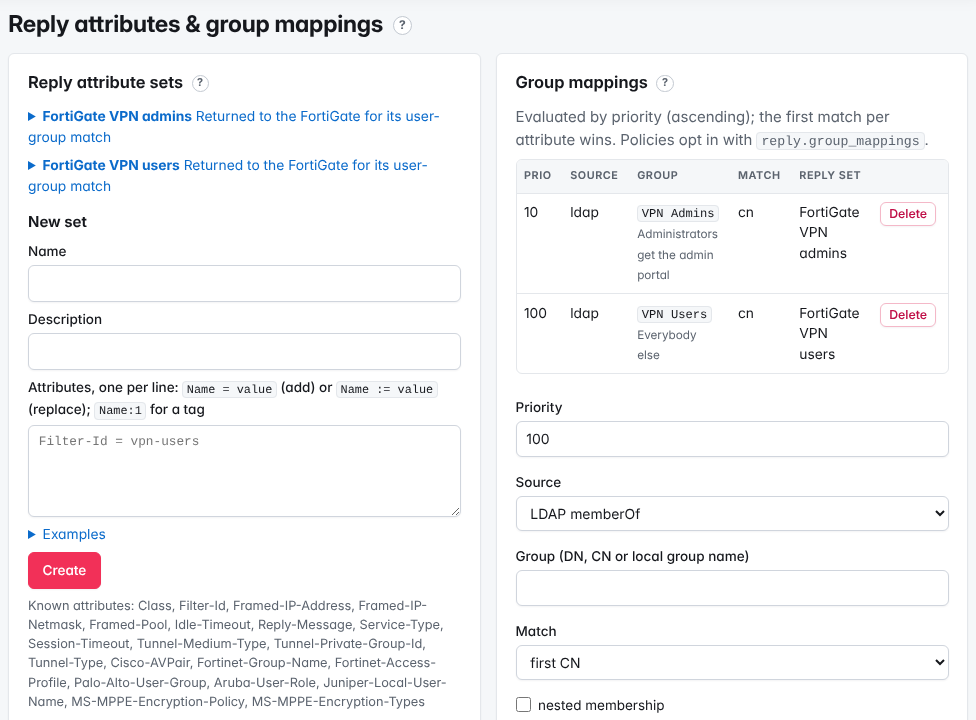
Common attributes:
| Device | Attribute |
|---|---|
| FortiGate user group | Fortinet-Group-Name = VPN-Users (match it in the FortiGate user group) |
| FortiGate admin profile | Fortinet-Access-Profile = super_admin |
| Firewalls in general (WatchGuard, Sophos, pfSense …) | Filter-Id = vpn-users |
| Cisco ASA group policy | Class = OU=VPN-Staff; |
| Cisco IOS privilege level | Cisco-AVPair = shell:priv-lvl=15 |
| Palo Alto GlobalProtect | PaloAlto-User-Group = vpn-users |
| Citrix ADC / NetScaler | Citrix-Group-Names = VPN-Users |
| Dynamic VLAN (802.1X, Wi-Fi) | Tunnel-Type:1 = VLAN, Tunnel-Medium-Type:1 = IEEE-802, Tunnel-Private-Group-Id:1 = 20 |
The built-in dictionary covers the RFC attributes and the Microsoft, Cisco, Fortinet, Palo Alto, Citrix, Juniper, Aruba, WISPr and MikroTik vendor attributes. Names and values are checked when you save a set: an unknown attribute (for example a typo such as Foo-Bar) or a value of the wrong type (text for a number) is refused with the reason next to the row. Names are not case-sensitive; numbers may be given as named values (Service-Type = Framed-User). A set stored by an earlier version that still holds such an attribute keeps working, but that attribute is left out of the answer: Test authentication marks it as not sent and counts only the attributes that are sent.
Step 2. Map groups to sets
Under Group mappings, add one mapping per group:
► Priority – evaluated in ascending order: 10 for VPN Admins, 100 for VPN Users.
► Source – LDAP memberOf or a local group.
► Group (DN, CN or local group name) – VPN Admins or CN=VPN Admins,OU=Groups,DC=example,DC=com.
► Match – first CN (the group's name) or exact DN.
► nested membership – include groups inside groups (Active Directory).
► Reply set – FortiGate VPN admins.
► Directory – (any) or one directory.
Press Add mapping. A user who is in both groups gets the VPN-Admins value, because priority 10 is evaluated first.
Step 3. Enable the mappings in the policy
- Open Settings → Policies and the policy of the gateway, for example AD password + code (one field).
- Under Access restriction and RADIUS reply, tick Add attributes by group membership (label RADIUS LDAP group mapping). Optionally choose a set under Additional RADIUS attributes for attributes every user gets.
- Press Save.
LDAP groups are read from the policy's directory (with the service account, or with the user's own bind for directories without one), so the policy's Password checked against must be that LDAP directory. For OTP-only policies use Local groups (bottom of the same page; members are added on the user pages).
Test
Open Settings → Test authentication, choose the NAS client, enter a user, the password and the current code, press Test and open Request and response attributes. The trace line Reply attribute sources shows which mappings applied.
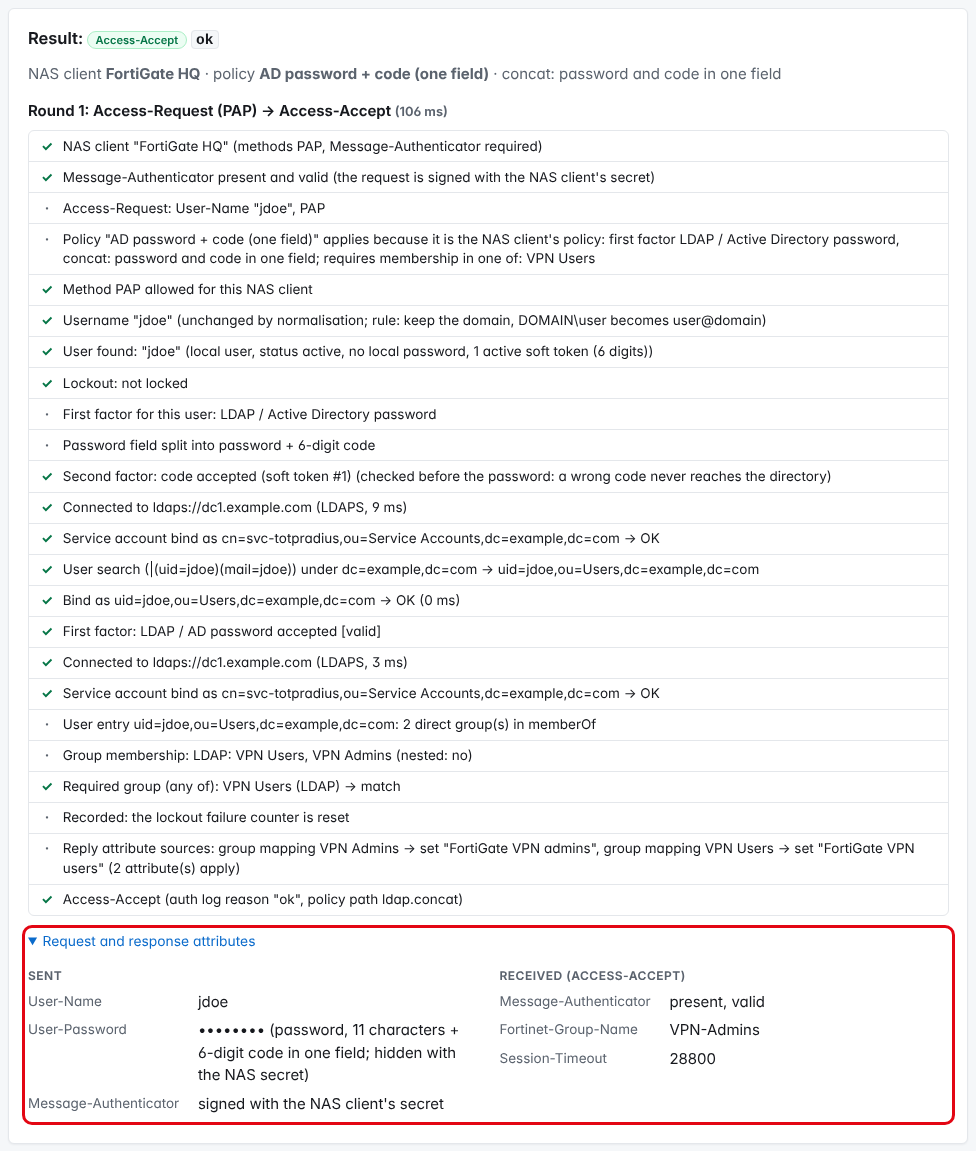
The policy's Simulate box with contact the directory for real also shows the reply attributes a user would get, without a real login.
Troubleshooting
| Symptom | What to check |
|---|---|
| No attributes arrive | The policy does not tick Add attributes by group membership; the user is in none of the groups; or an attribute from an older set is not in the dictionary (Test authentication shows "Reply attribute … not sent"). |
| Wrong value for users in two groups | Priorities: the lowest number wins. |
group_lookup_failed in the authentication log | The groups could not be read: check the directory's service account and the Group membership attribute (Test connection). |
:= does not remove an attribute | := only replaces values from earlier sets; it cannot remove attributes the NAS adds itself. |
PART III · TOKENS AND SELF-SERVICE ENROLMENT
13. Managing hardware tokens in TOTPRadius 0.4
Hardware tokens are key-fobs or cards that show TOTP codes (for example Token2 C202 or C301), or keys that type HOTP codes (see HOTP and HID-HOTP keys). TOTPRadius 0.4 keeps them in an inventory: a token is either free or assigned to one user. Assigning links the token to the user; the seed is never copied or shown.
Before you start
- A TOTPRadius 0.4 appliance (see Quick setup)
- The seed file of your tokens (Token2 delivers it with the order) or the seed of each token
- Example values: tokens
60000101–60000112(Token2 C202), usersbwong,jdoe
The inventory
Open Hardware tokens in the top bar. The list shows serial, model, parameters (type, algorithm, digits, period), drift or HOTP counter, status, the assigned user and the last use. Search by serial or model and filter all / in inventory / assigned.
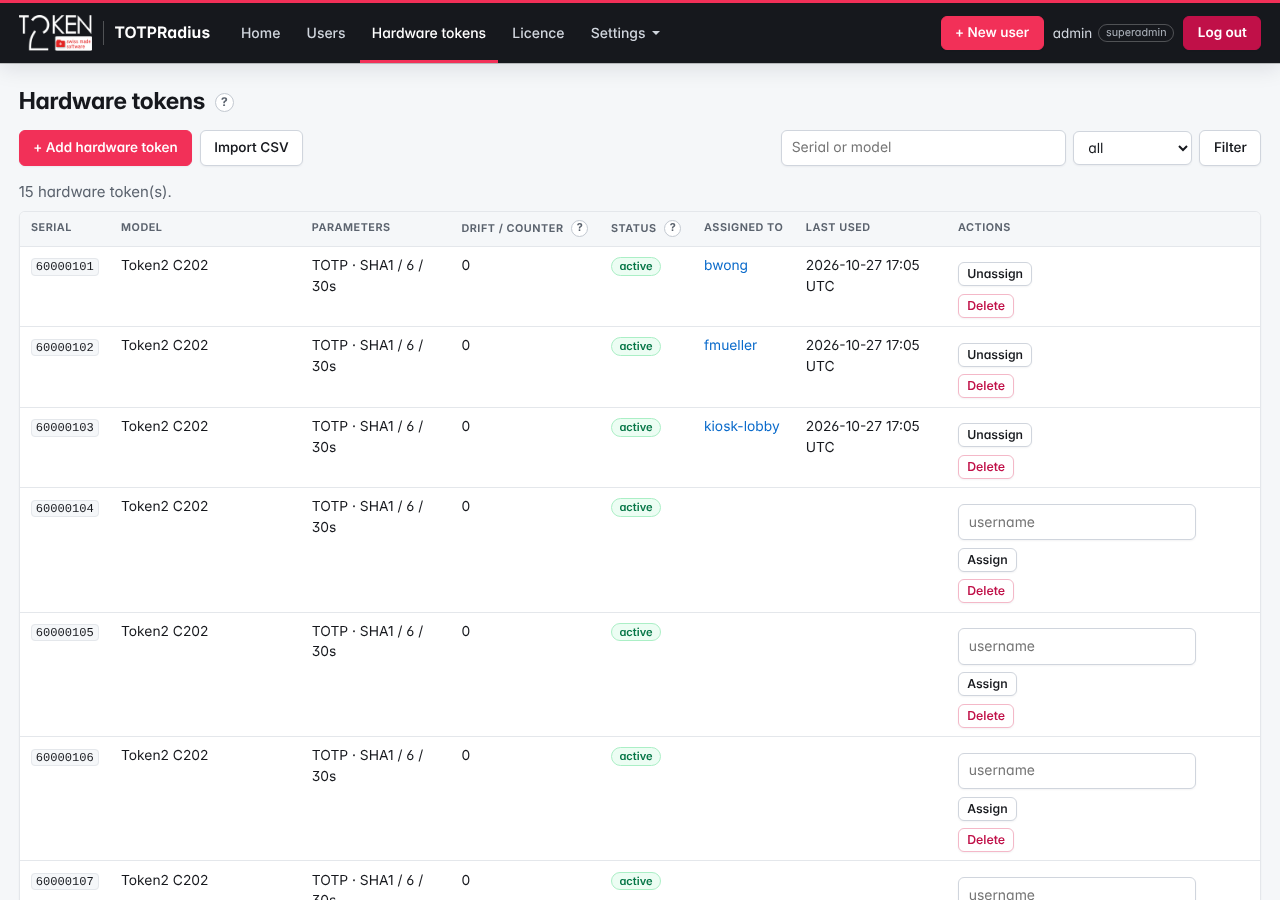
Step 1a. Import many tokens (CSV)
- Press Import CSV (or open Hardware tokens → + Add hardware token and scroll to Import many tokens (CSV)).
- Choose the CSV file, or paste its text into …or paste the CSV text.
- Keep Dry run: check the file and report problems without saving ticked and press Import.
- Read the result (rows, problems by line, licence check), then press Import this file now – or Discard.
The format is the Microsoft Entra ID (Azure MFA) hardware OATH token file, with three optional columns for HOTP keys and 8-digit tokens:
upn,serial number,secret key,time interval,manufacturer,model,type,counter,digits
,60000101,JBSWY3DPEHPK3PXP,30,Token2,C202,,,
[email protected],60000102,GEZDGNBVGY3TQOJQGEZDGNBVGY3TQOJQ,60,Token2,C301,,,
,HID-2001,MFRGGZDFMZTWQ2LKNNWG23TPOBYXE43U,,Token2,PIN+ (HID-HOTP),hotp,0,6
(placeholder seeds)
upnempty: the token goes into the inventory. A user name: the token is assigned to that existing user.secret key: base32 or hex.time interval: 30 or 60 (ignored for HOTP).type:totp(default) orhotp;counter: next expected HOTP counter (default 0);digits: 6 (default) or 8. Files in the plain Entra ID format import unchanged as TOTP tokens.- The algorithm follows the 0.3.x seed-length rule (20-byte seeds: SHA1). To set it yourself, use the single-token form.
- A serial number already in the inventory is skipped (or re-assigned when a
upnis given).
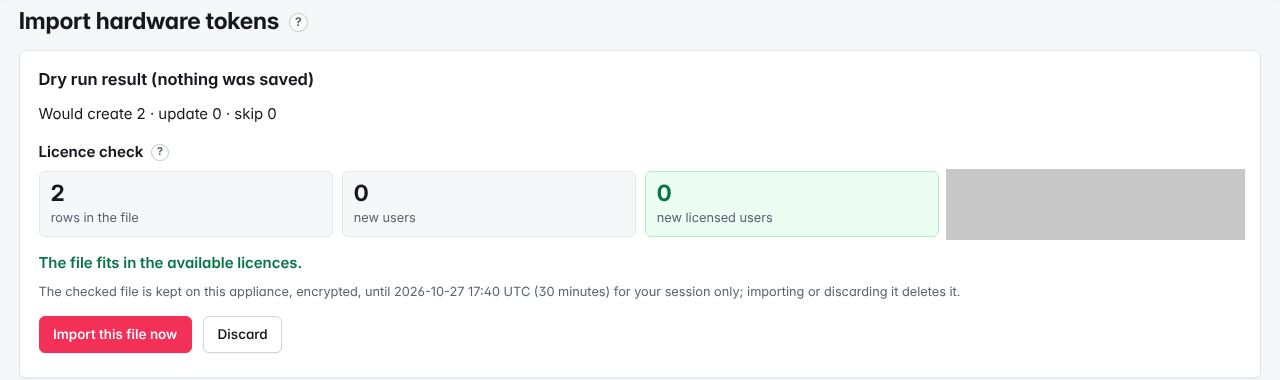
The checked file is kept encrypted on the appliance for 30 minutes, for your session and one import only. A file that needs more licences than available is refused as a whole. A downloadable example file is linked on the form.
Step 1b. Add one token
Open Hardware tokens → + Add hardware token:
► Serial number – as printed on the token, for example 60000113 (unique, 1–64 characters).
► Model – for example Token2 C202.
► Seed (secret key) – from the seed file; at least 10 bytes. It is stored encrypted and never shown in the inventory.
► Seed format – Detect (base32 first, then hex), Base32 or Hexadecimal. A hex seed made only of a–f and 2–7 is also valid base32: choose the format explicitly when in doubt.
► Type – TOTP (time-based, most tokens) or HOTP (counter-based, e.g. HID-HOTP of Token2 keys).
► Algorithm, Digits, Period (TOTP) – as stated by the vendor; most tokens: SHA1, 6, 30 seconds. Choose SHA256 only for SHA256 models.
► Next counter (HOTP) – 0 for a new key.
► Assign to user (optional) – an existing user, or empty to keep it in the inventory.
Press Add token, or Add and enter another (keeps model and parameters).
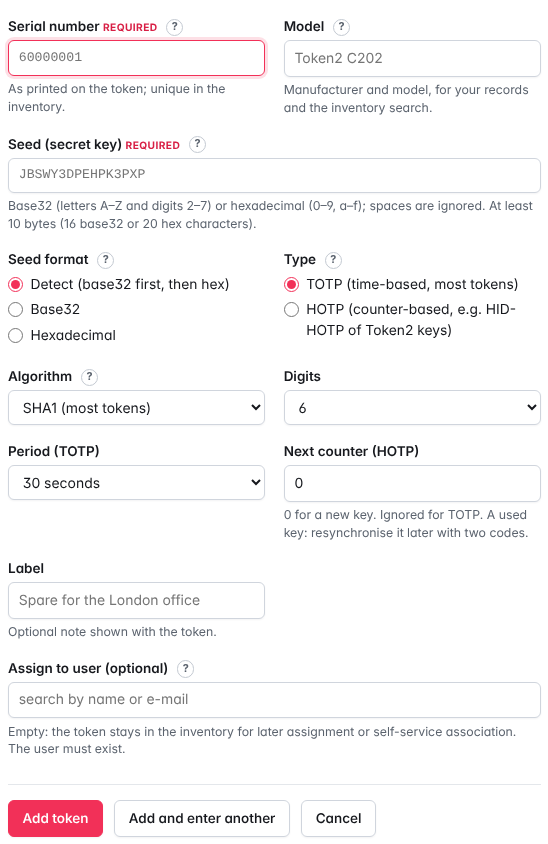
Step 2. Assign a token to a user
Any of these:
- Hardware tokens list: type the user name in the token's row and press Assign.
- User page → Assign a hardware token → serial number → Assign.
- + New user → Enrol a token now → Hardware token from the inventory → Serial number (free tokens are suggested).
- The user on a self-service portal (see below).
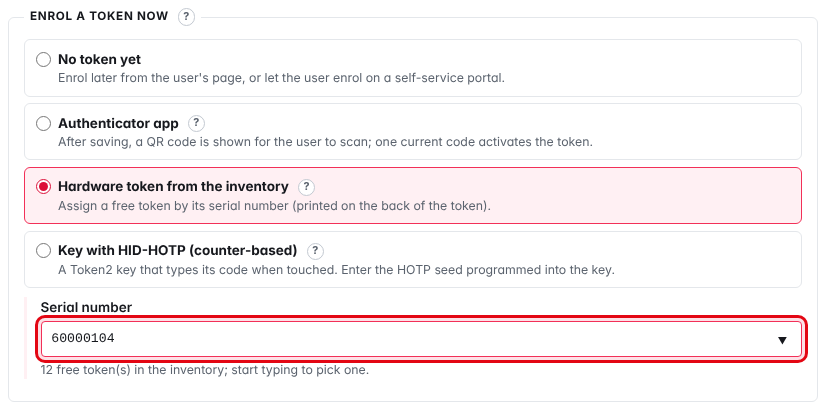
The user page then shows the token under OTP tokens:
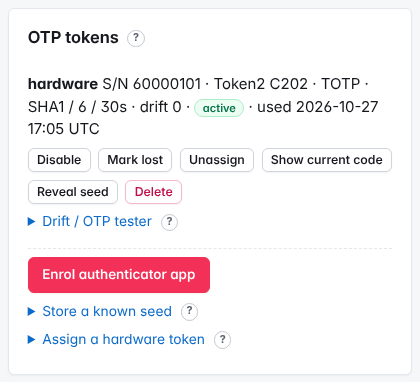
Rules: a user may hold at most Tokens per user active tokens (Settings → General settings → Users, default 1). With Hardware token restriction on (Settings → General settings → Portals → Hardware tokens, default on) a token assigned to someone else must be unassigned first. Unassign returns the token to the inventory with its status unchanged.
Self-association on the portals
With Allow hwtoken on (Settings → General settings → Portals → Hardware tokens), users of /ldap-enroll, /vpn/ldap and /vpn/local can assign a free token to themselves: they enter its serial number and two consecutive codes (Codes required to assign). The appliance finds the token's clock drift (±30 steps) and stores it. Attempts are limited to 5 per hour per source address and per serial number.
Step 3. Clock drift: the Drift / OTP tester
Token clocks drift over the years. TOTPRadius accepts codes within the policy's Totp skew around the token's stored drift and adjusts the drift automatically after two consecutive logins at the same offset (Settings → General settings → OTP → Adjust drift automatically). When a user's codes are always rejected:
- Open the user's page → token → Drift / OTP tester.
- Enter the code shown now and, if possible, the next code.
- Optionally widen the window (± steps; default 30).
- Press Scan. The result shows the offset where the code was found, for example
+4(the token is 2 minutes ahead). - Enter that offset next to Set drift and press it.
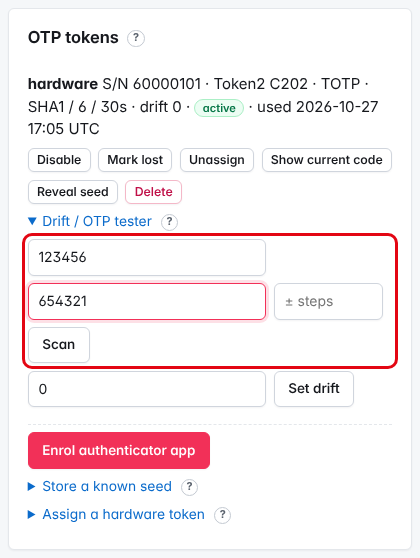
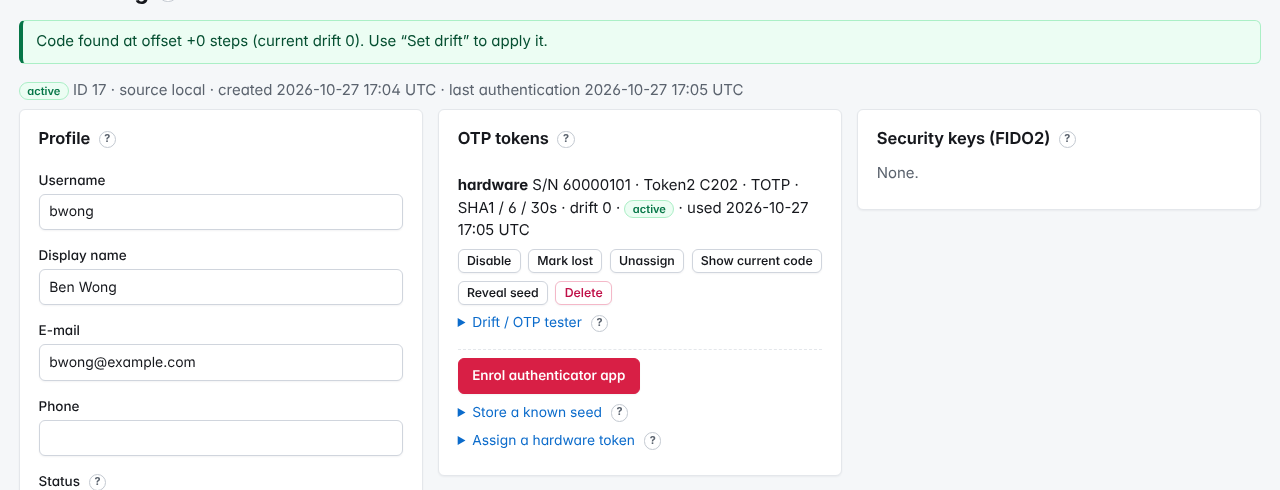
Show current code on a token shows the previous, current and next code (with the drift applied) without using anything up – useful to compare with what the user reads off the token.
Reveal a seed (superadmins)
The seed of a token is stored encrypted and never shown in the inventory or on the user page. When it is really needed – for example to move a user's authenticator app to a second device, or to program a replacement token with the same seed – a superadmin can read it again:
- Re-authenticate: Settings → My account security → Re-authenticate (see re-authentication).
- Open the user page (Users → the user) and, under OTP tokens, press Reveal seed next to the token. The button is shown to superadmins only; it works for authenticator apps and for hardware tokens.
- The Token seed page shows the Secret, the otpauth URI and the QR code once. Press Done when you have finished.
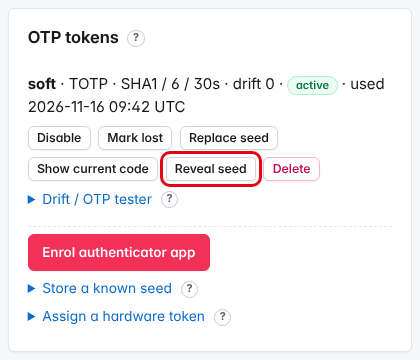
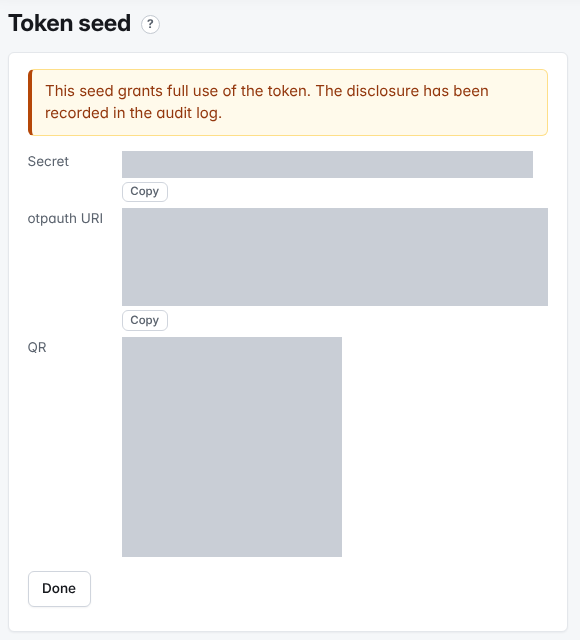
Lost tokens
| Status | Meaning |
|---|---|
| active | Codes are accepted. |
| disabled | Codes are refused; the token stays assigned. |
| lost | Codes are refused; marks a token reported lost or stolen. |
- On the user page press Mark lost – codes are refused at once.
- If the user also had VPN portal credentials, press Revoke VPN credentials.
- Give the user a new token (assign one or enrol an app). For self-service re-enrolment issue an enrolment code (Issue enrolment code on the user page).
A found token keeps the status lost, also when unassigned: Enable it before assigning it again.
Test
Open Settings → Test authentication and test the user with a code from the token; see Testing TOTPRadius authentication.
Troubleshooting
| Symptom / reason | What to check |
|---|---|
All codes rejected right after import (otp_invalid) | Wrong algorithm, digits or period, or a hex seed read as base32. Delete the token and add it again with the right values. |
| Codes rejected only sometimes | Drift; use the Drift / OTP tester. |
no_token for a user with a hardware token | The token is disabled or lost. |
| Assigning is refused | The user already has the maximum number of tokens, or the token belongs to someone else (Hardware token restriction). |
14. HOTP and HID-HOTP keys with TOTPRadius
TOTPRadius 0.4 accepts HOTP codes (RFC 4226, counter-based) next to TOTP. The typical HOTP token is the HID-HOTP function of Token2 security keys: touching the key types a 6- (or 8-) digit code as a USB keyboard. Users type their password and touch the key in the same field (password + code), or touch the key at the code prompt.
How HOTP differs from TOTP
- Codes come from the seed and an event counter, not from the time. The key advances its counter at every touch; the appliance stores the next expected counter of each HOTP token. There is no clock and no drift.
- A code is accepted when it matches the next expected counter or one of the following N counters – the HOTP look-ahead (Settings → General settings → OTP → HOTP look-ahead (codes), default
20, at most100). Touches that never reached the appliance (a code typed into a text editor, a cancelled login) are therefore tolerated. On success the stored counter moves past the matched code: that code and every earlier one can never be accepted again. - A larger look-ahead tolerates more lost touches but accepts more guesses per attempt.
- PAP, CHAP, MS-CHAPv1 and MS-CHAPv2 all work with HOTP codes (MS-CHAPv2 only from NAS clients the policy accepts it from, see MS-CHAPv2 accepted from; for the CHAP family the appliance hashes the codes of the look-ahead window, at most 101 per token). Directory passwords still need PAP.
- Wrong HOTP codes count for the lockout like wrong TOTP codes; a code used before is rejected as
replay. - Authenticator apps are always enrolled as TOTP; HOTP is meant for keys.
Before you start
- A Token2 key with the HID-HOTP function, programmed with an HOTP seed (SHA-1, 6 or 8 digits) using Token2's programming tool (see tools for programmable tokens). Note the seed (base32 or hex).
- A TOTPRadius 0.4 appliance with a policy (see Quick setup)
- Example values: user
kbrown, key labelToken2 PIN+ key
Step 1a. Enrol the key when creating the user
- Press + New user and enter the User name, for example
kbrown. - Under Enrol a token now choose Key with HID-HOTP (counter-based).
- ► HOTP seed (base32 or hex) – the seed programmed into the key.
- ► Digits –
6(or8if the key was programmed so). - ► Next counter –
0for a freshly programmed key. - ► Label (optional) –
Token2 PIN+ key. - ► Verify with a code (recommended) – click into the field and touch the key once. The code confirms the seed before it is stored; the counter continues after it.
- Press Create user.
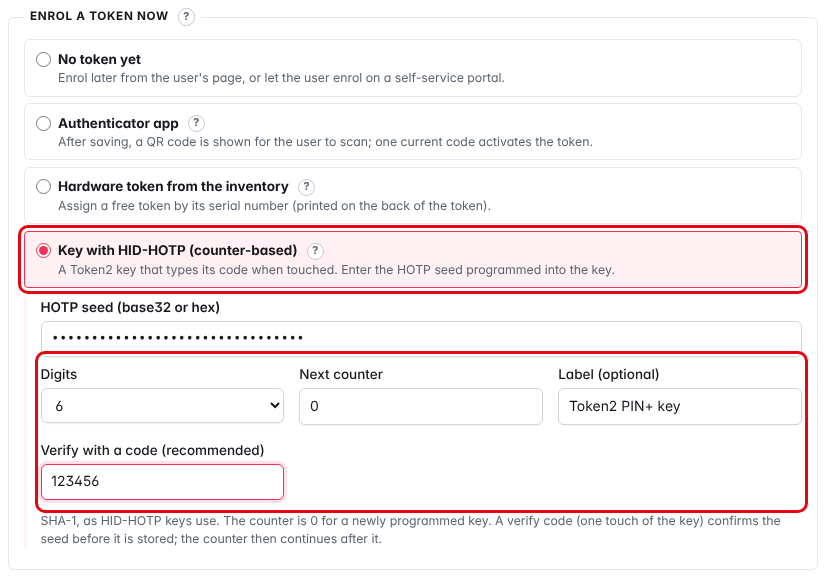
For an existing user, use Store a known seed on the user page with Type = HOTP (counter-based), Next counter (HOTP) and Verify with a current code.
Step 1b. Keys with serial numbers: the inventory
Keys can also go into the hardware-token inventory and be assigned by serial number like TOTP tokens:
- Hardware tokens → + Add hardware token: Type = HOTP (counter-based, e.g. HID-HOTP of Token2 keys), Next counter (HOTP) =
0. - CSV import with the columns
type=hotp,counteranddigits:
(placeholder seed)upn,serial number,secret key,time interval,manufacturer,model,type,counter,digits ,HID-2001,MFRGGZDFMZTWQ2LKNNWG23TPOBYXE43U,,Token2,PIN+ (HID-HOTP),hotp,0,6
The inventory shows HOTP in the parameters and the next expected counter (#0) instead of the drift:
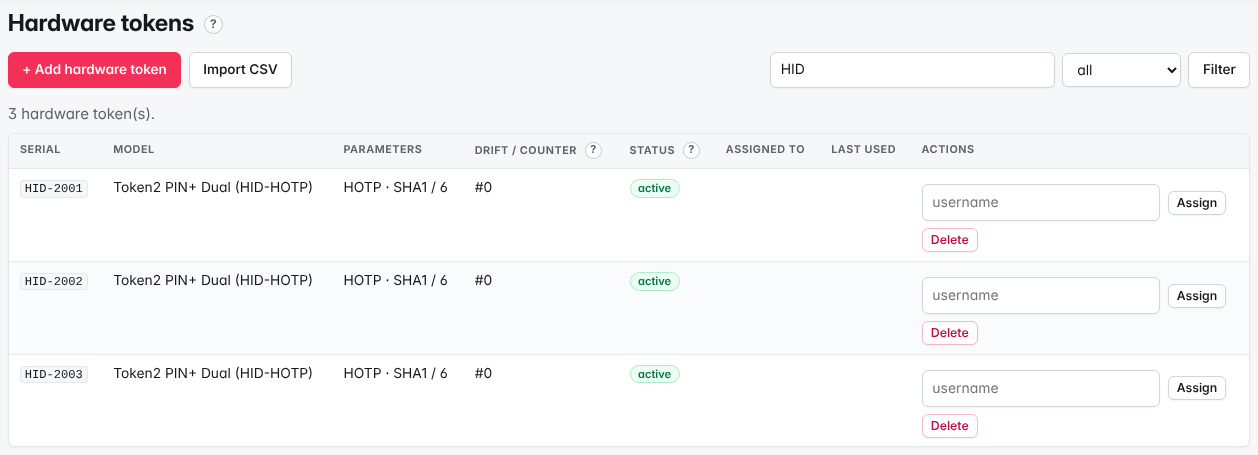
See Managing hardware tokens for import, assignment and self-association. For a key that was already used, add it with any counter and resynchronise it (Step 3).
Step 2. Sign in
The user page shows the key under OTP tokens with its next expected counter. A key stored with Key with HID-HOTP or Store a known seed is labelled HID-HOTP key: it belongs to the user (no serial number, not in the hardware inventory) and is removed with the user.
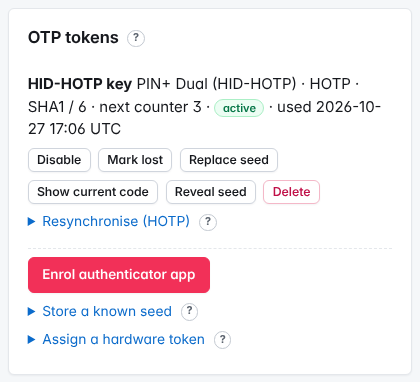
- Policy In one field: the user types the password and, without pressing Enter, touches the key:
Winter2026!+123456. Some keys send Enter after the code. - Policy with a second prompt: the user types the password, then touches the key at the code prompt.
- OTP-only policy: the user touches the key in the password field.
Show current code on an HOTP token shows the code of the next expected counter, the one after it and the last used one, without using anything up.
Step 3. Resynchronise a key
When the key has been touched many times outside logins (more than the look-ahead), its codes are rejected as otp_invalid:
- Open the user page → token → Resynchronise (HOTP).
- Touch the key twice and enter both codes (first code, next code).
- Leave the start counter empty. Enter
0only if the key itself was reset or re-programmed – the search never goes backwards otherwise. - Press Resynchronise.
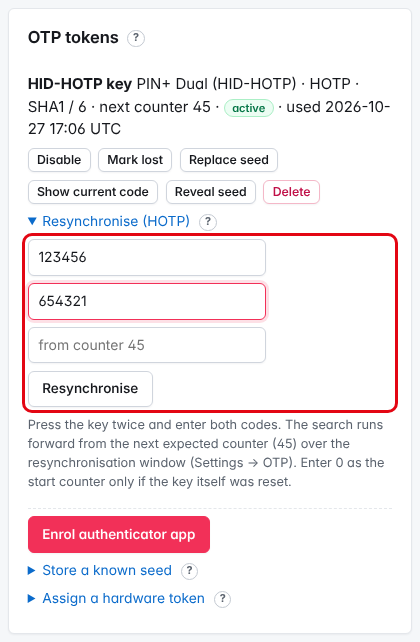
The appliance searches the two codes as consecutive codes forward from the stored counter over the HOTP resynchronisation window (codes) (Settings → General settings → OTP, default 1000) and stores the counter after the second code; both codes are then used. Nothing changes when they are not found. Every resynchronisation is written to the audit log (token.resync).
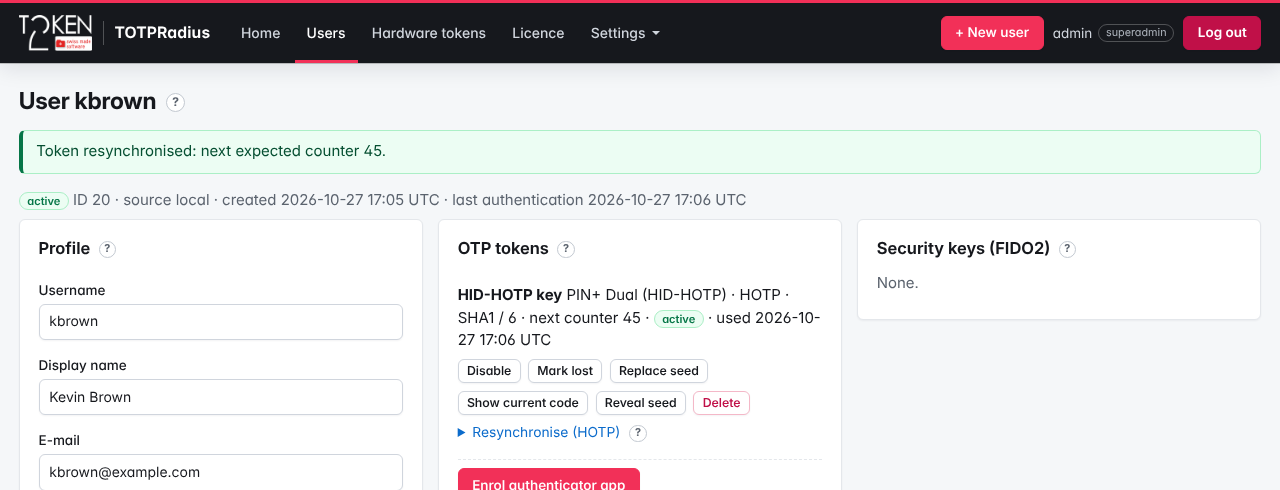
Self-association on the portals (Allow hwtoken) uses the same forward search for HOTP tokens.
HOTP in a cluster
An HOTP counter is shared state, and an unused HOTP code stays valid indefinitely. Therefore HOTP codes are verified on the primary node only, whatever Strict mode OTP across a cluster says. A replica rejects users who only have HOTP tokens with otp_primary_only; a user who also has a TOTP token can still sign in there with that one. Point the NAS clients of HOTP users at the primary (or list it first); while the primary is down, HOTP users cannot sign in. See TOTPRadius cluster.
Test
Open Settings → Test authentication, choose the NAS client, enter kbrown, the password if the policy asks for one, click into Code (optional) and touch the key; press Test. See Testing TOTPRadius authentication.
Troubleshooting
| Reason in the authentication log | What to check |
|---|---|
otp_invalid | The key is further ahead than the look-ahead: resynchronise. Or wrong seed / digits: store the seed again with Verify with a code. |
replay | A code that was already accepted (or an earlier one) was sent again. |
otp_malformed | The key types 8 digits but the token is set to 6, or the reverse. |
otp_primary_only | The request reached a replica; HOTP is checked on the primary only. |
no_token | The token is disabled or lost. |
15. TOTPRadius - TOTP Self-service enrollment methods
With many users, setting up every second factor by hand is tedious. TOTPRadius lets users enrol their own authenticator app or associate a hardware token on a self-service page, after signing in with their directory (LDAP / Active Directory) password or with a local password.
The three enrolment portals
| Portal | Address | Sign-in | Replacing a token |
|---|---|---|---|
| Internal LDAP enrolment | https://radius.example.com/ldap-enroll/ (admin listener, inside your network) | Directory password | with Allow ldap key change |
| External LDAP enrolment | https://vpn.example.com:9443/vpn/ldap/ (portal listener, may face the Internet) | Directory password | only with Allow re-enrolment on the external portal (off by default) |
| Local enrolment | https://vpn.example.com:9443/vpn/local/ | Local password stored on the appliance | never |
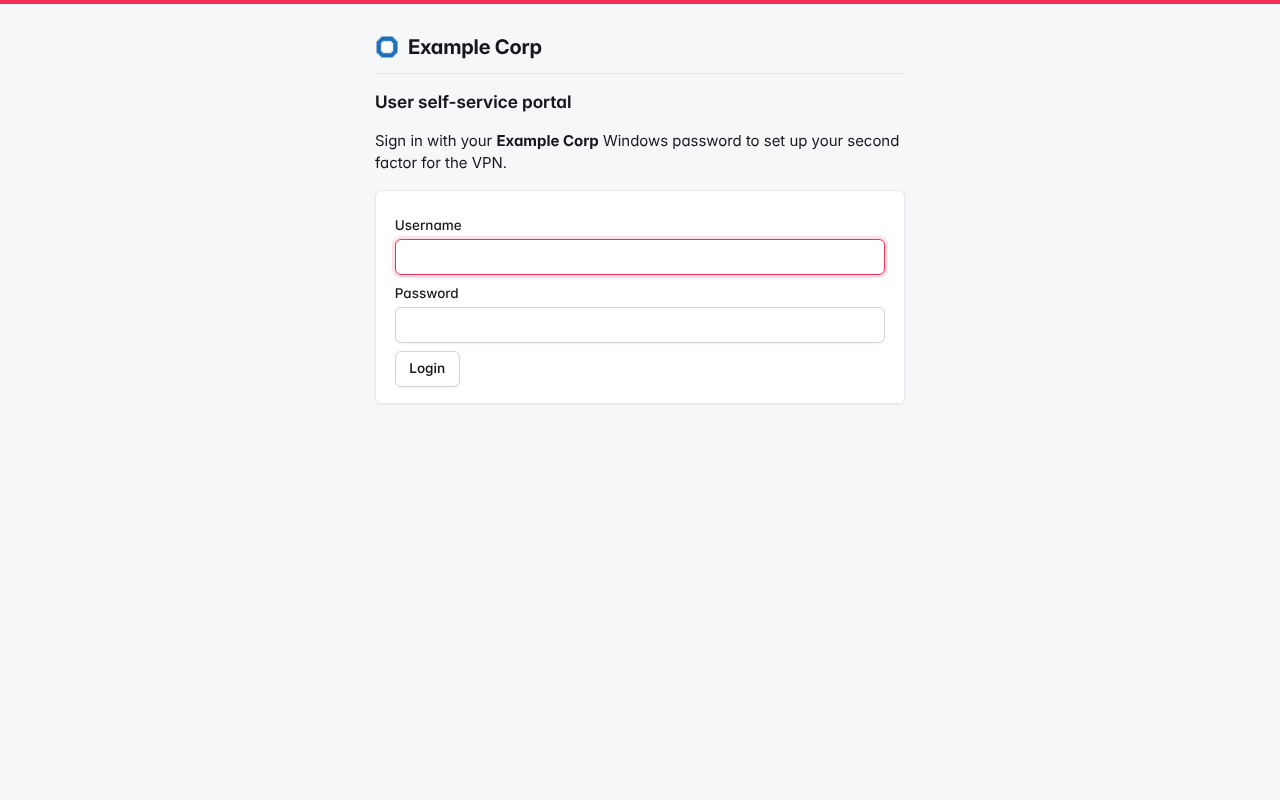
/vpn/ldap/ by default. In 0.4 /ldap-enroll is a full portal of its own and Ldap web url redirect is empty by default (set it, for example to /vpn/ldap/, to send users elsewhere after enrolment).Step 1. Check the directory
The LDAP portals check the password against the directory chosen in Settings → General settings → Portals → Internal LDAP enrolment → Directory. When none is chosen they use the directory of the default policy, otherwise the first enabled LDAP directory. Set up the directory first: LDAP configuration or Quick setup.
Step 2. Turn on the portals
- Open Settings → General settings → Portals.
- Internal page: tick Allow ldap enrollment; optionally choose the Directory, write an Ldap intro text (simple HTML), and keep Allow ldap key change (on by default) to let users replace a token; untick it to allow first enrolment only.
- External page: tick Allow ldap web enrollment. Users with local passwords: tick Local password enrolment portal.
- Hardware tokens: tick Allow hwtoken to let users associate a token from the inventory themselves; keep Hardware token restriction on (tokens assigned to someone else cannot be taken) and Codes required to assign at 2.
- Press Save.
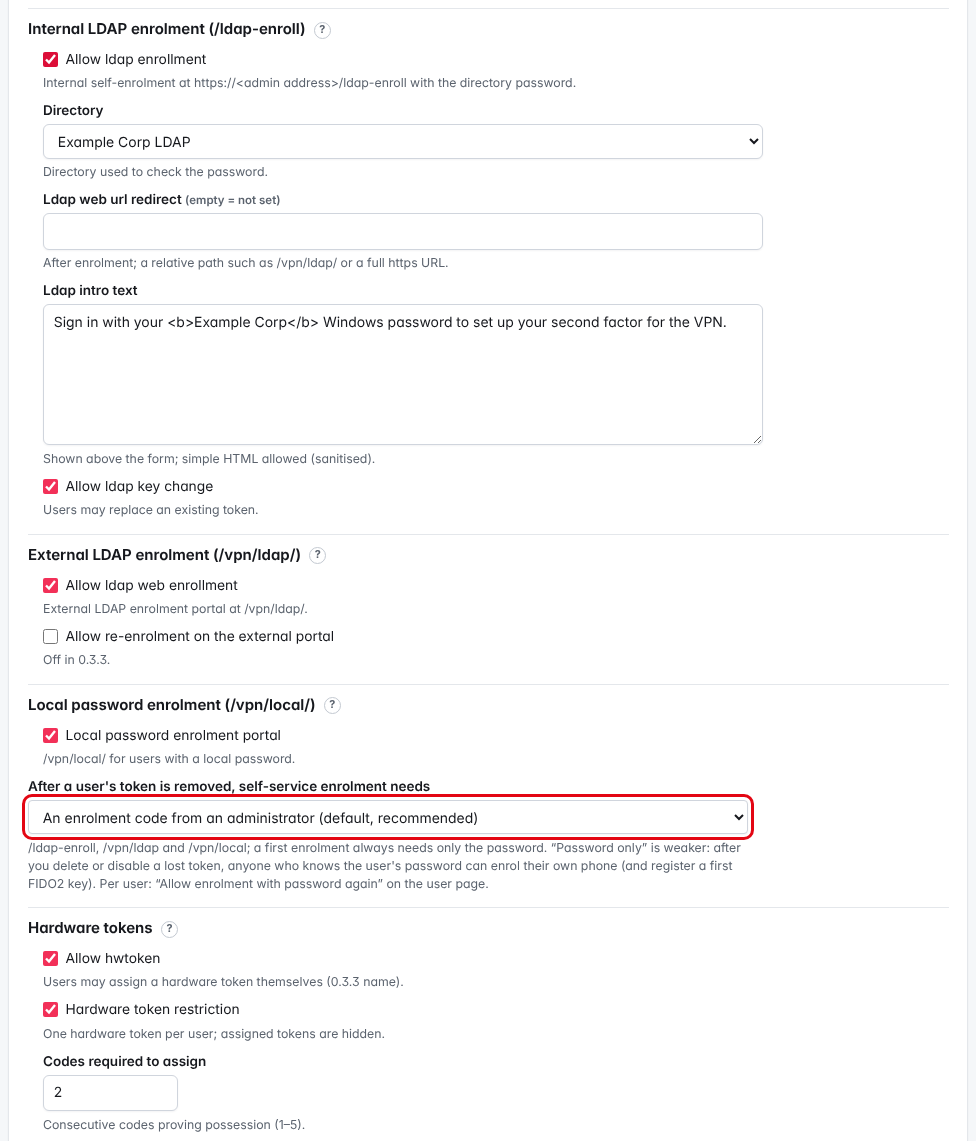
Users also need the user-page permission May use the LDAP enrolment portals (and May re-enrol in self-service to replace a token). Users created in the console have them; for users created by the portals or by CSV import the defaults are under Settings → General settings → Users (Allow LDAP enrolment for new users, Allow self-service re-enrolment for new users).
Who may enrol, and with what
| User | Needs |
|---|---|
| Never had a token (first enrolment) | the password only |
| Has an active token (re-enrolment, where allowed) | the password and the current code of that token |
| Had a token, none active now (lost phone: token disabled, marked lost, unassigned or deleted) | the password and an enrolment code from an administrator – unless After a user's token is removed, self-service enrolment needs is set to The directory or local password only, or the administrator used Allow enrolment with password again for that user |
- Re-enrolment is allowed only on the page whose setting permits it:
/ldap-enroll/with Allow ldap key change,/vpn/ldap/with Allow re-enrolment on the external portal (off by default), never on/vpn/local/; the user's May re-enrol in self-service permission must also be on. The two settings are independent: Allow ldap key change never opens/vpn/ldap/. - Both conditions are checked again when the user confirms the new token (types the code from the new QR code). Switching re-enrolment off therefore also stops a QR code that is already on a user's screen.
- An enrolment is confirmed only on the portal page that started it. A first enrolment started while the user had no token cannot be confirmed once the user has one (for example from a second browser tab): replacing a token always needs the current code.
- The default policy's LDAP group restriction also applies to the LDAP portals: with the default policy limited to
VPN Users, only members of that group can enrol. - Disabled and banned users cannot enrol.
- Over the licence limit, users who do not count yet cannot enrol a first token.
- A user may hold at most Tokens per user active tokens (Settings → General settings → Users, default 1).
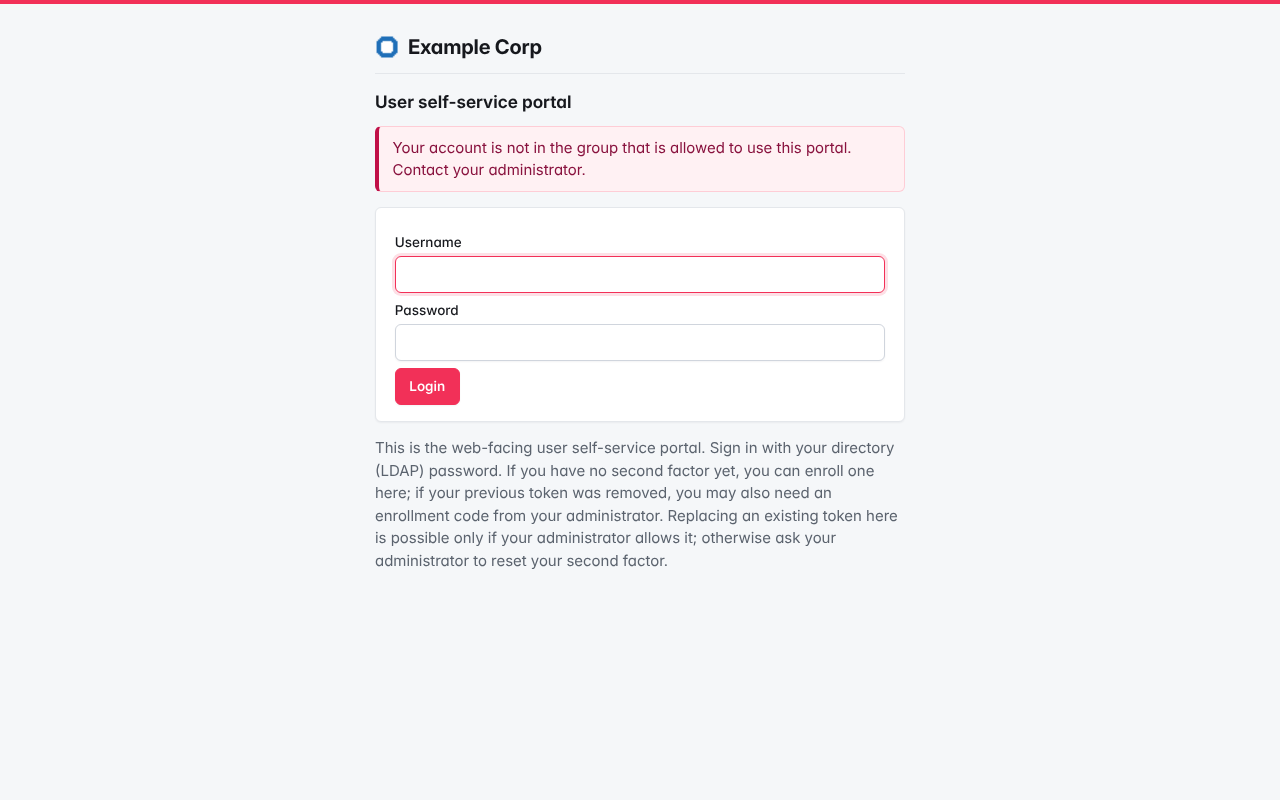
Step 3. Users enrol an authenticator app
- The user installs a TOTP app (Token2 TOTP+, Microsoft Authenticator, Google Authenticator, FreeOTP …).
- The user opens the portal, for example
https://vpn.example.com:9443/vpn/ldap/, and signs in with the Windows user name and password (jdoe/Winter2026!). - On add software token the user presses TOTP Enrollment, scans the QR code (or types the key shown), enters the code the app shows in type your one-time password and presses verify OTP. The token is active only when the code is correct.
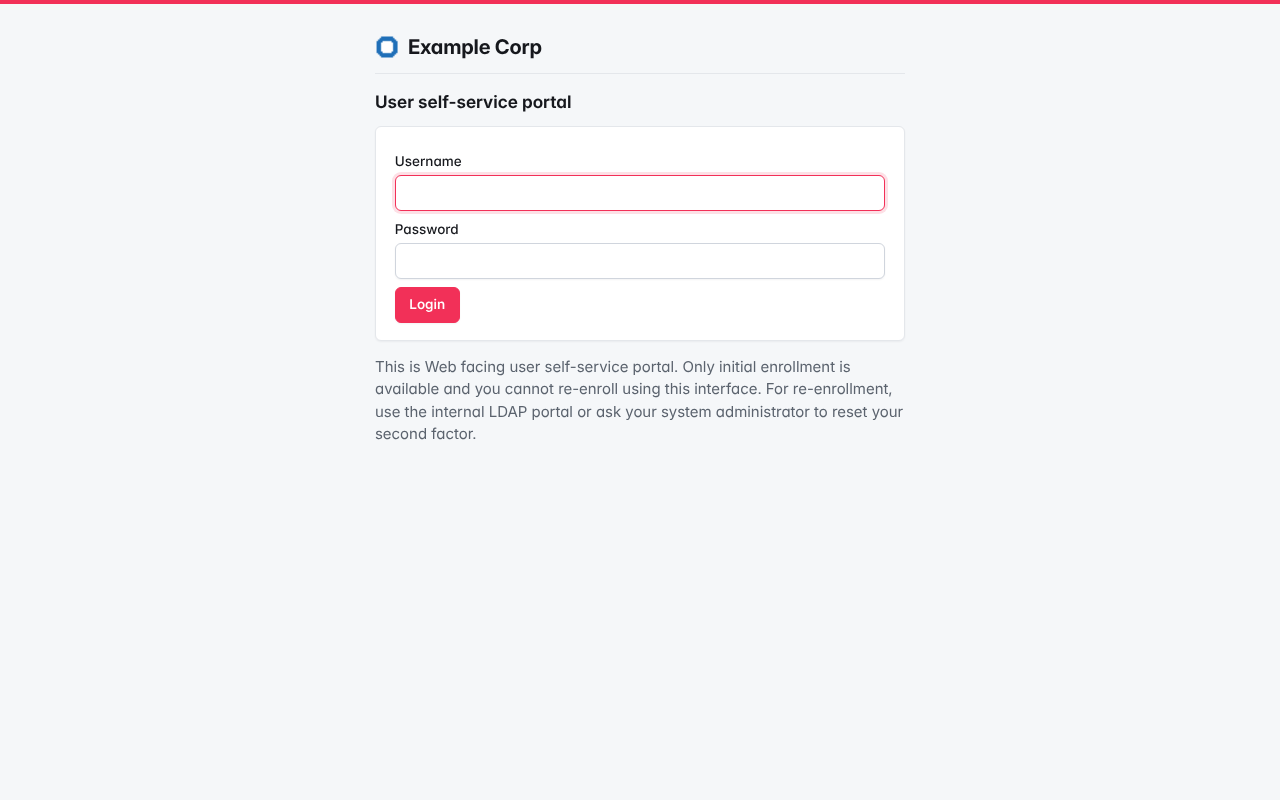
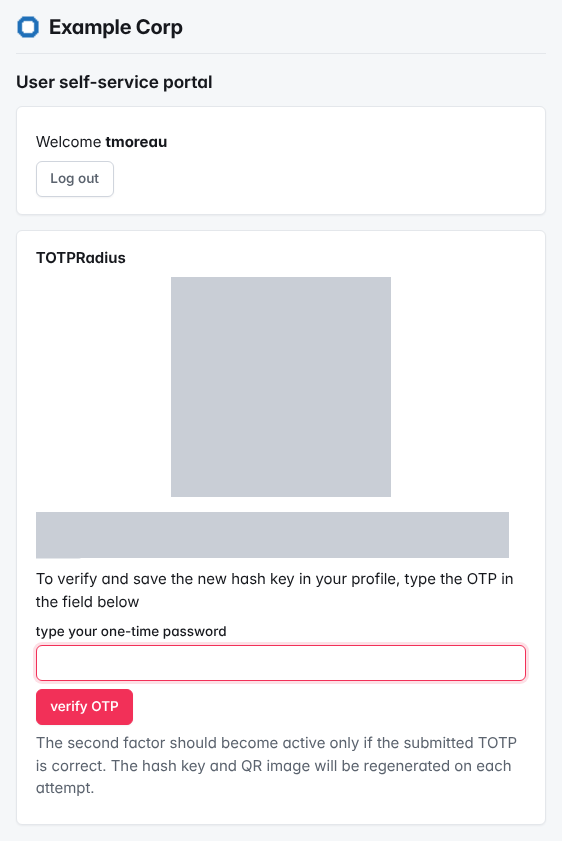
To move an existing app entry to a second device, the user re-enrols (where allowed), or a superadmin uses Reveal seed on the user page (audited, see Reveal a seed).
New tokens use the algorithm, digits and period set under Settings → General settings → OTP (default SHA1, 6 digits, 30 seconds), which every app supports.
Step 4. Users associate a hardware token
The administrator first adds the tokens to the inventory (Hardware tokens → Add or CSV import, see Hardware token management). Then the user:
- signs in on the portal and opens add hardware token;
- enters the Serial number exactly as printed on the back of the token (for example
60000105); - presses the token's button and enters the code in OTP 1, waits for the next code and enters it in OTP 2, then presses add hardware token.
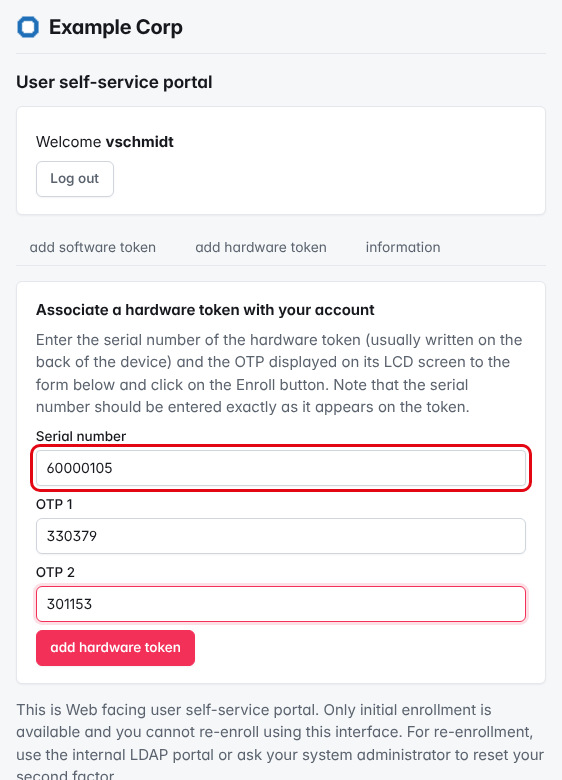
- The appliance searches ±30 time steps for the token's clock (Settings → General settings → OTP → Hardware token drift scan) and stores the drift it finds.
- TOTP tokens with 6 or 8 digits and 30 or 60 seconds, and HOTP (counter) tokens are supported.
- Attempts are limited to 5 per hour per source address and per serial number.
Local users: /vpn/local
Users with a local password (for example contractors) sign in on /vpn/local/. A password marked Must change at first use (or a 0.3.x tmp_ password) must be changed first; the new password needs at least the Minimum local password length of Settings → General settings → Users (default 10 characters, the same rule as for passwords set in the console and through API v2) and three of: lower case, upper case, digits, symbols; it must differ from the old one and must not start with tmp_. Afterwards the user enrols as above.
When a user loses a phone or token
- On the user page, Mark lost, disable, unassign or delete the token (codes are refused at once). Also press Revoke VPN credentials if the user had portal credentials.
- The user page now shows Self-service enrolment: needs an enrolment code (had a token).
- Either press Issue enrolment code and give the code to the user over a trusted channel (one-time, valid 24 hours by default), or – when you are sure who will enrol, for example with the user on the phone – press Allow enrolment with password again (offered only after the lost token is deleted or unassigned – disabled or lost tokens that are still assigned count; it applies once).
- The user signs in on the portal; with a code required the portal asks for the Enrolment code before showing the QR code.
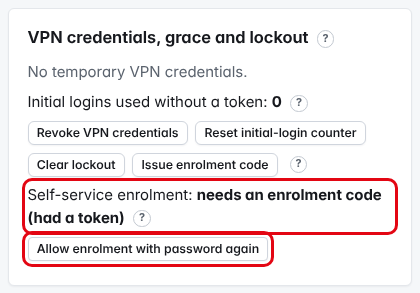
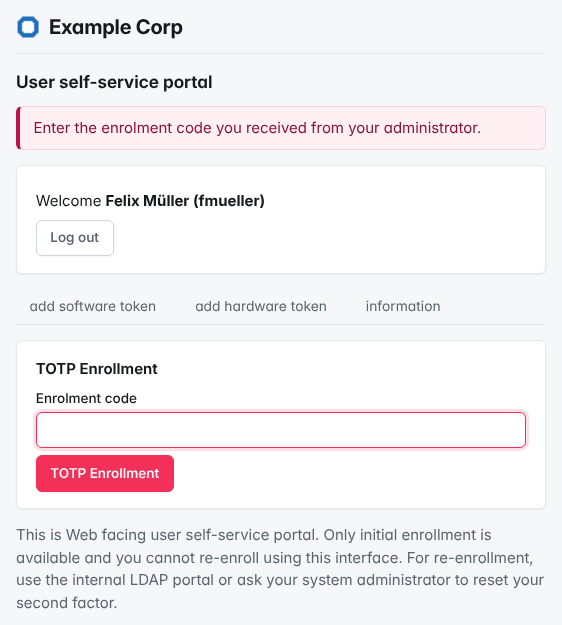
Troubleshooting
| Message / reason | What to check |
|---|---|
| "Your account is not in the group that is allowed to use this portal" | The user is outside the default policy's LDAP group. |
| Other refusal with "Contact your administrator" | The user lacks May use the LDAP enrolment portals, is disabled, or already has a token where re-enrolment is not allowed on that page. |
| "Enter the enrolment code you received from your administrator" | The user had a token before: issue an enrolment code or use Allow enrolment with password again. |
| "Wrong credentials" | Wrong password, or the directory chosen for the portal is not the user's directory (Settings → Directories (LDAP / AD) → Test connection). |
| Hardware token not accepted | Serial not in the inventory, assigned to someone else, disabled/lost, codes not consecutive, or more than 5 attempts in an hour. |
otp_invalid at the first VPN login | The phone's clock is wrong; use network time. Check with the drift tool on the user page. |
PART IV · VPN PORTALS
16. TOTPRadius VPN Portal - Overview
Most VPN gateways only speak RADIUS with a password and a one-time code. The TOTPRadius VPN portal adds two stronger sign-in methods in front of such gateways – FIDO2 security keys (including passwordless) and single sign-on with Entra ID or another OpenID Connect provider – and the self-service pages where users enrol their own authenticator app or hardware token. After a successful portal sign-in the user receives a short-lived temporary VPN password, which the normal VPN client then sends through RADIUS.
The portals at a glance
| Portal | Address | What users do there | Guide |
|---|---|---|---|
| Landing page | https://vpn.example.com:9443/vpn/ | Links to every enabled portal | – |
| FIDO2 VPN portal | /vpn/fido2/ | Sign in with a security key (with or without password) and get a temporary VPN password | FIDO2 VPN portal |
| Entra ID / OIDC VPN portal | /vpn/oauth2/ (0.3.x page /vpn/oauth/ kept as an option) | Single sign-on with Entra ID, Keycloak, Okta, Authentik …, then a temporary VPN password | Entra ID / OIDC VPN portal |
| External LDAP enrolment | /vpn/ldap/ | Enrol an authenticator app or associate a hardware token with the directory password | Self-service enrolment |
| Local enrolment | /vpn/local/ | The same for users with a password stored on the appliance | Self-service enrolment |
| Internal LDAP enrolment | https://radius.example.com/ldap-enroll/ (admin address, not the portal) | Enrolment from inside the network; also allows replacing a token | Self-service enrolment |
How the portal is built in 0.4
- The portal is a separate process with its own HTTPS listener – port 9443 on the appliance – and its own certificate (Certificates → slot portal). It never receives the admin certificate's key.
- The portal process has no database access: it can only call a narrow set of portal operations of the core service.
- Every portal is off by default and is switched on separately under Settings → General settings → Portals.
- Temporary VPN passwords are shown once, stored only as a hash and are valid once, for one hour, one day or one week (validity classes 1–4).
Step 1. Set the portal address
- Open Settings → General settings → Portals.
- In Url enter the external address users open, for example
https://vpn.example.com:9443(orhttps://vpn.example.comwhen a firewall forwards 443 to 9443, see below). - In Portal host name enter the host name only:
vpn.example.com– nohttps://, port or path (a typed URL or:9443is removed when you save). FIDO2 keys are bound to this name and work on every port of that host. - Tick the portals you need (Allow fido2 interface, Oauth2 interface, Allow ldap web enrollment, Local password enrolment portal) and press Save.
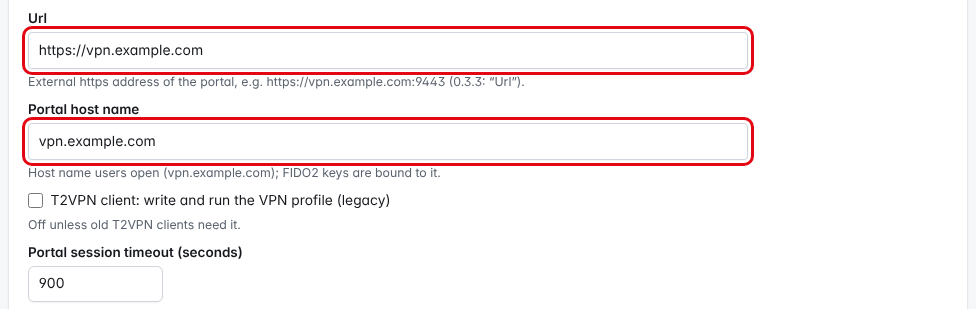
Step 2. Publish the portal
The portal listens on TCP 9443. You can publish it directly (https://vpn.example.com:9443) or forward the public port 443 to 9443 on your firewall, as in 0.3.x (NAT or TCP pass-through; reverse proxies that terminate TLS are not supported in 0.4). Only the portal port should be reachable from the Internet – never the admin console (443 on the appliance) and never RADIUS. Details and a Meraki example: Network configuration.
Step 3. Install a certificate for the portal
FIDO2 and single sign-on need a host name with a certificate the users' browsers trust. Upload it under Settings → Certificates with slot portal; it is used within 30 seconds, without a restart. See Web server and LDAPS certificates.
Step 4. Let the VPN accept portal credentials
The NAS client of your VPN gateway uses a policy. That policy must accept the temporary passwords of the portals: Settings → Policies → your policy → More options: portal credentials, MS-CHAP → Temporary credentials from the VPN portals. Both portals are accepted by default; tick Accept only these credentials to refuse normal password + code logins for that gateway (0.3.x FIDO2 only / OAuth2 only).
Next steps
- FIDO2 VPN portal – security keys and passkeys
- Entra ID / OIDC VPN portal – single sign-on
- Client authentication flow – how the temporary password reaches the VPN client (T2VPN, .bat, .mobileconfig)
- VPN portal security
17. TOTPRadius VPN Portal - Client Authentication flow
The FIDO2 and Entra ID / OIDC VPN portals do not connect the VPN themselves. They issue a temporary VPN password after a strong sign-in; the user's normal VPN client (for example the Windows L2TP/IPsec client for Meraki Client VPN) sends that password to the gateway, and the gateway checks it with TOTPRadius over RADIUS. No special VPN client is required; the Token2 T2VPN helper app only saves the user a few clicks.
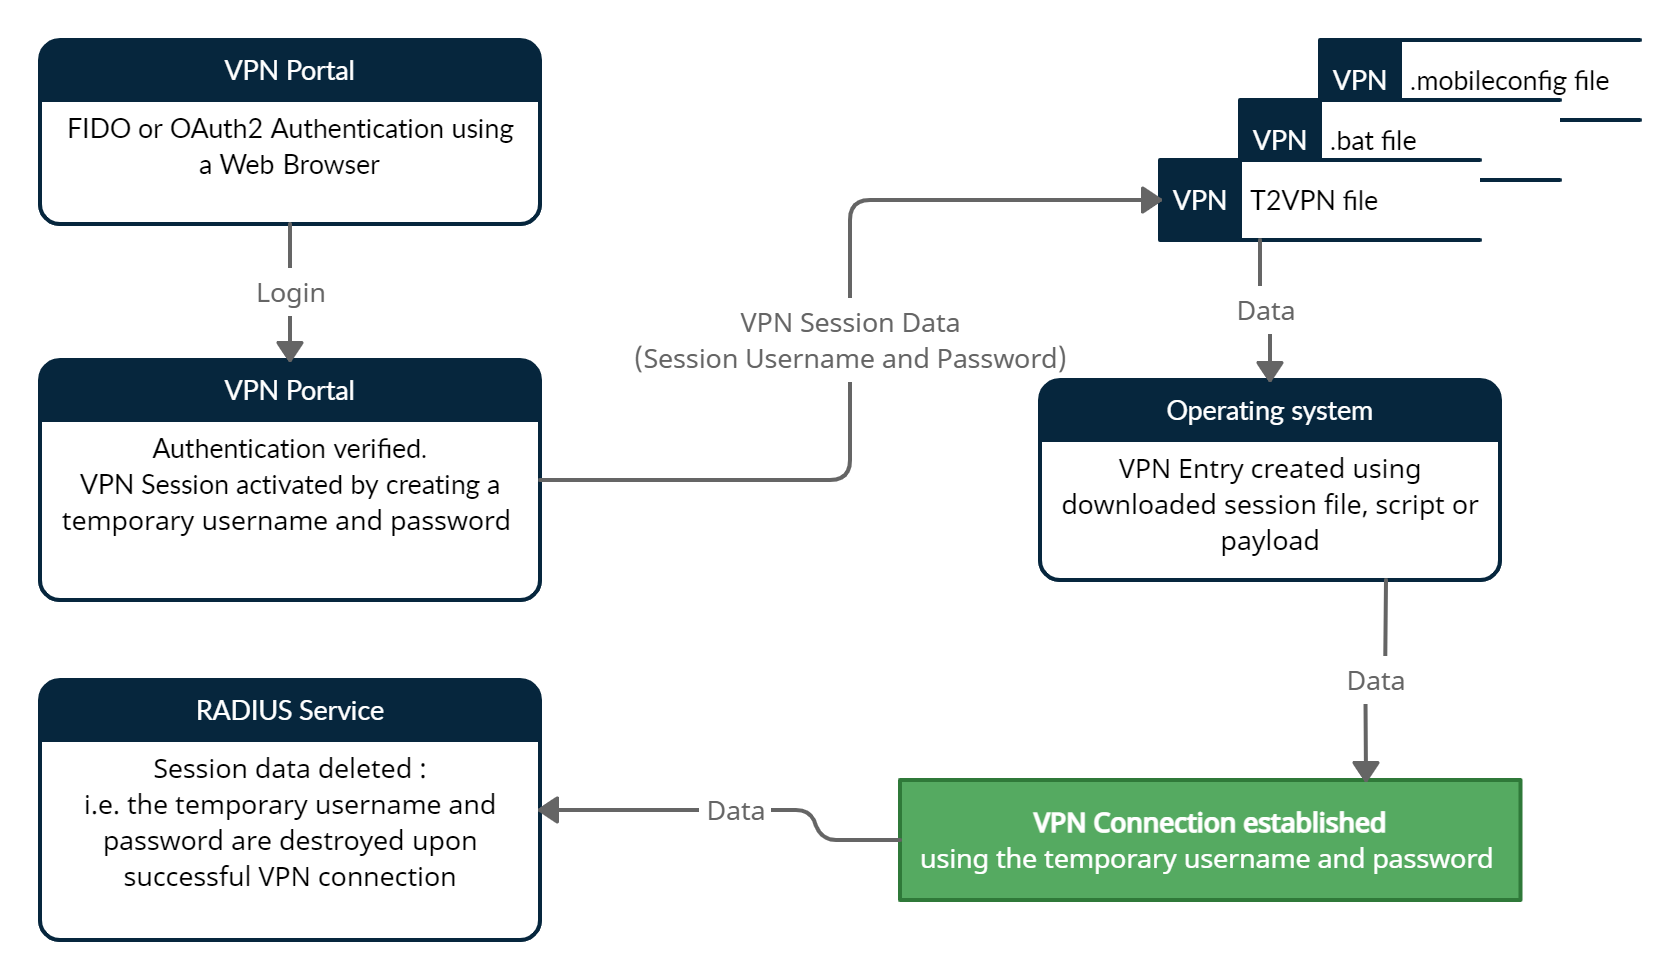
The flow step by step
- The user opens the portal (
https://vpn.example.com:9443/vpn/fido2/or/vpn/oauth2/) and signs in with a security key or with single sign-on. - The user chooses how long the credential should be valid and presses Generate VPN credentials.
- The portal shows the VPN username, the Hostname and the Temporary password once, and offers the connection files.
- The VPN client connects with these values. The gateway sends them to TOTPRadius (RADIUS, PAP); the policy of that NAS client accepts the temporary credential instead of password + code.
Temporary credentials
| Class | Validity |
|---|---|
| 1 | once: valid for one login |
| 2 | one hour |
| 3 | one day |
| 4 | one week |
- The password is 32 random characters followed by
_t2f2_pass(FIDO2 portal) or_t2o2_pass(Entra ID / OIDC portal). It is shown once and stored only as a hash. - One active credential per user and portal: generating a new one revokes the previous one.
- The VPN client must use the VPN username the portal shows. It is the user's name on the appliance:
jdoeon the FIDO2 portal, the sign-in name such as[email protected]on the Entra ID / OIDC portal (the 0.3.x formjdoe--at--example.comis added as an alias, so older connection entries keep working), and[email protected]on the legacy/vpn/oauth/page. - Users revoke their credential on the portal (revoke); administrators use Revoke VPN credentials on the user page, for example when a laptop is lost.
Which classes users may choose is set in Settings → General settings → Portals → Temporary credential validity classes (default 1–4, one per line). For VPNs that use CHAP or MS-CHAP instead of PAP, tick Keep temporary credentials reversibly encrypted.
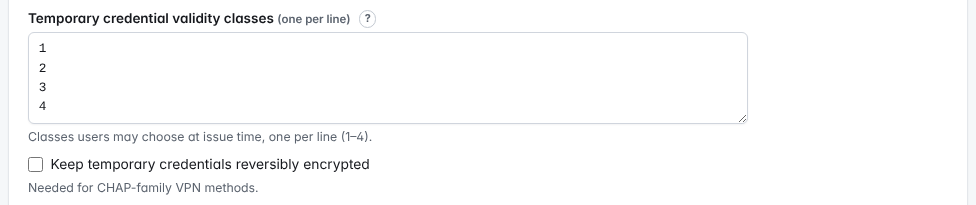
Connection files
After generating a credential the portal offers three downloads. Each download link is single use and valid for 10 minutes.
| Download | For | What it does |
|---|---|---|
download T2VPN file (.t2vpn) | Windows with the T2VPN app | T2VPN reads the VPN settings and the temporary credentials and creates and starts the VPN connection. |
download batch file (.bat) | Windows without T2VPN | Creates the VPN entry with PowerShell Add-VpnConnection. Not offered when the VPN settings or the user name contain characters that are unsafe in a batch file; the portal then says so. |
| download Apple profile (.mobileconfig) | macOS and iOS | Installs a VPN profile; the user confirms it in the system settings. |
The VPN settings in these files come from Fido2 vpn settings and Oauth2 vpn settings (Settings → General settings → Portals), passed to T2VPN unchanged, as in 0.3.x. Example for an L2TP/IPsec VPN (replace the pre-shared key):
Name=Example Corp VPN
ServerAddress=vpn.example.com
TunnelType=L2tp
L2tpPsk=<pre-shared key of the VPN>
AuthenticationMethod=Pap
EncryptionLevel=Optional
Force=
RememberCredential=Troubleshooting
| Reason in the authentication log | What to check |
|---|---|
temp_disabled | The policy of the gateway's NAS client does not accept credentials from this portal (Policies → Temporary credentials from the VPN portals). |
temp_invalid | Wrong temporary password or wrong user name: the VPN client must use the VPN username shown by the portal. With a VPN that uses CHAP / MS-CHAP also check that Keep temporary credentials reversibly encrypted was on when the credential was generated (generate a new one), or switch the VPN to PAP. |
temp_expired, temp_consumed | The credential expired or a class-1 credential was already used: generate a new one. |
temp_only | The policy accepts only portal credentials; the user tried password + code. |
18. FIDO2 - TOTPRadius VPN Portal - Easy and secure access to corporate VPN
With the FIDO2 VPN portal users sign in with a FIDO2 security key – with the key alone (passwordless, PIN or fingerprint on the key) or with password and key – and receive a temporary VPN password for their normal VPN client. This works with any VPN gateway that checks users through RADIUS, for example Meraki Client VPN or FortiGate. RADIUS itself never sees the key; how the temporary password reaches the VPN client is explained in Client authentication flow.
Before you start
- A TOTPRadius 0.4 appliance with the portal published, for example at
https://vpn.example.com:9443(see VPN portal overview and Network configuration). - A certificate for
vpn.example.comin the portal slot that browsers trust (Certificates). WebAuthn works only over HTTPS with a host name. - Users who can sign in with a password: directory (LDAP / AD) or a local password.
- A VPN gateway already working with TOTPRadius (NAS client and policy), for example Meraki Client VPN.
Step 1. Turn on the FIDO2 portal
- Open Settings → General settings → Portals.
- Check Url (
https://vpn.example.com:9443) and Portal host name (vpn.example.com): the host name is required for this portal and keys are bound to it. Enter the host name only, withouthttps://, port or path (they are removed when you save); keys work on every port of that host. - Under FIDO2 VPN portal (/vpn/fido2) tick Allow fido2 interface.
- Paste the VPN settings for the T2VPN client into Fido2 vpn settings (see the example below), set the options in the table, and press Save.
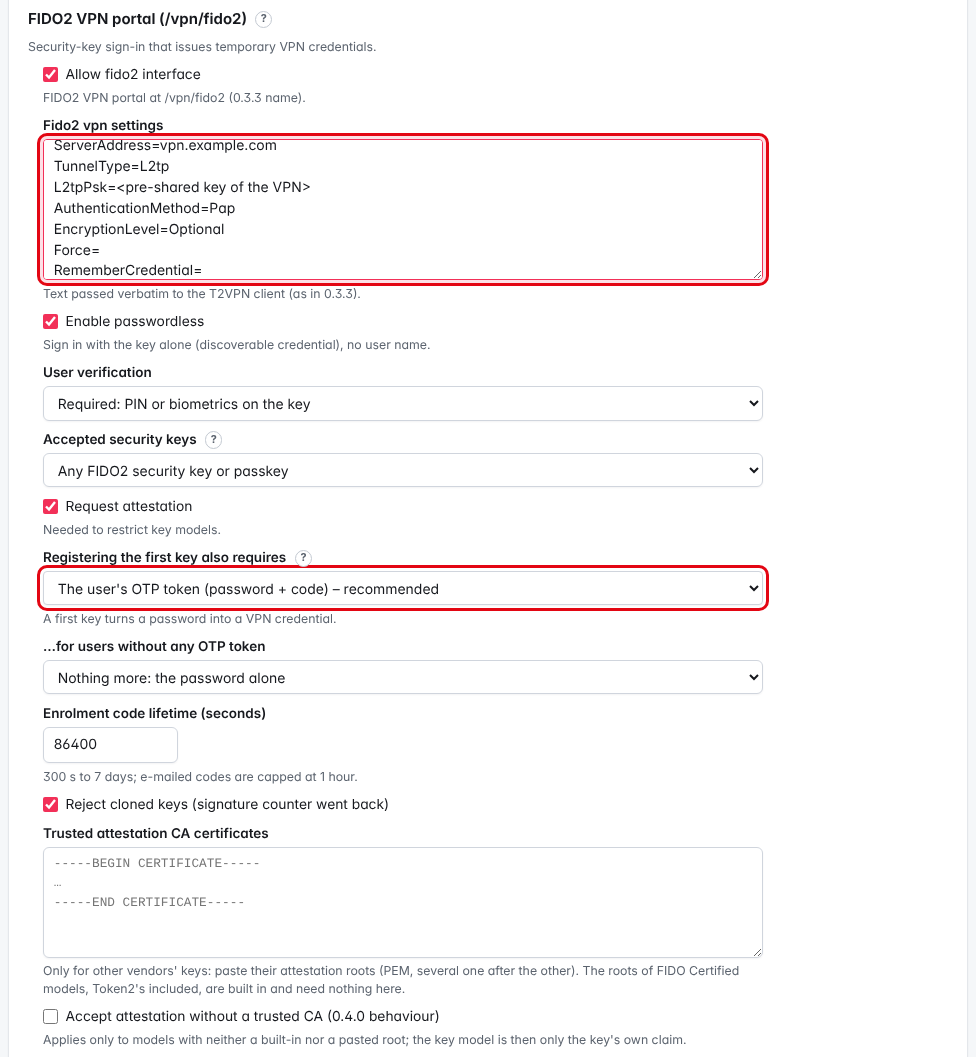
► Allow fido2 interface – switches the portal /vpn/fido2/ on (0.3.x: Allow FIDO2 Interface).
► Fido2 vpn settings – the text passed unchanged to the T2VPN client and used for the connection files, as in 0.3.x:
Name=Example Corp VPN
ServerAddress=vpn.example.com
TunnelType=L2tp
L2tpPsk=<pre-shared key of the VPN>
AuthenticationMethod=Pap
EncryptionLevel=Optional
Force=
RememberCredential=
► Enable passwordless – (default on) users sign in with the key alone; the key must hold a discoverable credential (resident key) and the user is identified by the key. Off: the portal asks for the password first and then for the key.
► User verification – Required: PIN or biometrics on the key (default) or Preferred: also accept keys without PIN (0.3.x Allow legacy keys).
► Accepted security keys – which key models may register: Any FIDO2 security key or passkey (default), FIDO Certified security keys (L1 or higher, built-in FIDO MDS list), Token2 security keys only, or Only the key models listed below (AAGUIDs). See Restrict the accepted key models below.
► Registering the first key also requires – what a user must prove besides the password before the first key is registered (see Step 3; by default a user without any OTP token needs only the password, see the warning there). Changing this, the accepted keys or user verification needs a recent re-authentication.
► Reject cloned keys (signature counter went back) – (default on) a key whose counter went back is marked flagged on the user page and refused.
► Trusted attestation CA certificates – only for other vendors' keys that are not in the built-in list: paste their attestation roots (PEM, several one after the other). Leave it empty for FIDO Certified keys, Token2's included.
Optional: restrict the accepted key models
With the default Any FIDO2 security key or passkey the portal does not check the key model: any security key, platform authenticator or synced passkey can be registered. To allow only hardware keys of known models, choose another option under Accepted security keys:
| Option | Accepted keys |
|---|---|
| Any FIDO2 security key or passkey (default) | every FIDO2 key or passkey (no attestation check) |
| FIDO Certified security keys (L1 or higher, built-in FIDO MDS list) | models the FIDO Alliance certified at level L1 or higher, with an attestation that verifies to that model's built-in root |
| Token2 security keys only | Token2's FIDO2 and PIN+ keys, verified against Token2's built-in attestation root |
| Only the key models listed below (AAGUIDs) | the models whose AAGUIDs you enter under Allowed AAGUIDs (one per line) |
Every option except Any requires the key's attestation: when it is registered, the key signs its registration with a certificate that must verify to a trusted root for the model the key claims to be (its AAGUID). Self-made certificates and keys without attestation are refused.
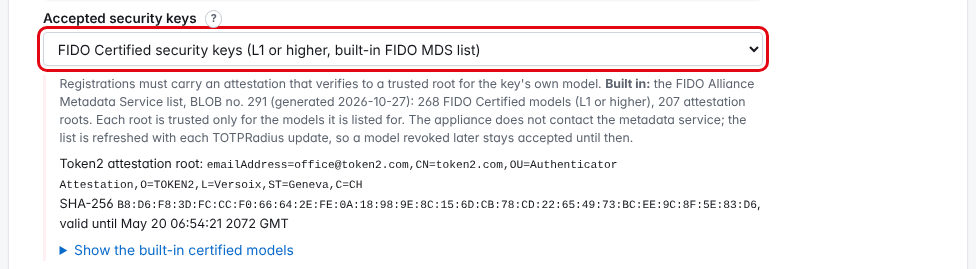
- Built-in roots, nothing to download. The appliance contains the FIDO Alliance Metadata Service (MDS) list of certified models with their attestation roots, Token2's included. The list in use is shown under the setting: its MDS number and date (in this release BLOB no. 291 with 268 FIDO Certified models), Token2's root with its SHA-256 fingerprint and validity, and Show the built-in certified models, a searchable table of all models with their AAGUID, certification level and root.
- Each built-in root is trusted only for the models it is listed for, so one vendor's root cannot vouch for another vendor's model.
- The appliance never contacts the metadata service. The list is refreshed with each TOTPRadius update: a model certified later needs its vendor's root pasted until then, and a model whose certification is revoked stays accepted until the update.
- Other vendors' keys that are not in the built-in list: choose Only the key models listed below (AAGUIDs), enter the model's AAGUID and paste the vendor's root certificates (PEM, from the vendor) into Trusted attestation CA certificates. Pasted roots are trusted for every model. A listed model with neither a built-in nor a pasted root is refused, unless Accept attestation without a trusted CA (0.4.0 behaviour) is ticked (then the model is only the key's own claim; not recommended).
- The rule is checked again at each sign-in. Keys imported from 0.3.x carry no attestation and are exempt. Administrators' own security keys for the admin console are not affected.
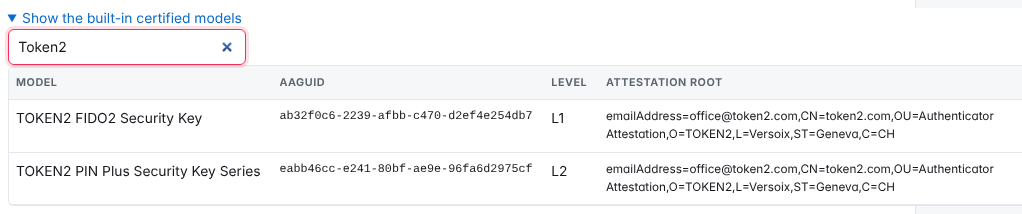
Example: to allow only Token2's two models by AAGUID (the same as Token2 security keys only, but extensible with other models), choose Only the key models listed below (AAGUIDs) and enter their AAGUIDs:
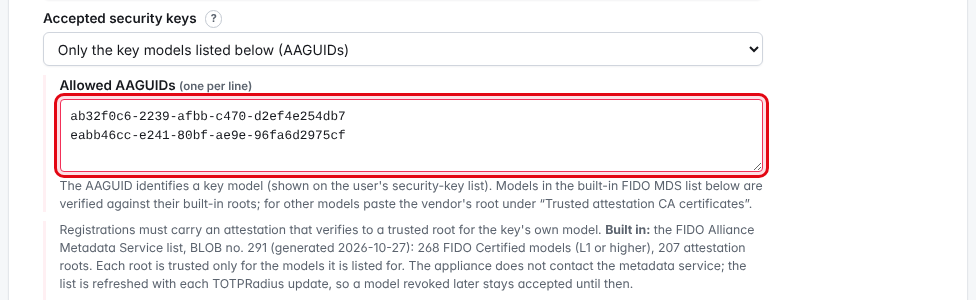
Step 2. Allow users and gateways
- Users: the user page option May use the FIDO2 VPN portal must be on. Users created in the admin console have it on; for users created by the portals or by CSV import the default is Settings → General settings → Users → Allow the FIDO2 portal for new users (0.3.x FIDO-VPN enabled by default per user).
- Gateway: open Settings → Policies, the policy of the VPN's NAS client, More options: portal credentials, MS-CHAP → Temporary credentials from the VPN portals. Accept credentials issued by the FIDO2 portal (/vpn/fido2) is on by default. Tick Accept only these credentials if this gateway should accept nothing but portal credentials (0.3.x FIDO2 only).
Step 3. Users register their first key
- The user opens
https://vpn.example.com:9443/vpn/fido2/and clicks First-time registration (username and password). - The user signs in with the directory or local password, for example
jdoe/Winter2026!. - The portal shows Register security key. Depending on the first-key rule it also asks for the current code of the user's authenticator or for an enrolment code.
- The user enters a Passkey name, presses Register security key and touches the key (or holds it to the NFC area). The key asks for its PIN when user verification is required.
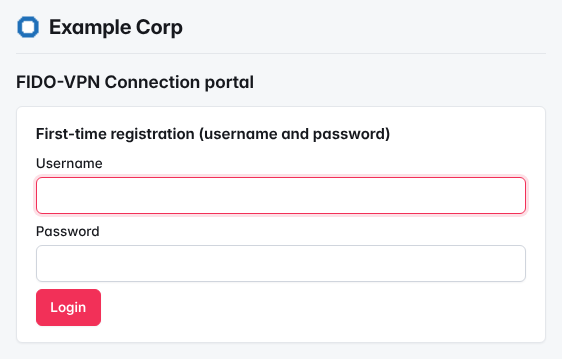
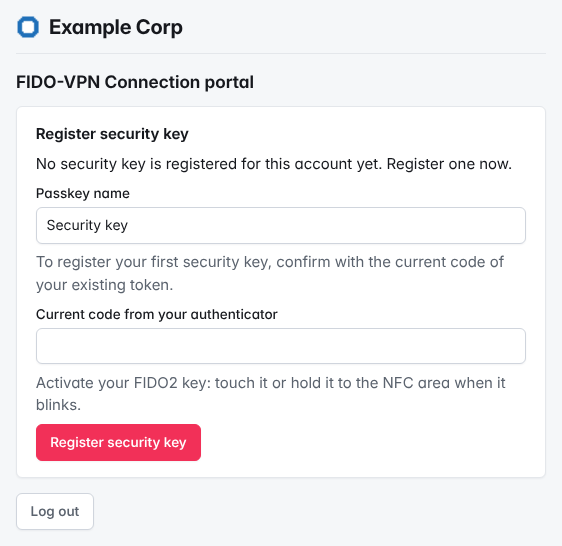
The first key turns a password into a VPN credential, so it needs more than the password. The rule is set in Registering the first key also requires and …for users without any OTP token:
| Setting | User with an authenticator / token | User without any token |
|---|---|---|
| The user's OTP token (password + code) – recommended (default) | password + current code | as set in …for users without any OTP token: Nothing more: the password alone (default, see the warning below), An enrolment code sent by e-mail, or An enrolment code issued by an administrator |
| An enrolment code sent by e-mail | password + e-mailed code + current code | password + e-mailed code |
| An enrolment code issued by an administrator | password + administrator's code + current code | password + administrator's code |
| Nothing more: the password alone (0.4.0 behaviour, insecure) | password | password |
- A user whose token was removed or disabled (lost phone) is refused with the default settings – an enrolment code does not help unless …for users without any OTP token asks for one. To let the user register a key: set …for users without any OTP token to an enrolment code and issue one; or delete / unassign the lost token and press Allow enrolment with password again on the user page (applies once); or let the user first enrol a new authenticator on the self-service portal (with an enrolment code from an administrator) and then register the key with password + code. Setting After a user's token is removed, self-service enrolment needs to the password only also lifts the block for everyone, but is weaker (see Self-service enrolment).
- Administrators issue a code on the user page with Issue enrolment code (valid 24 hours by default, Enrolment code lifetime (seconds)). E-mailed codes need the user's e-mail address and an e-mail provider (Settings → General settings → Notifications) and are valid at most 1 hour.
- Further keys are added from a session opened with an existing key (Add another security key).
Step 4. Sign in and connect
- The user opens
https://vpn.example.com:9443/vpn/fido2/, presses Continue with FIDO2 key and touches the key (passwordless mode), or enters the password first (passwordless off). - The user chooses the validity and presses Generate VPN credentials; the portal shows the VPN username and the temporary password once and offers the T2VPN, batch and Apple files.
- The VPN client connects; the gateway sends the credential to TOTPRadius through RADIUS.
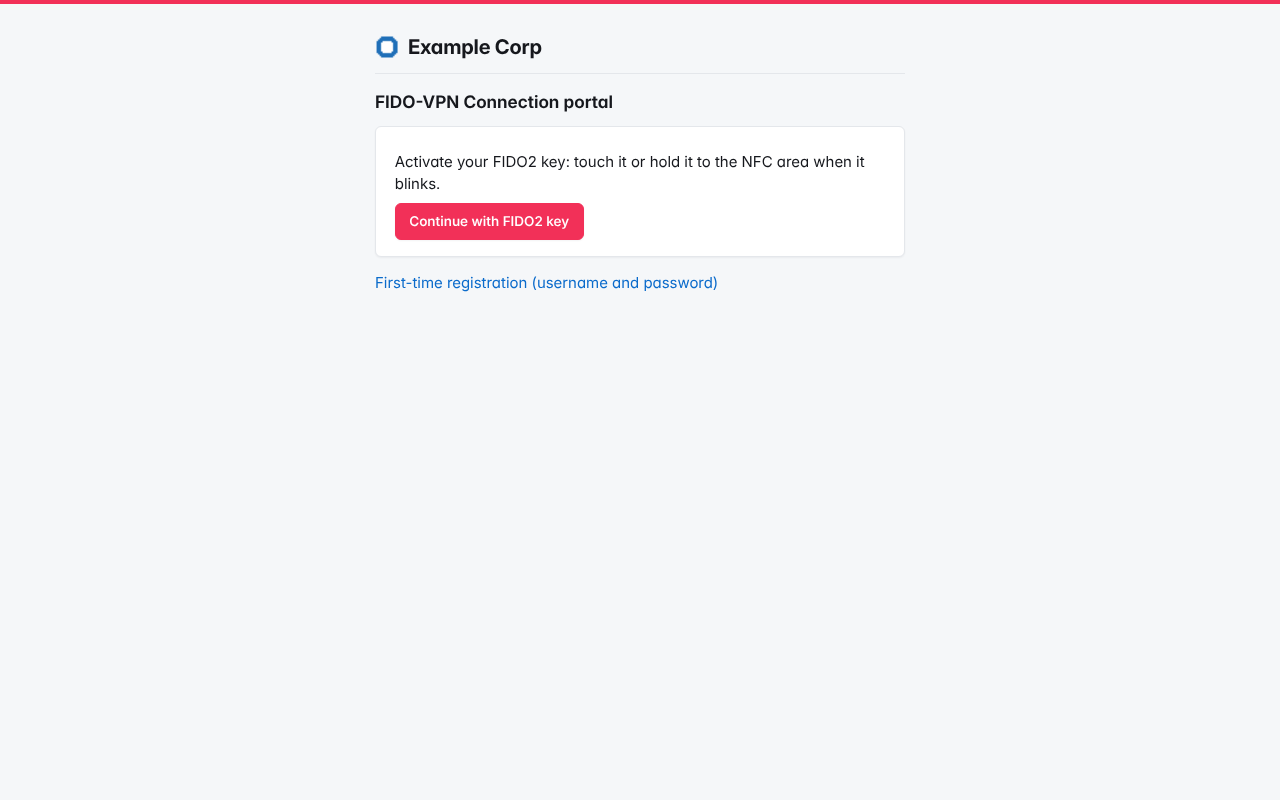
Manage keys
- The user page lists each key with name, Model (AAGUID) – the model name and its FIDO certification level when the model is in the built-in list, for example TOKEN2 PIN Plus Security Key Series with its level – registration and last-use time, and the marks imported (from 0.3.x) and flagged.
- Remove deletes a key (lost key, leaver); after the last key is removed, the next first key needs the password and the first-key rule again. Use Revoke VPN credentials as well when a laptop is lost.
- Users can remove their own keys on the portal (Registered security keys).
Test
- Register a key for a test user and generate a credential with class once.
- Connect the VPN with the VPN username and temporary password shown.
- Open Settings → Authentication log: the login appears with reason
okfor that user.
Troubleshooting
| Symptom / reason | What to check |
|---|---|
Registration fails with "not allowed" (authenticator_not_allowed, attestation_untrusted, attestation_trust_missing in the authentication log) | The key model is excluded by Accepted security keys, the key sent no attestation, or its attestation does not verify to a built-in or pasted root for its model. For a model outside the built-in list, list its AAGUID and paste the vendor's root. |
| Keys stopped working | The Portal host name was changed: keys are bound to it; users must register again. |
| The browser shows no key prompt | The portal is opened by IP address or without a trusted certificate; use the host name. |
temp_disabled / temp_only | The gateway's policy does not accept FIDO2 credentials, or accepts only portal credentials while the user typed password + code. |
temp_invalid, temp_expired, temp_consumed | Wrong VPN username or password, or the credential expired or was already used: generate a new one. |
19. Entra ID / OIDC - TOTPRadius VPN Portal - Easy and secure access to corporate VPN
With the Entra ID / OIDC VPN portal users sign in with single sign-on – Microsoft Entra ID (formerly Azure AD) or another OpenID Connect provider such as Keycloak, Okta or Authentik – and receive a temporary VPN password for their normal VPN client. Users already signed in to Microsoft 365 are not asked again, and Entra's own MFA and conditional access apply. The account security therefore relies on the identity provider: require MFA or passwordless sign-in for the users allowed to use this portal.
Before you start
- A TOTPRadius 0.4 appliance with the portal published, for example at
https://vpn.example.com:9443, and a trusted certificate in the portal slot (see VPN portal overview, Network configuration, Certificates). - Outbound HTTPS (TCP 443) from the appliance to the identity provider (for Entra ID:
login.microsoftonline.com). - A VPN gateway already working with TOTPRadius, for example Meraki Client VPN.
Step 1. Register the application in Entra ID
The steps on the Microsoft side are unchanged; the portal is now called Microsoft Entra admin center (Identity → Applications → App registrations), the Azure portal still offers the same pages.
- Open App registrations and click New registration.
- Enter a name, choose the account type (single tenant), select platform Web and enter the Redirect URI exactly as you will enter it in TOTPRadius:
https://vpn.example.com:9443/vpn/oauth2/callback(orhttps://vpn.example.com/vpn/oauth2/callbackwhen users reach the portal on port 443). Click Register. - On the Overview page note the Application (client) ID and the Directory (tenant) ID.
- Open Certificates & secrets → New client secret, enter a description and an expiry, and copy the secret value.
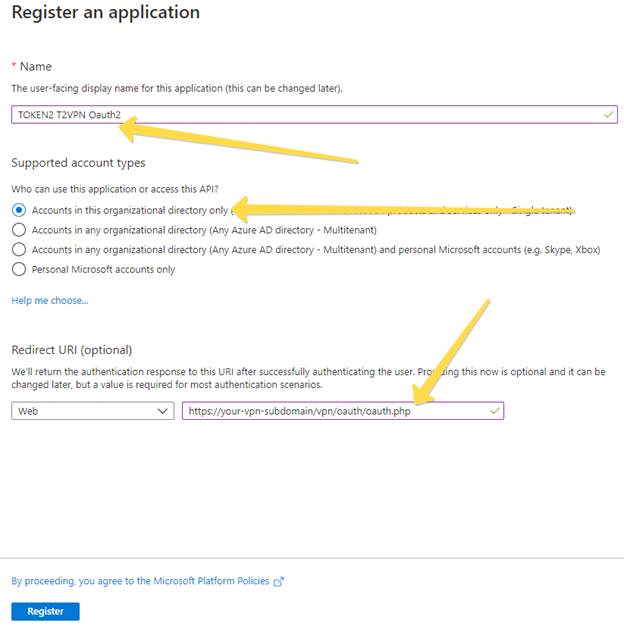
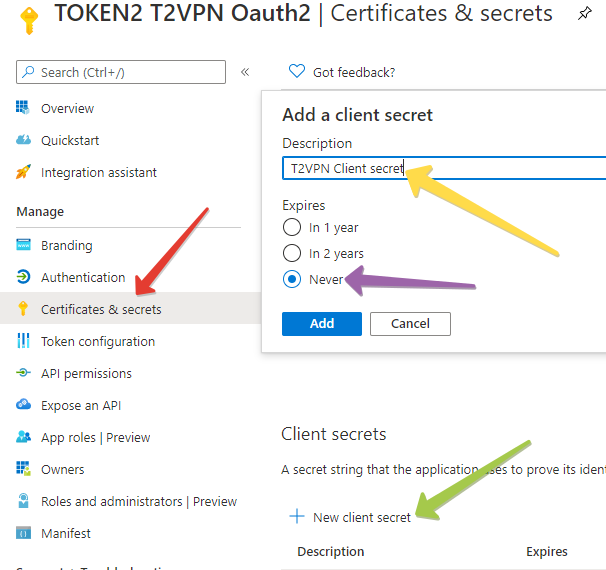
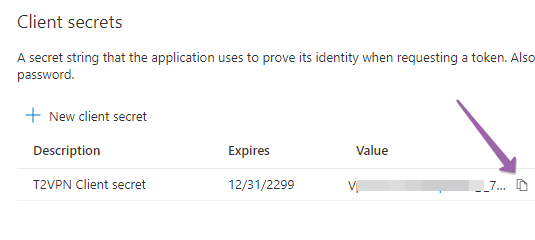
…/oauth/oauth.php). Existing app registrations keep working: 0.4 accepts /vpn/oauth2/callback, /vpn/oauth2/, /vpn/oauth2/oauth.php and /vpn/oauth/oauth.php. The value must be identical in Entra and in TOTPRadius, including port and path. Prefer a client secret with an expiry and renew it in time.Step 2. Configure the portal in TOTPRadius
- Open Settings → General settings → Portals. Optionally choose the preset Entra ID single sign-on (OAuth2 / OIDC portal): it fills the fields with placeholders to replace.
- Under Entra ID / OIDC VPN portal tick Oauth2 interface.
- Enter Oauth2 client id (Application (client) ID), Oauth2 tenant id (Directory (tenant) ID or
example.onmicrosoft.com) and Oauth2 redirect uri (the same URL as in Entra). Leave Issuer empty for Entra ID. - Paste the T2VPN settings into Oauth2 vpn settings (same format as on the FIDO2 page) and press Save.
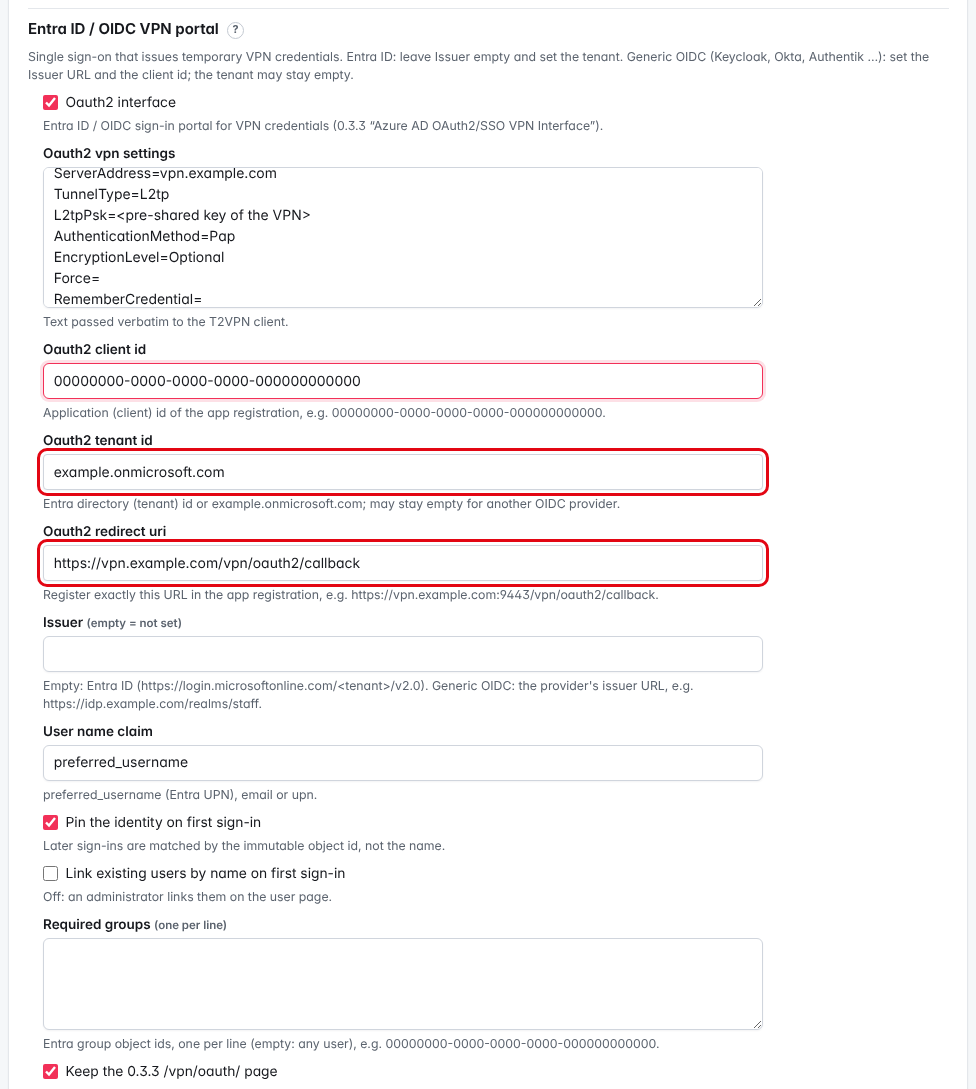
► User name claim – which claim of the ID token becomes the user name (default preferred_username; then upn, and email only when the provider marks it verified). The name is normalised with the default policy's user-name rules.
► Pin the identity on first sign-in – (default on) later sign-ins are matched by the immutable object id (oid, or sub), not by the name, so a renamed or recycled account cannot take over another user.
► Link existing users by name on first sign-in – (default off) a user that already exists on the appliance (for example imported from 0.3.x or an LDAP user) is linked to the Entra identity only when this is on, or when an administrator links it on the user page (Link OIDC identity with the object id, or Allow the next OIDC sign-in to link (24 h)). A user that does not exist yet is created at the first sign-in if the licence allows.
► Required groups – optional Entra group object ids, one per line. The app registration must then emit the groups claim in the ID token (Entra: Token configuration → Add groups claim).
► Keep the 0.3.3 /vpn/oauth/ page – keeps the old page for existing connection entries; it issues credentials for the user name t2oauth2_<name>.
Step 3. Enter the client secret
- Scroll to the Secrets box at the bottom of the settings page.
- In Secret choose OIDC portal: Oauth2 client secret, paste the value into New value and save.
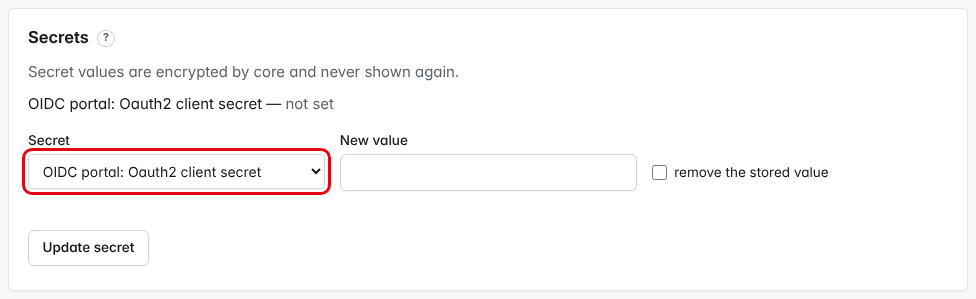
Step 4. Let the VPN accept the credentials
Open Settings → Policies, the policy of the VPN's NAS client, More options: portal credentials, MS-CHAP → Temporary credentials from the VPN portals. Accept credentials issued by the Entra ID / OIDC portal is on by default; tick Accept only these credentials to refuse password + code on that gateway (0.3.x Oauth2 only).
Other OpenID Connect providers
Choose the preset Generic OIDC provider (Keycloak, Okta, Authentik …) or enter: Issuer = the provider's issuer URL, for example https://idp.example.com/realms/staff; Oauth2 client id; Oauth2 redirect uri; the client secret in Secrets. The tenant may stay empty.
User restrictions in Entra ID
To allow only some users, open the enterprise application (Managed application in local directory link of the app registration), set Assignment required? to Yes under Properties, and add the allowed users or groups under Users and groups. Group assignment depends on your Entra licence. Alternatively use Required groups in TOTPRadius.
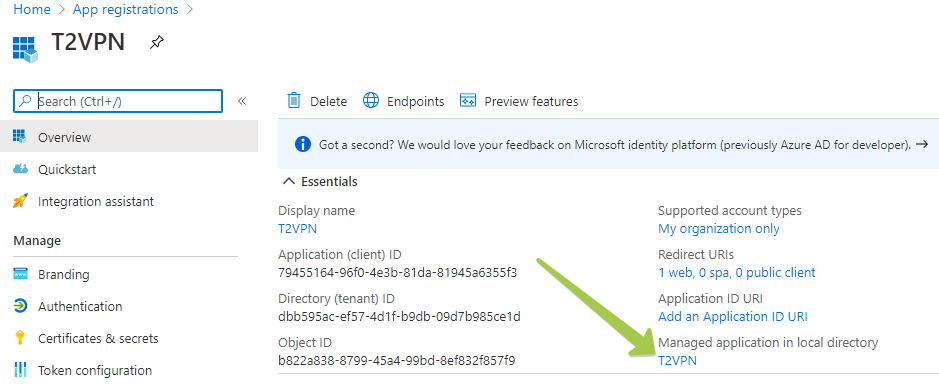
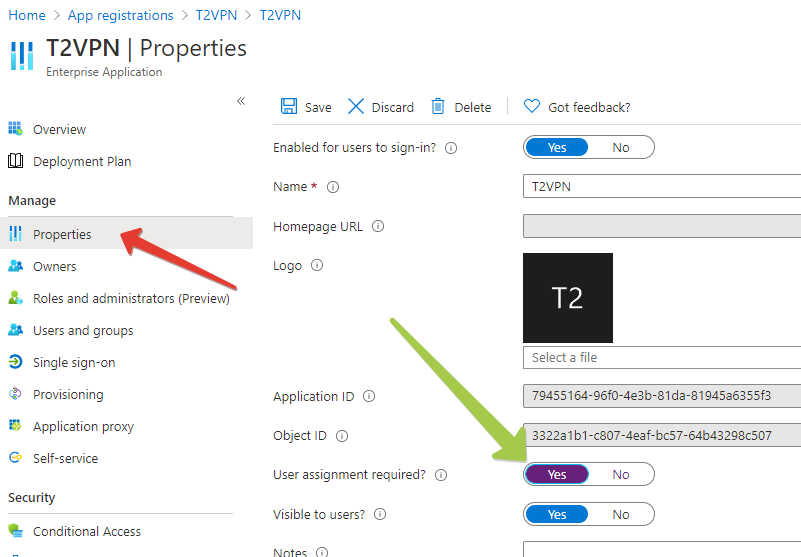
Test
- Open
https://vpn.example.com:9443/vpn/oauth2/with a test user and sign in with Microsoft. - Choose the validity, press Generate VPN credentials and connect the VPN with the VPN username and temporary password shown.
- Check Settings → Authentication log for reason
ok.
Troubleshooting
| Symptom / reason | What to check |
|---|---|
| Entra error "redirect URI mismatch" (AADSTS50011) | The redirect URI in Entra and in Oauth2 redirect uri differ (port, path, trailing slash). |
Sign-in works, VPN fails with temp_disabled | The policy of the VPN's NAS client does not accept Entra ID / OIDC credentials. |
temp_invalid | The VPN client does not use the VPN username shown by the portal. |
| Existing user refused at first sign-in | The user exists on the appliance but is not linked: link it on the user page or turn on Link existing users by name on first sign-in. |
| User refused although Entra sign-in succeeded | Not in Required groups, or the ID token has no groups claim. |
20. TOTPRadius VPN Portal - Security
The VPN portal is the only part of TOTPRadius that is meant to be reachable from the Internet: users open it from home to enrol a token, to sign in with a FIDO2 key or with single sign-on. This page explains how the portal is separated from the rest of the appliance in 0.4 and how to publish it safely.
How the portal is separated
- Own process. The
/vpn/…pages run in a separate portal process, not in the admin console. - No database access. The portal process cannot read the user database. It can only call a narrow set of portal operations of the core service (sign in, enrol, issue a temporary credential …).
- Own listener and certificate. The portal listens on TCP 9443 with its own certificate (Certificates → slot portal). It never receives the private key of the admin console's certificate.
- Off by default. Each portal (FIDO2, Entra ID / OIDC,
/vpn/ldap,/vpn/local) answers only when it is enabled under Settings → General settings → Portals. The internal/ldap-enrollpage and the APIs run on the admin listener, not on the portal. - Short-lived credentials. Temporary VPN passwords are shown once, stored only as a hash, limited to one active credential per user and portal, and expire after one login, one hour, one day or one week.
- Browser hardening. Every page is sent with a strict Content-Security-Policy (no inline scripts or styles, no framing),
X-Frame-Options: DENY,X-Content-Type-Options: nosniff,Cache-Control: no-storeand, over HTTPS, HSTS. - Brute-force limits. Wrong passwords and codes slow down and then lock the user on every surface (RADIUS, portals, API); password attempts per source address are limited (Settings → General settings → Lockout → Password attempts per IP and minute, default 30); hardware-token association is limited to 5 attempts per hour per source address and serial number.
- Single sign-on. The Entra ID / OIDC portal uses the authorization-code flow with PKCE and nonce and validates the ID token (signature, issuer, audience, expiry, nonce, tenant).
- FIDO2. Keys are bound to the portal host name; cloned keys (signature counter went back) are refused by default; registering the first key needs the user's OTP token (password + code) – but users without any OTP token need only the password by default: set …for users without any OTP token to an enrolment code unless every portal user has a token (see FIDO2 VPN portal).
Recommended network layout
| From | To the appliance | Allow |
|---|---|---|
| Internet (VPN users) | TCP 9443 (portal), directly or forwarded from 443 | only if you use a portal; restrict to known countries / ranges where possible |
| VPN gateway | UDP 1812 (and 1813 for accounting) | only the gateway's address |
| Administrators' network | TCP 443 (admin console, APIs, /ldap-enroll) | internal only – never from the Internet |
All ports and the outbound connections are listed in Network configuration.
Step 1. Restrict the listeners with the appliance firewall
- Open Settings → System, card Firewall allow-lists.
- Under Start from an example choose Admin console only from the management network, or fill the rows yourself.
- In Allowed sources of Admin console and API (HTTPS) enter your management network, for example
10.0.0.0/8; for RADIUS authentication the VPN gateway, for example192.0.2.1. Leave the VPN / self-service portal (HTTPS) row open if users connect from the Internet. - Press Apply firewall rules (needs a recent re-authentication).
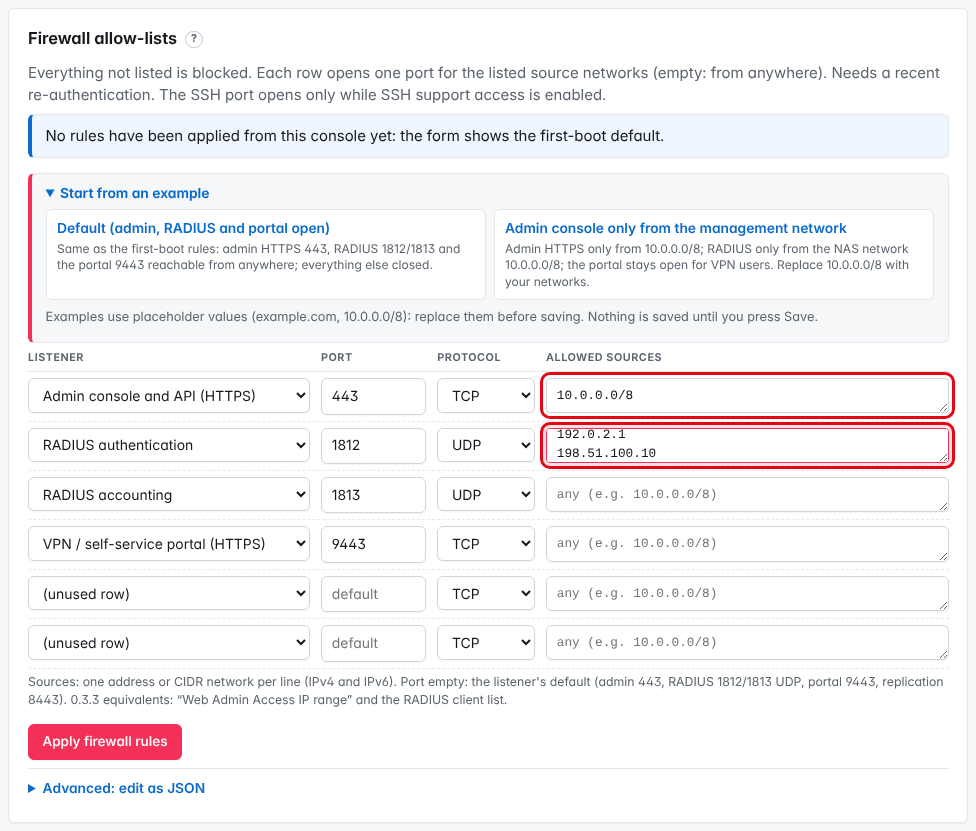
Step 2 (optional). Put the portal on a DMZ interface
The appliance can have a second network interface for the portal only. Under Settings → System → Network set the second interface's Role to Portal only (DMZ); the first interface keeps the role Management (console, RADIUS, DNS and the default route). The change is applied with an automatic rollback unless you confirm it from the new address.
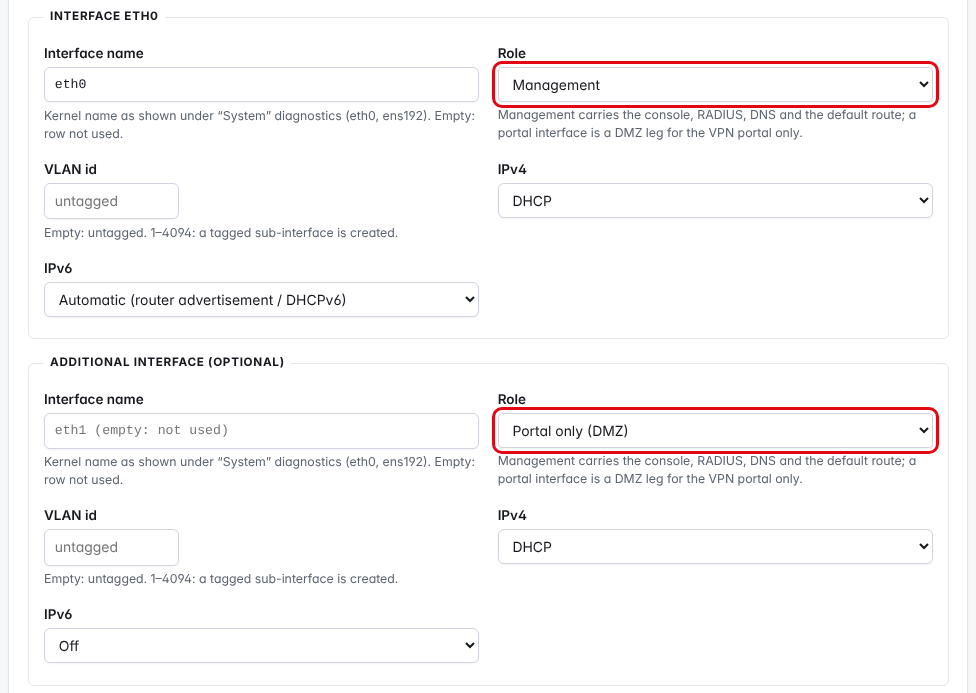
Step 3. Publish the portal: NAT, not a reverse proxy
Publish the portal with port forwarding / NAT or a TCP pass-through on your firewall (for example external TCP 443 → <appliance>:9443), so that the TLS connection ends on the appliance with the portal certificate. Keep the host name users see (FIDO2 keys and the OIDC redirect URI are bound to it) identical to Settings → General settings → Portals → Url.
Penetration test of the 0.3.x portal
The independent penetration test published for 0.3.x was carried out on the 0.3.x VPN portal. The 0.4 portal has been rewritten from scratch.
PART V · TESTING, NETWORK, CERTIFICATES AND LOGGING
21. Testing TOTPRadius authentication (Test authentication, RADPing, radtest)
Test every new configuration in two stages: first on the appliance itself with Test authentication, then from another machine with RADPing (Windows) or radtest (Linux), and finally from the real VPN gateway. This guide shows all three and how to read the results.
Before you start
- A configured TOTPRadius 0.4 appliance: a NAS client, a policy and – for LDAP – a directory (see Quick setup)
- A test user with an active token, for example
jdoe, and the user's LDAP password - Example values: appliance
radius.example.com(10.0.0.20), NAS client FortiGate HQ (192.0.2.1)
radius.test). Passwords and codes are never shown or stored.Step 1. Test authentication on the appliance
Test authentication sends a genuine RADIUS Access-Request to the appliance's own authentication listener, signed with the chosen NAS client's shared secret. The NAS client's policy, allowed methods and reply attributes apply and the directory is contacted for real – exactly as for the device.
- Open Settings → Test authentication.
- Act as NAS client: choose the client of the device you are setting up, for example
FortiGate HQ(orQuick setup). The list shows each client's policy. - User-Name:
jdoe. - Password: the user's LDAP password, for example
Winter2026!. Leave it empty for an OTP-only policy. - Code (optional): the current 6-digit code from the user's token. The test combines password and code the way the policy expects (one field, or a second round for challenge mode).
- Method:
PAP(the hint below the field shows what the NAS client allows and whether it requires Message-Authenticator). Calling-Station-Id (optional) is only needed to test trusted station ranges (see below). - Press Test.
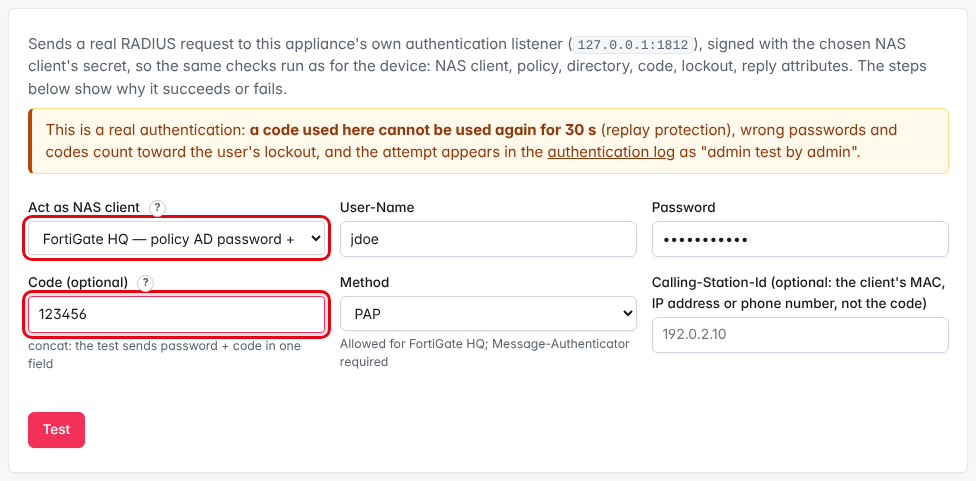
► Calling-Station-Id – sent as the client's address, for example to try trusted station ranges (see single-factor options). Accepted: a MAC address (00-11-22-33-44-55), an IP address (optionally with a port) or a phone number (with its + prefix or at least 9 digits), at most 64 characters. A plain 6–8 digit number is refused before anything is sent, because it is almost always a code typed into the wrong field; such values are never written to the authentication or audit log.
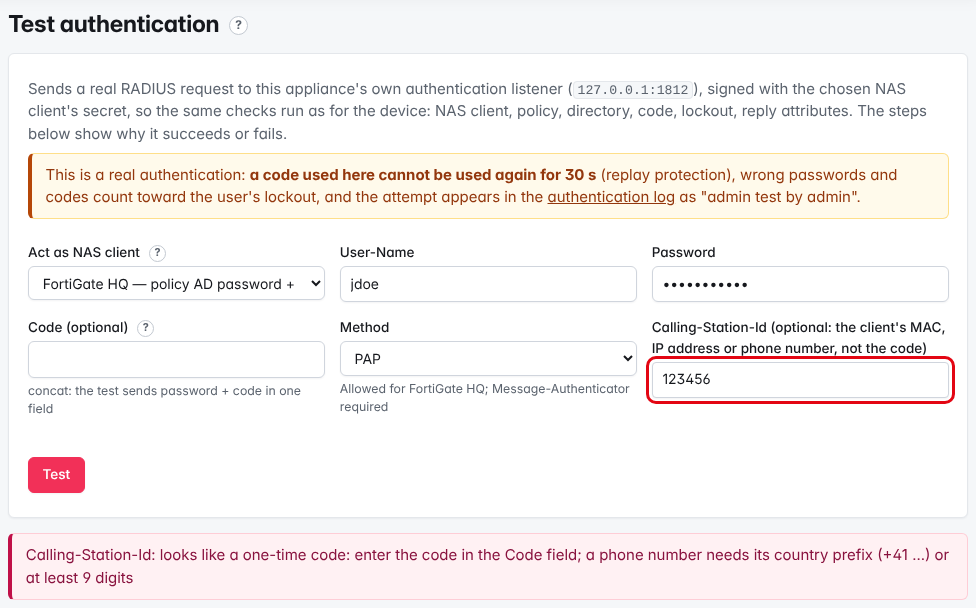
Reading the result
The result lists every check in the order the appliance performed it, with ✓ (passed) or ✗ (failed): NAS client and Message-Authenticator, policy, user name normalisation, user, lockout, code (checked before the password, so wrong codes never reach Active Directory), LDAP connection and bind, group membership and the final answer with its reason code. The first ✗ is usually the cause.
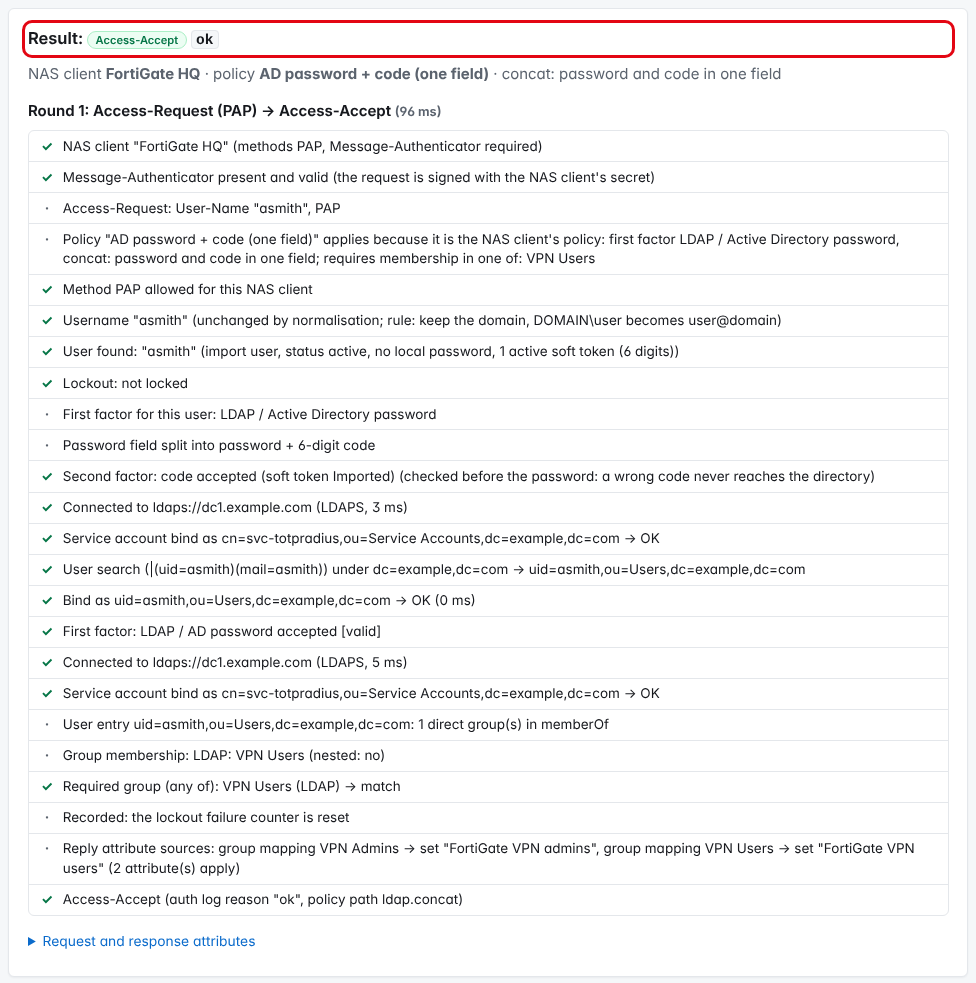
Request and response attributes shows what was sent (password masked) and what came back, including reply attributes such as Fortinet-Group-Name:
Challenge mode (second prompt)
With a policy that asks for the code in a second prompt (for example AD password, then code prompt on the NAS client Palo Alto GlobalProtect), the result shows two rounds: Round 1 ends with Access-Challenge, Round 2 (code) sends the code with the State and ends with the final answer. Without a code the test stops after round 1.
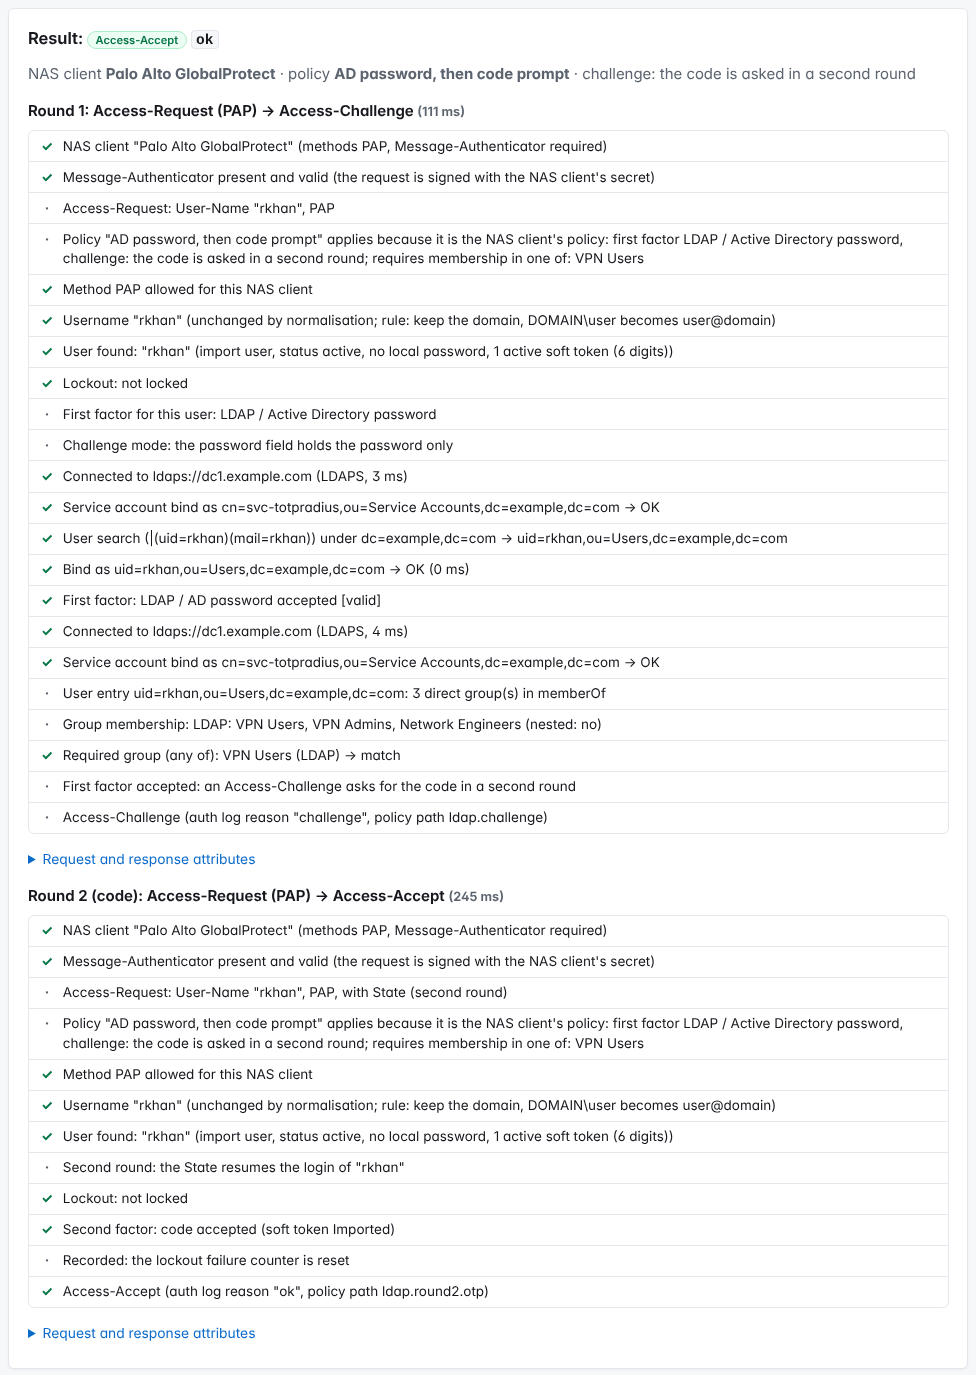
A failed test
Here the code was right but the LDAP password wrong: the bind fails with LDAP result 49 and the answer is Access-Reject with reason first_factor_invalid. The code is used up all the same: to repeat the test, wait for the next code (the same code is now rejected as replay).
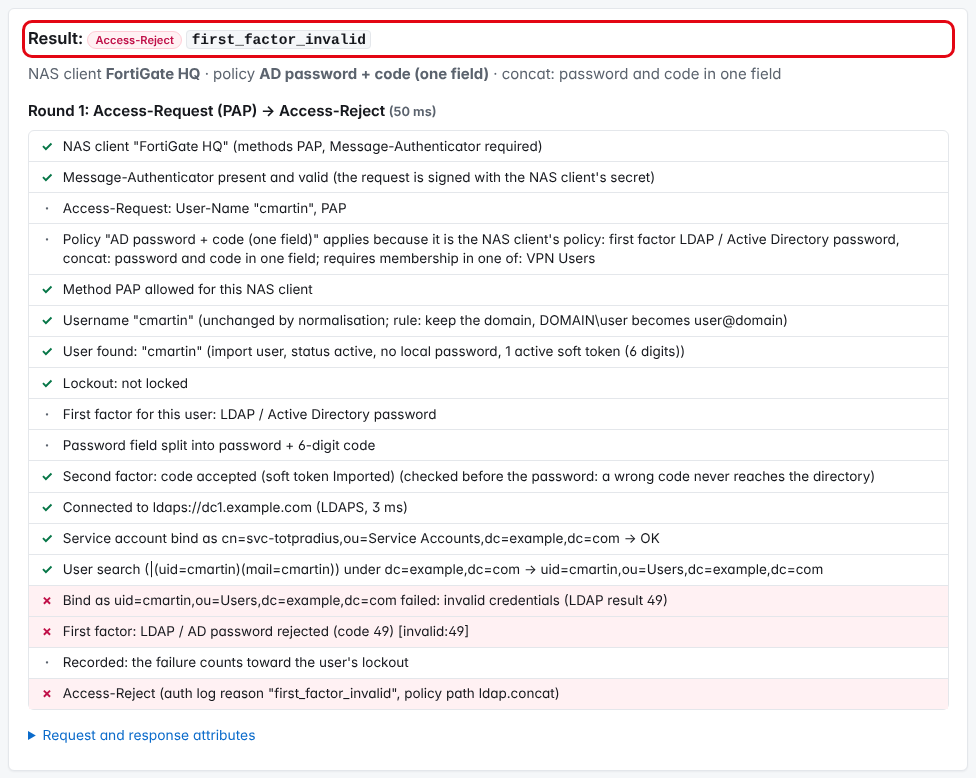
Typical LDAP messages:
Cannot connect … server unreachable– check the address, port 636/389 and firewalls.TLS error: invalid peer certificate: UnknownIssuer– the DC's CA is not trusted: use Fetch certificate on the directory.Service account bind … failed: invalid credentials– the service account password stored in the directory is wrong or expired.User search … → no entry– the user is outside the search base, or the user filter does not match.Bind as … failed … data 52e– wrong password. Other Active Directory codes:532password expired,533account disabled,701account expired,773must change password,775locked out.
ldap_chap_unsupported. Use PAP for LDAP and Entra ID policies.Step 2. Test from another machine
To test the whole path – network, firewall, the device's source address and shared secret – send a request from another computer. That computer must be added as a NAS client (Settings → NAS clients, its own address and secret); requests from unknown addresses are dropped without an answer. The download link and commands are also at the bottom of the Test authentication page:
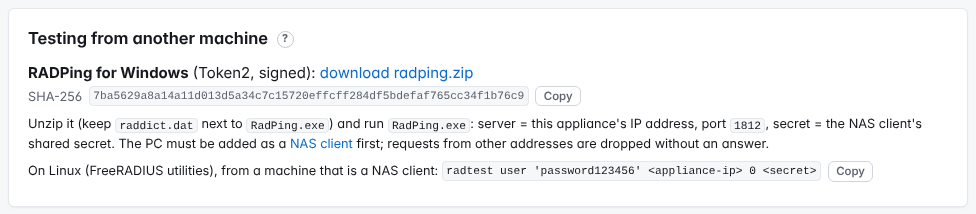
Windows: RADPing
- Download
radping.zipfrom the link on the Test authentication page (https://radius.example.com/static/radping.zip) and compare its SHA-256 with the value shown there. - Unzip it and keep
raddict.datnext toRadPing.exe. - RADPing does not send the Message-Authenticator attribute: on the test PC's NAS client, untick require Message-Authenticator while you test with RADPing (and delete that NAS client, or tick the option again, when you are done).
- Run
RadPing.exe: server = the appliance's IP address10.0.0.20, port1812, secret = the NAS client's shared secret, then the user name and the password field as the policy expects (for exampleWinter2026!123456for password + code in one field, or just123456for OTP only).
Linux: radtest
With the FreeRADIUS utilities (for example apt install freeradius-utils):
radtest jdoe 'Winter2026!123456' 10.0.0.20 0 <shared secret>radtest sends PAP by default (-t chap or -t mschap select other methods, if the NAS client allows them).
Step 3. Test from the device
Finally log in through the real gateway, for example on a FortiGate:
diagnose test authserver radius TOTPRadius pap jdoe Winter2026!123456Each attempt appears in Settings → Authentication log with result and reason.
When nothing comes back: Dropped requests
A request that matches no enabled NAS client, or lacks a required Message-Authenticator, is not answered at all; the device or tool only sees a timeout. Settings → NAS clients → Dropped requests (last 24 h) lists such requests per source address with the reason; Add as NAS client fills the form with that address.
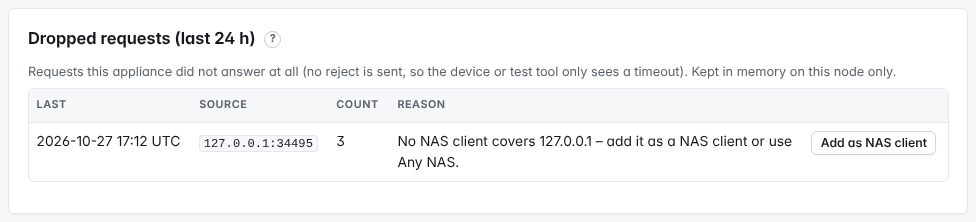
| Reason | What to do |
|---|---|
| No NAS client covers the address | Add the device's real source address as a NAS client. |
| Message-Authenticator required but missing | Enable it on the device, or untick require Message-Authenticator for this client. |
| Message-Authenticator wrong | The shared secret on the device differs: compare with Show secret. |
| Request type not served on this port | Accounting sent to 1812, or authentication to 1813. |
| Not a valid RADIUS packet | Wrong port or protocol, or a truncated datagram. |
| Proxy-State without Message-Authenticator | BlastRADIUS protection: enable Message-Authenticator on the device or RADIUS proxy. |
| EAP request without Message-Authenticator | EAP always needs it; EAP (PEAP, EAP-TTLS …) is not supported anyway, see reason codes. |
| Status-Server without Message-Authenticator | Mandatory for Status-Server: enable it in the device or tool. |
| Accounting request with a wrong authenticator | The shared secret on the device differs. |
| Server overloaded | Too many requests in flight; the request was dropped. Check for a flood or a misconfigured device. |
The list is kept in memory on the node that received the requests and is empty after a restart.
Reason codes
Every entry of the authentication log, and the last line of a Test authentication result, carries a reason code that names the check that decided it. This table lists every reason code of RADIUS and API logins, grouped in the order the checks run:
| Reason code | Meaning – what to do |
|---|---|
| Accepted and challenges | |
ok | Accepted. |
challenge | A second prompt was sent: the code (challenge mode), or the prompt for an SMS / e-mail fallback code. What to do: Normal in challenge mode; the next entry for the same user shows the final answer. |
| Request and method | |
method_not_allowed | The method (PAP, CHAP, MS-CHAPv1, MS-CHAPv2) is not ticked under Allowed methods of the NAS client. What to do: Tick the method the device uses, or change the device to PAP. |
mschapv2_not_allowed | MS-CHAPv2 is not accepted from this NAS client by the policy. What to do: Tick the NAS client under MS-CHAPv2 accepted from in the policy (OTP-only policies), see PAP, CHAP and MS-CHAP. |
eap_not_supported | The request carried EAP (PEAP, EAP-TTLS, EAP-TLS …). TOTPRadius 0.4 does not support EAP. What to do: Configure the device to send PAP (or MS-CHAPv2 with an OTP-only policy). |
ldap_chap_unsupported | CHAP or MS-CHAP with a policy that checks an LDAP or Entra ID password: the password is never sent, so it cannot be checked. What to do: Allow only PAP on that NAS client. |
no_reversible_password | CHAP-family request with a local password that the policy does not keep in the needed form (NT hash for MS-CHAP, reversible copy for CHAP). What to do: Turn on the option in the policy (More options → MS-CHAP); it is filled at the user's next PAP login or password change. |
| User and status | |
bad_username | Empty or too long user name, or control characters in it. What to do: Check what the device sends as User-Name. |
unknown_user | No user or alias with this name (after the policy's user-name rules: lower case, domain stripping …). What to do: Compare the name in the log with the user list and the policy's User names (multidomain) rules. |
user_disabled | The user is disabled. What to do: Enable the user, if intended. |
user_banned | The user is banned. What to do: Lift the ban on the user page, if intended. |
penalty | Delay after 5 consecutive failures (1 second, doubling up to 300 seconds); attempts in this window are rejected at once. What to do: Wait, fix the cause (wrong code or password), or Clear lockout. |
locked | Temporary lock after 20 failures in 15 minutes (Settings → General settings → Lockout). What to do: Clear lockout on the user page or the authentication log page (in a cluster see Cluster). |
| Code | |
no_token | The user has no active token and no initial-login grace. What to do: Enrol a token, or let the user enrol on the self-service portal. |
otp_missing | Password without a code where the policy requires one. What to do: In one-field mode the user must append the code; in challenge mode the device must show the second prompt. |
otp_malformed | The code part does not have the expected number of digits. What to do: Check the token type (6 or 8 digits) and how the user types password and code. |
otp_invalid | Wrong code. What to do: Check the token's clock (drift tool on the user page) and that the user uses the right token. |
replay | The code was already used – also when a code matched but the password that followed was wrong. What to do: Wait for the next code (HOTP: press the key again). |
otp_primary_only | Strict mode OTP across a cluster, or a user with only HOTP tokens on a replica: only the primary accepts these codes. What to do: Send the request to the primary, or see Cluster. |
| Password and directory | |
empty_password | The password part is empty although the policy checks a password. What to do: The user must type the password (followed by the code in one-field mode). |
first_factor_invalid | Wrong password (local, LDAP or Entra ID). What to do: Check the password; the code was right and is used up. |
directory_unavailable | The directory did not answer, or too slowly. What to do: Check the directory with Test connection and the network path to the DCs. |
directory_blocked | Entra ID refused the sign-in because of a conditional-access policy (AADSTS53003). A disabled, expired or locked AD account is reported as first_factor_invalid (the trace shows the AD code, see above). What to do: Check the conditional-access policies for the account. |
directory_rate_limited | The per-user cap on directory password checks was reached (Settings → General settings → Lockout, binds per minute); no bind was attempted, so the account is not locked in AD. What to do: Look for a device or script retrying this user's login. |
group_not_allowed | The user is not in a group of the policy's LDAP group restriction. What to do: Add the user to the group, or check the group name and (nested). |
group_lookup_failed | The group membership could not be read. What to do: Check the directory's group settings and the service account. |
| Temporary VPN credentials (portals) | |
temp_only | The policy accepts only temporary portal credentials, and the request had none. What to do: The user signs in on the VPN portal first. |
temp_disabled | Temporary credentials are not accepted by this policy. What to do: Enable them in the policy (Temporary credentials from the VPN portals). |
temp_invalid | Wrong temporary credential. What to do: The user copies the credential again from the portal. |
temp_expired | The temporary credential has expired. What to do: The user signs in on the portal again. |
temp_consumed | A single-use temporary credential was already used. What to do: The user gets a new one on the portal. |
| SMS / e-mail fallback and challenge state | |
fallback_unavailable | No fallback code could be sent (no phone number or e-mail address, or no provider configured). What to do: Add the user's number or address; configure the provider under Settings → General settings → Notifications. |
fallback_rate_limited | Too many fallback codes for this user. What to do: Wait; see the limits under Notifications. |
fallback_code_invalid | Wrong fallback code. What to do: The user types the code from the latest SMS or e-mail. |
state_mismatch | Answer to a second prompt from another user or NAS, or after the prompt expired (120 seconds). What to do: The user starts the login again. |
| Other | |
internal_error | An unexpected error on the appliance. What to do: See the service log (System page) and contact Token2 support if it repeats. |
fallback_sent | Defined for compatibility; 0.4 records a sent fallback code as challenge. |
Requests that never reach a decision are logged with the result drop and one of these reasons: unknown_nas (the NAS client was removed while the request was processed) and nas_rate_limited (the NAS client's request rate limit under Settings → General settings → RADIUS was exceeded). Requests from unknown addresses or with a missing or wrong Message-Authenticator are not logged at all; see Dropped requests.
Entries of the kinds portal, enrol and admin (VPN portal sign-ins, self-service enrolment, console sign-ins) use their own descriptive codes, for example group_restriction (user outside the allowed groups), portal_not_allowed (the user's portal permission is off), enrolment_code_required / enrolment_code_invalid (an administrator-issued enrolment code is needed or was wrong), first_key_refused and otp_required (the FIDO2 first-key rule), authenticator_not_allowed (security key model not accepted), counter_regression (a possibly cloned FIDO2 key), password_change_required (/vpn/local password must be changed first), ldap_bind_failed and bad_credentials.
Troubleshooting
| Reason in the authentication log | What to check |
|---|---|
unknown_user | No user or alias with this name; compare the name in the log with the user list and the policy's user-name rules. |
no_token | The user has no active token and no initial-login grace. |
otp_invalid, otp_malformed | Wrong code or wrong number of digits; check the token's clock with the drift tool on the user page. |
replay | The code was used before (for example in a previous test); wait for the next code. |
otp_missing | Password without code in one-field mode, or the device did not show the second prompt. |
first_factor_invalid | The code was right, the password wrong. |
group_not_allowed | The user is not in a group required by the policy. |
method_not_allowed, ldap_chap_unsupported, mschapv2_not_allowed | The device uses a method that is not allowed for this NAS client or this policy (use PAP for directory passwords). |
penalty, locked | Too many failures; clear the lockout on the user page after fixing the cause. |
22. TOTPRadius Network configuration
This page lists the ports TOTPRadius 0.4 uses, shows a recommended layout with and without the VPN portal, and explains the appliance's own network and firewall settings.
Ports
Inbound (to the appliance)
| Port | Service | Allow from |
|---|---|---|
| UDP 1812 | RADIUS authentication | the VPN gateways / NAS devices only |
| UDP 1813 | RADIUS accounting | the NAS devices, if they send accounting |
| TCP 443 | Admin console, API v1 and v2, internal enrolment page /ldap-enroll | administrators' workstations and API clients (for example the StoreFront servers) – never the Internet |
| TCP 9443 | VPN / self-service portal (/vpn/…) | VPN users; from the Internet only if you use a portal |
| TCP 8443 | Cluster replication (mutual TLS) | the other cluster nodes only (closed until a cluster is set up) |
| TCP 22 | SSH support access (key-only, user totpr-support) | open only while SSH support access is enabled on the System page; off by default |
RadSec (RADIUS over TLS, TCP 2083) is not offered by TOTPRadius 0.4, so the appliance firewall has no rule for it.
Outbound (from the appliance)
| Port | To | Needed for |
|---|---|---|
| TCP 389 / 636 | domain controllers / LDAP servers | directory passwords and groups (LDAP / StartTLS on 389, LDAPS on 636) |
| UDP 53 | DNS servers | name resolution |
| UDP 123 | NTP servers (default 0.ch.pool.ntp.org … or your domain controllers) | the clock – TOTP codes depend on it |
| TCP 443 | Token2 update server; login.microsoftonline.com or your OIDC provider; SendGrid / Twilio / webhook | online updates, Entra ID / OIDC portal and Entra ID (legacy) directory, SMS / e-mail notifications |
| TCP 587 / 465 / 25 | SMTP server | e-mail notifications via SMTP |
| UDP 514 (or as configured) | syslog server | remote syslog (Settings → General settings → Logging) |
| TCP 8443 | the primary node | replicas only, in a cluster |
Standard layout (RADIUS only, no portal)
- VPN gateway → appliance: UDP 1812.
- Appliance → domain controller: TCP 636 (LDAPS) or 389.
- Administrators' workstations → appliance: TCP 443.
- Nothing is reachable from the Internet.
Layout with the VPN portal
To use the FIDO2 or Entra ID / OIDC portal, or external self-service enrolment, users must reach TCP 9443 from where they are – usually from the Internet. Publish only this port: either directly (https://vpn.example.com:9443) or by forwarding the public port 443 to 9443 on your firewall, as in 0.3.x. Settings → General settings → Portals → Url must be the address users type, and the portal certificate must match its host name. Reverse proxies that terminate TLS are not supported in 0.4 (see VPN portal security).
vpn.example.com), to reduce the risk of DNS spoofing. Both FIDO2 and single sign-on need a host name with a valid certificate.Example: 1:Many NAT on a Cisco Meraki MX
Log in to the Meraki Dashboard, open your network and go to Security & SD-WAN → Firewall.
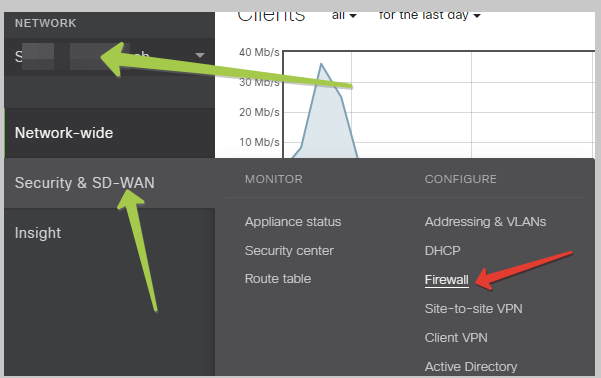
In the 1:Many NAT section add a rule for the public IP that forwards TCP 443 to port 9443 of the appliance (for example 10.0.0.20).
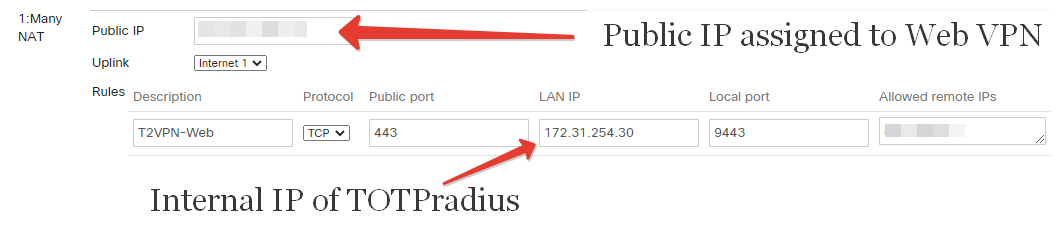
Set Allowed remote IPs to the ranges or countries your users connect from where possible, rather than Any. With this rule set Url to https://vpn.example.com (no port) and register the OIDC redirect URI without the port as well.
Network settings on the appliance
The appliance's network is configured under Settings → System, card Network (or from the VM console, menu Network setup):
► Host name, DNS servers (at most 3; empty = from DHCP), Search domains.
► Per interface: Interface name (eth0, ens192 …), Role, VLAN id (1–4094, empty = untagged), IPv4 (DHCP, static address with prefix and gateway such as 10.0.0.20/24 / 10.0.0.1, or off) and IPv6. The gateway is checked before anything is applied: it must be of the same family (IPv4 / IPv6), must not be the appliance's own address and must lie inside the network given by the address and prefix (IPv6 link-local gateways are allowed). A typical mistake – 192.168.0.251/32 with gateway 192.168.0.1 – is refused with a hint: "gateway 192.168.0.1 is not in 192.168.0.251/32 — did you mean /24?"
► Role: Management carries the console, RADIUS, DNS and the default route; Portal only (DMZ) is a second leg for the VPN portal only.
► Rollback after (seconds) (default 60): a new configuration is undone unless you open the console from the new address and confirm it in time.
Appliance firewall
The card Firewall allow-lists on the same page opens one port per row for the listed source networks; everything else is blocked. Example: admin console only from 10.0.0.0/8, RADIUS only from the gateways 192.0.2.1 and 198.51.100.10, portal open. Press Apply firewall rules (re-authentication needed).
In addition, Settings → General settings → Admin console can restrict the console to allowed source networks, and RADIUS requests are answered only for addresses listed in a NAS client.
Check connectivity
Card Connectivity test (Settings → System): a DNS lookup (dc1.example.com) or a TCP connection (dc1.example.com:636, smtp.example.com:587) from the appliance. Use it before blaming the directory or provider settings.
For RADIUS, use Settings → Test authentication and the list Dropped requests (last 24 h) on the NAS clients page: requests from addresses that match no NAS client are dropped without an answer. See Testing authentication.
23. TOTPRadius - Web Server and LDAPS certificates
TOTPRadius 0.4 has two HTTPS listeners, each with its own certificate: the admin console (port 443, also the APIs and /ldap-enroll) and the VPN portal (port 9443). Both start with a self-signed certificate; replace them with certificates your users' browsers trust. The CA certificate for LDAPS is set per directory.
Certificate slots
| Slot | Used for |
|---|---|
| admin | HTTPS of the admin console, API v1 and v2 and /ldap-enroll (for example radius.example.com); internal CA is fine when all admin PCs and API clients trust it |
| portal | HTTPS of the /vpn/… portals (for example vpn.example.com); usually a public certificate, because users open it from anywhere |
| ldap_ca | storage only; the CA used for LDAPS is set on each directory (see below) |
One certificate per slot is active. Without an active certificate the listener creates a self-signed one at first use. The portal never receives the admin certificate's private key.
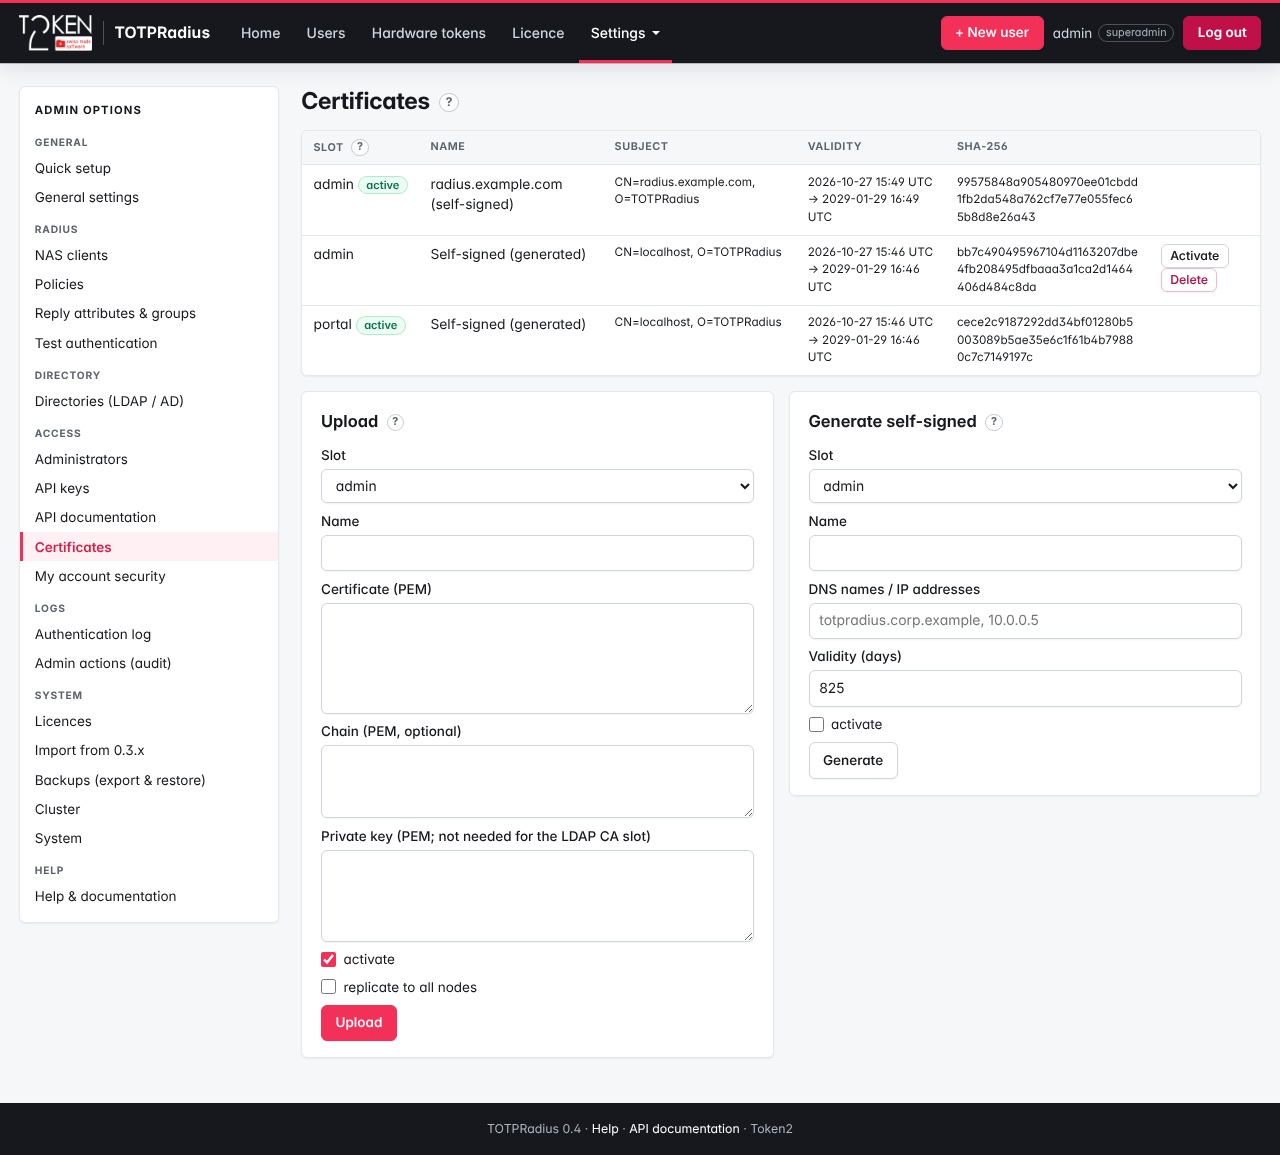
Upload a certificate
- Open Settings → Certificates (superadmin).
- Under Upload choose the Slot (
adminorportal) and a Name, for examplevpn.example.com 2026. - Paste the certificate into Certificate (PEM), the intermediate certificates into Chain (PEM, optional), and the unencrypted private key into Private key (PEM; not needed for the LDAP CA slot).
- Keep activate ticked. In a cluster, tick replicate to all nodes for a certificate every node should use (for example the portal certificate behind a shared name).
- Press Upload. A key that does not belong to the certificate is refused.
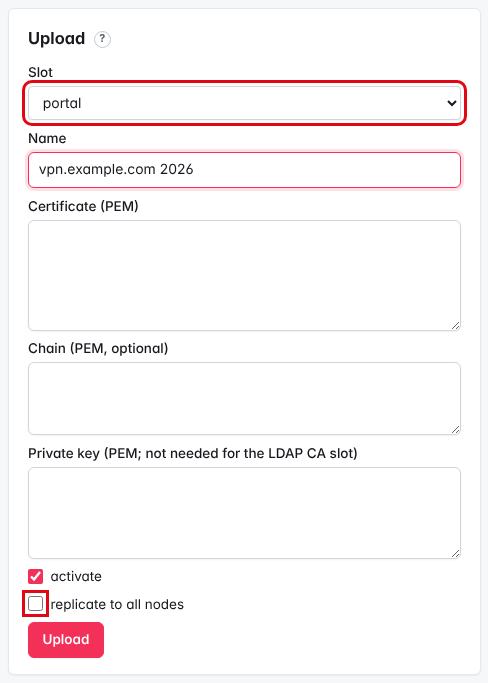
Generate a self-signed certificate
For tests, or when clients trust the appliance explicitly: under Generate self-signed choose the slot, enter the DNS names / IP addresses (comma-separated, for example radius.example.com, 10.0.0.20), the Validity (days) (default 825), tick activate and press Generate.
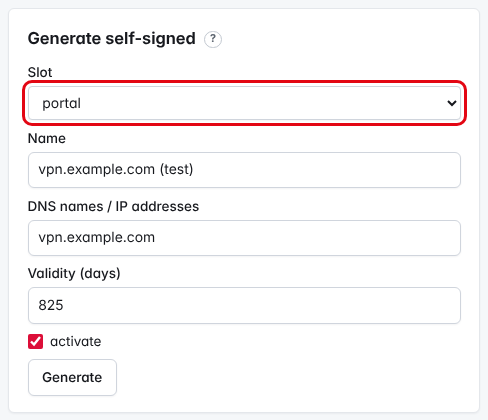
Applying a new certificate – no restart needed
The admin console and the portal check their certificate every 30 seconds and switch to a newly activated one by themselves. Only new connections get the new certificate: a browser that keeps a connection open may show the old one until it reconnects. To switch all clients at once, press Apply now (restart portal) (or Apply now (restart admin console)) in the notice; it closes every open connection and needs a recent re-authentication.
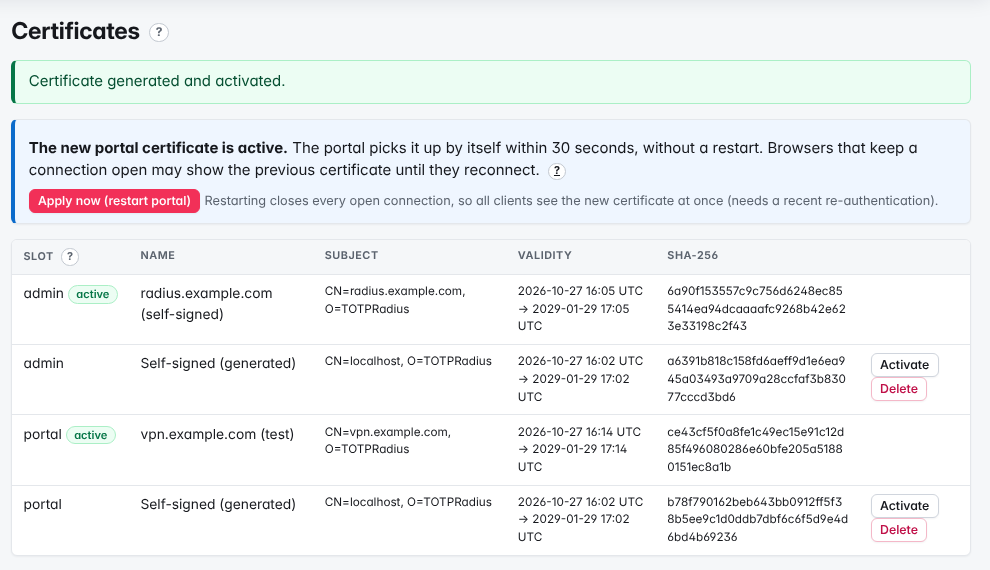
Certificates that expire within 30 days are marked on this page and listed on the dashboard.
LDAPS: trust the directory's CA
For ldaps:// the appliance must trust the CA that issued the domain controllers' certificates. In 0.4 this is set on each directory, not on the certificates page:
- Open Settings → Directories (LDAP / AD) and the directory (or Settings → Quick setup, section 3. LDAP).
- Press Fetch certificate (Quick setup) or Fetch certificate from server (Directories): the appliance shows what the first server presents.
- Choose Trust this CA (Quick setup) / Trust this CA for this directory (Directories) – recommended – or Pin the server certificate, then save.
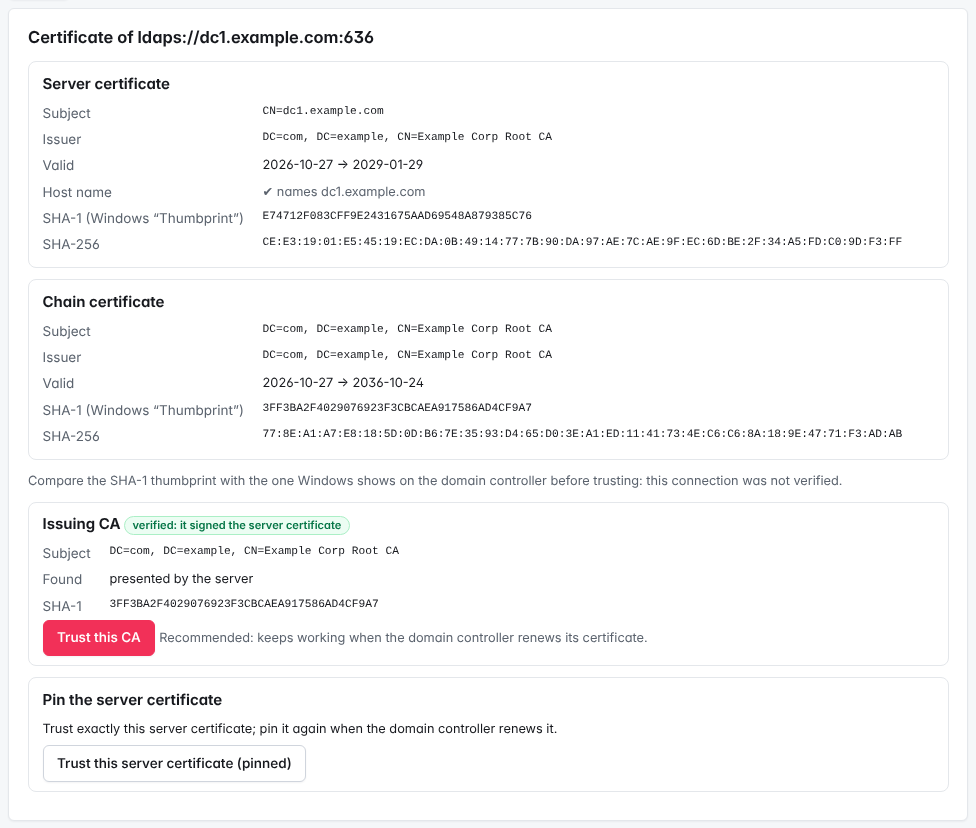
You can also paste the CA certificate (PEM) into the directory's CA certificate field. Choose Certificate chain only as certificate check when the servers are addressed by IP address (the host name is then not checked). Details: LDAP configuration.
Troubleshooting
- The browser still shows the old certificate: it reuses an open connection. Reload after a minute, or use Apply now.
- Browser warning about an incomplete chain: paste the intermediate certificates into Chain (PEM, optional).
- Upload refused: the private key does not belong to the certificate, or the key is encrypted (remove the passphrase first).
- FIDO2 or single sign-on fails on the portal: the portal certificate must be valid for the Portal host name users open.
- LDAPS connection fails (
directory_unavailablein the authentication log): the directory does not trust the DC's CA, or the host name does not match the certificate – use Fetch certificate and Test connection.
24. TOTPRadius - Remote syslog configuration options
TOTPRadius can forward the result of every RADIUS authentication to a syslog server or SIEM. In 0.4 the messages can be sent in RFC 5424 format or in the exact 0.3.x line format, so existing SIEM parsers keep working. Administrator actions are recorded separately in the tamper-evident audit log.
Step 1. Add a syslog server
- Open Settings → General settings → Logging.
- Under Remote syslog server → Add syslog server, fill in:
► Host – name or IP address of the syslog server, for example
192.0.2.60(an empty row is ignored).► Port – usually
514.► Transport –
UDP(the only transport that is sent).► Format – RFC 5424 (default) or 0.3.3 line format when a SIEM parser expects the old lines.
► Facility – default
authpriv(RFC 5424 only; the 0.3.x line format has no facility). - + Add another adds a second server; every server receives every message.
- Press Save.
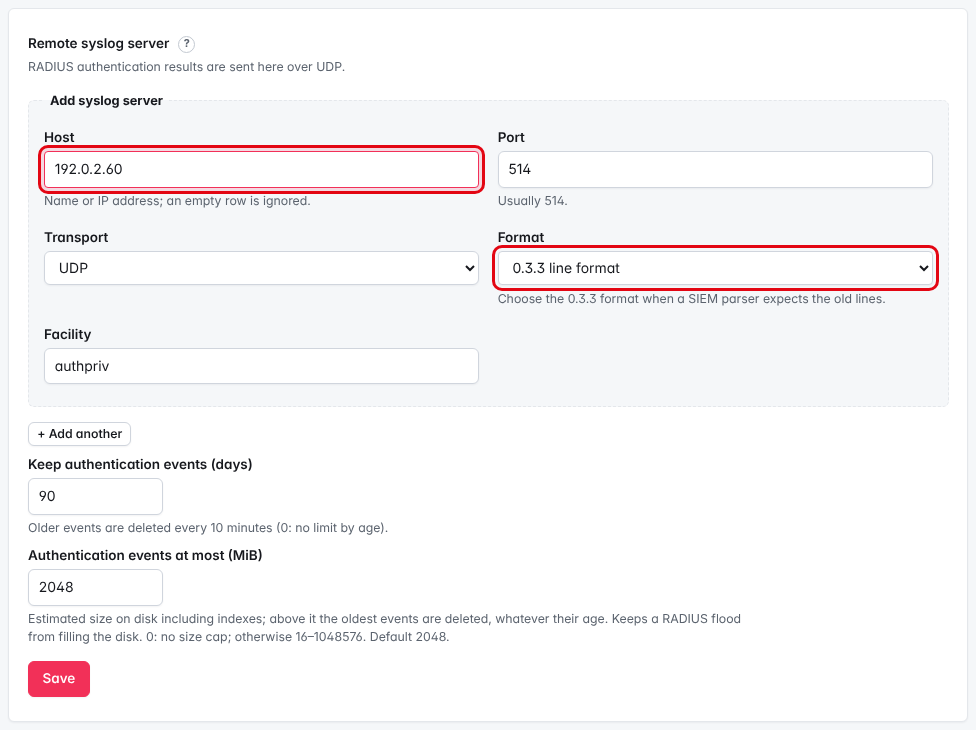
IP_OR_FQDN:PORT under Settings → Remote syslog server, and none disabled it. In 0.4 delete the row (or leave Host empty) to stop forwarding.What is sent
For each RADIUS request a few lines are sent: the request, the outcome of the code or directory check where it applies, and the result. Client IP is the Calling-Station-Id sent by the NAS (usually the VPN user's address), or the NAS address when there is none. Passwords and codes are never sent. Console and disk-space alerts of the appliance are also forwarded.
Example in the 0.3.3 line format (same text and spacing as 0.3.x; the leading number is the syslog severity):
<5> October 27, 2026, 09:15:02 radius TOTPRadius; Radius authentication request from jdoe ; Client IP: 198.51.100.23
<5> October 27, 2026, 09:15:02 radius TOTPRadius; Valid OTP provided (user: jdoe )
<4> October 27, 2026, 09:15:02 radius TOTPRadius; Authentication attempt for  jdoe ; Return value: Accept
<3> October 27, 2026, 09:16:40 radius TOTPRadius; Checking LDAP Binding for  asmith failed  Error code: 49
<4> October 27, 2026, 09:16:40 radius TOTPRadius; Authentication attempt for  asmith ; Return value: Reject
The same result in RFC 5424 format (facility authpriv, application totpradius, message id radius):
<84>1 2026-10-27T09:15:02+01:00 radius totpradius - radius - Authentication attempt for jdoe ; Return value: AcceptOther 0.3.x messages that 0.4 sends where they apply: OTP has already been used recently, LDAP Group specified and not matching, LDAP Connect failure, Initial login is allowed. Creating user record, Client IP … is within trusted IP range ; Single factor is allowed, 2FA Fallback attempt … OTP Sent via SMS / email, and the FIDO / OAuth2 session messages for VPN portal credentials. The authentication log in the console shows more detail (reason codes) than the syslog lines.
Europe/Zurich), as in 0.3.x; a changed time zone applies to the next line at once, without a restart. RFC 5424 timestamps carry the offset (for example +01:00); the 0.3.3 line format has none. The authentication log and the audit log in the console are stored and shown in UTC.Administrator actions: the audit log
0.3.x sent administrator actions (Admin action: … table :users; action: insert) to syslog. In 0.4 every change made by an administrator, an API key or the system is written to Settings → Admin actions (audit) with time, actor, source address, action, object and changed fields (never secret values). Entries are chained with hashes: Verify hash chain checks that none was changed or removed; Export (JSON lines) downloads the log for archiving or a SIEM. The audit log is kept without time limit.
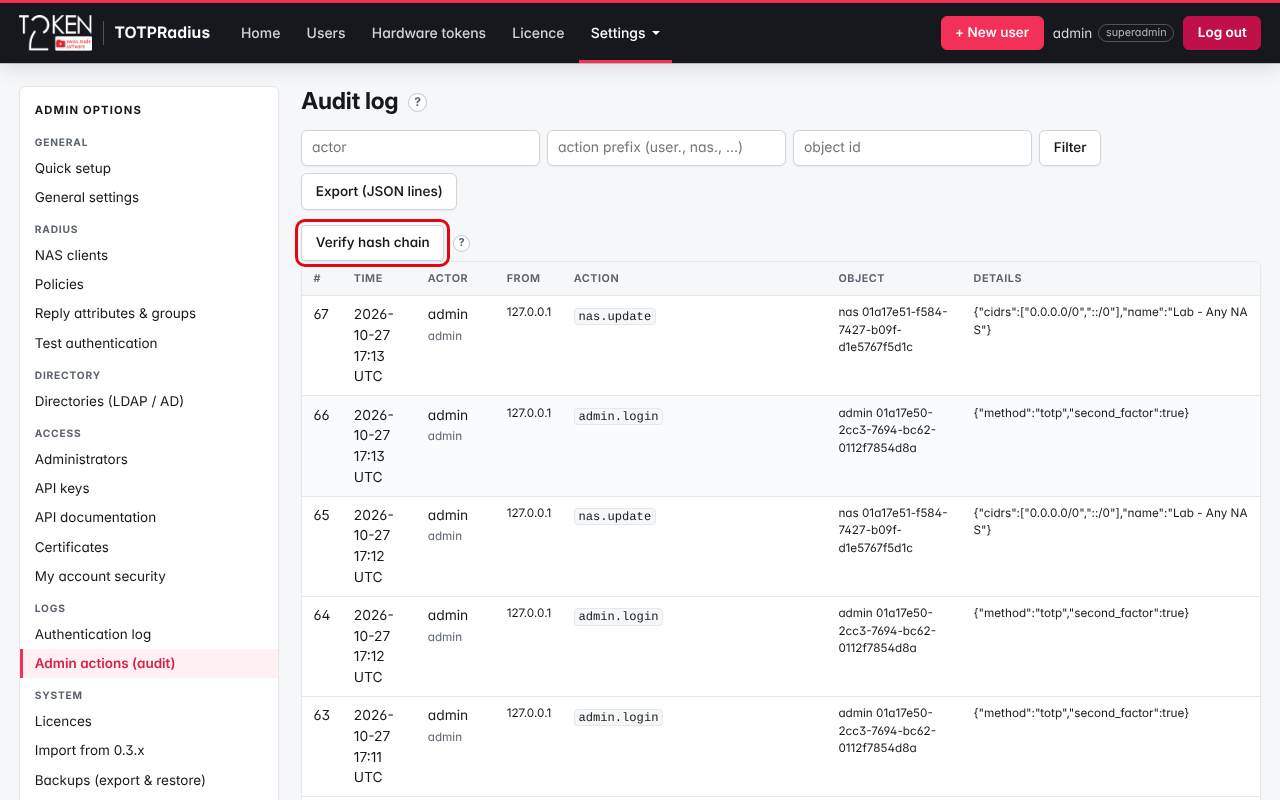
Local copy: the authentication log
Even without a syslog server, every authentication is kept on the appliance: Settings → Authentication log lists time, kind, user, method, result, reason code and client address, with filters for user name, kind, result, reason and time range. Each user page also shows the user's recent authentications.
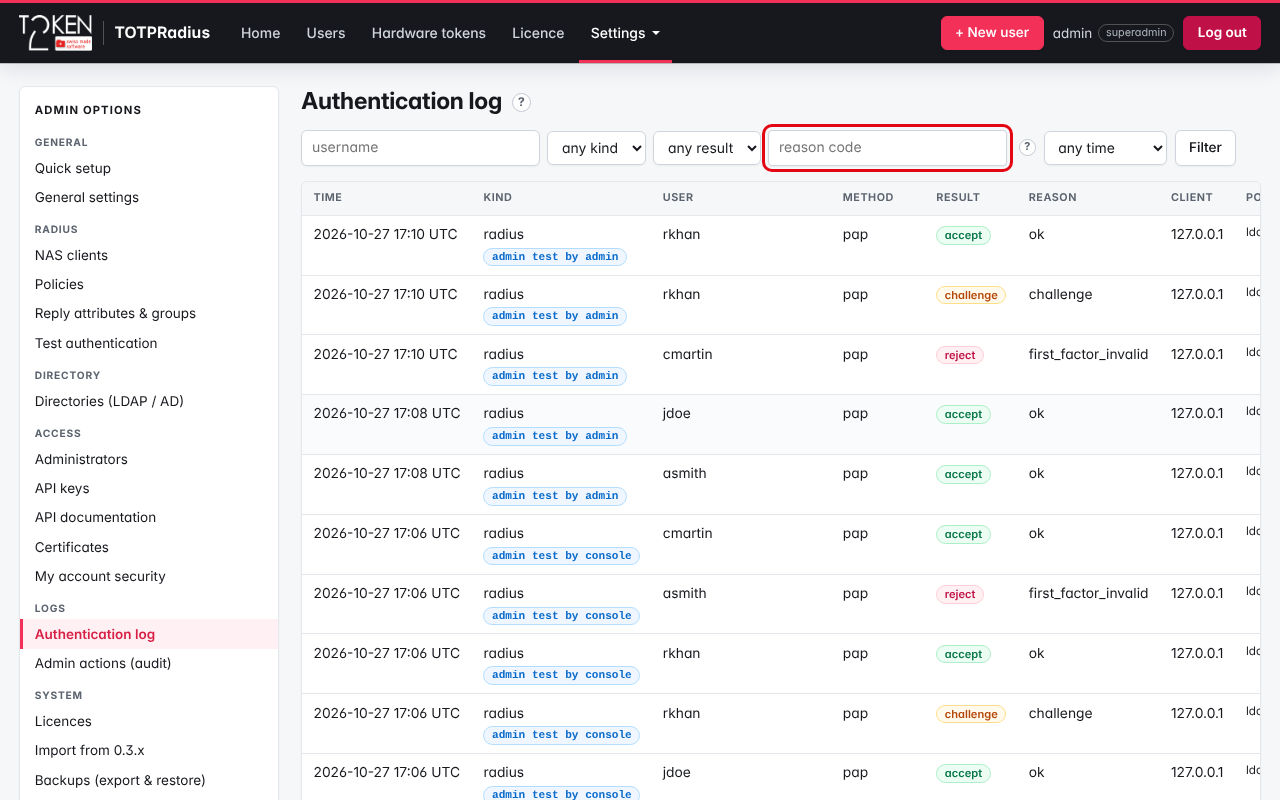
► Keep authentication events (days) – default 90 (Settings → General settings → Logging).
► Authentication events at most (MiB) – default 2048; above it the oldest events are deleted whatever their age, so a flood of requests cannot fill the disk.
Test
Send a test login with Settings → Test authentication (see Testing TOTPRadius authentication) and check that the lines arrive on the syslog server. If nothing arrives, check that UDP to the server's port is allowed from the appliance.
Common reason codes
| Reason | Meaning |
|---|---|
ok | Accepted. |
challenge | Second prompt sent. |
unknown_user | No user or alias with this name. |
otp_invalid, otp_malformed, replay | Wrong code, wrong number of digits, code used before. |
first_factor_invalid | Wrong password. |
group_not_allowed | Not in a required group. |
penalty, locked | Lockout after repeated failures. |
PART VI · APPLIANCE ADMINISTRATION
25. TOTPRadius - Purchasing and adding user licenses
TOTPRadius is licensed by the number of users, with no feature tiers and no expiry. Licences are signed files (.t2lic) issued by Token2 for one appliance, identified by its appliance id. This guide shows where to find the appliance id, how to install a licence file and how users are counted.
Step 1. Find the appliance id
Open Licence in the top bar (or Settings → Licences). The Appliance id is shown with a Copy button.
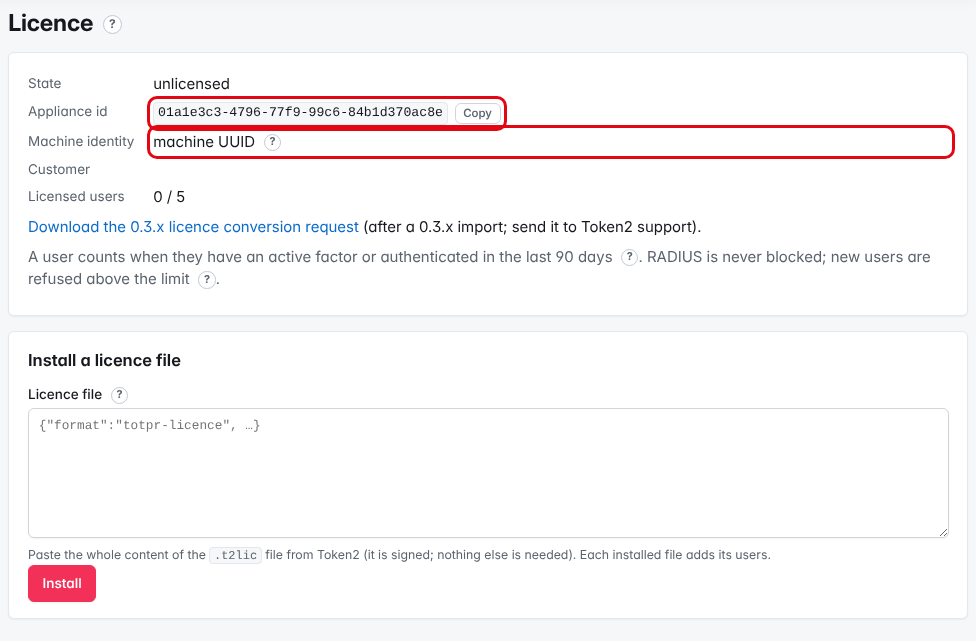
► State – unlicensed while only the 5 free users are available; exceeded when more users count than are licensed.
► Machine identity – what the appliance uses to recognise the machine it runs on (see Machine identity); the value itself is never shown.
► Licensed users – users that count now / users allowed, for example 0 / 5.
Step 2. Purchase and generate the licence
- Buy the number of user licences you need in the web shop. After the purchase you receive an e-mail with the URL of your order page.
- On the order page, choose to generate the licence for TOTPRadius 0.4 and enter the appliance id copied in Step 1.
- The shop issues the licence for that appliance id as a
.t2licfile. Keep the file with your order: after a restore on another VM you install it again (see below).
Step 3. Install the licence file
Installing a licence needs the superadmin role and a recent re-authentication (Settings → My account security → Re-authenticate, valid 5 minutes by default, see re-authentication).
- Open the
.t2licfile in a text editor and copy its whole content. It starts with{"format":"totpr-licence", …. - Open Licence → Install a licence file and paste it into Licence file.
- Press Install.
The page then shows the new number of licensed users. The file is signed; nothing else (no key, no Host ID) has to be entered.
Adding more users later
Licences stack: the allowed number is 5 + the sum of all valid licence files. To add users, buy an additional licence for the same appliance id and install it next to the existing ones; nothing is replaced. Installing the same file twice counts it once. A file for another appliance id is refused.
Which users count
A user counts when they are not banned and at least one of these is true:
- has an active OTP token;
- has a FIDO2 security key;
- has a local password;
- authenticated in the last 90 days (Settings → General settings → Users → Inactive after (days)).
Administrators of the console never count. Banned users, and users without any factor who have not signed in for 90 days, do not count. The count is refreshed within a few minutes of changes. In a cluster, replicas share the primary's licence and are not counted separately.
What happens over the limit
Enforcement is soft: RADIUS authentication is never blocked for licensing reasons, so existing users keep working. At or over the limit:
- creating users in the console and through API v1 / v2 is refused;
- the self-service portals do not create new users and do not let a user who does not count yet enrol a first token or key;
- users are not created automatically by initial logins;
- CSV imports of users and hardware tokens that would exceed the limit are refused as a whole (the dry run shows the numbers);
- a banner on every console page shows the state:

Install a larger licence, or remove (or ban) users who left, to free licences.
After an import from 0.3.x
0.3.x licences were bound to the old appliance's network card and cannot be read by 0.4. After importing a 0.3.x appliance:
- A 60-day grace period at the old user count starts automatically (shown as Import grace until on the Licence page).
- Click Download the 0.3.x licence conversion request on the Licence page (also on the Import page) and send the file to Token2 support, together with the old appliance's MAC address ("Host ID") if you did not enter it during the import.
- Install the converted licence Token2 sends you before the grace period ends.
The 5 free users and the 60-day grace period are fixed and cannot be changed in the settings.
Machine identity
The appliance remembers the machine it runs on, so that a copy of its disk on another machine is noticed (see Moved, restored or cloned appliance). The Licence page shows what this Machine identity is based on:
| Machine identity | Meaning |
|---|---|
| machine UUID | The SMBIOS / virtual-machine UUID. Hyper-V, VMware, VirtualBox and other hypervisors always provide a proper one: this is the normal case. |
| motherboard serial | The virtual machine reports a manufacturer placeholder UUID that many machines share (all zeros, 03000200-0400-0500-0006-000700080009, mostly-zero values such as a1c28570-c126-0000-0000-000000000000, often with "To Be Filled By O.E.M." as serial). This can happen when the hypervisor passes on the firmware values of the physical host, typically a self-built or white-box PC. Such a UUID is never used; the motherboard's own serial is used instead when it is real. A note under the value names the placeholder. |
| random id stored on this appliance | Placeholder UUID and no usable motherboard serial. Licences still work (they are bound to the appliance id), but a copy of the disk is not detected. |
Moved, restored or cloned appliance
The appliance remembers the virtual machine it runs on. After restoring a backup on another VM (for example after a disaster), the dashboard warns that the licence was installed on a different machine. Install the licence again on the new machine, or contact Token2. Users keep working meanwhile.
If a licence file is refused as being "for another appliance", the appliance id changed (a new installation instead of a restore). Ask Token2 for a replacement and include:
- information to identify your order (ideally the order ID or invoice ID, or the e-mail address used);
- the previous and the new appliance id.
26. TOTPRadius 0.4: backups and disaster recovery
A TOTPRadius 0.4 backup (.t2bak) is an encrypted archive of the complete appliance database: users, tokens, configuration, settings, administrators and the audit log. This guide sets up daily backups, creates a backup on demand, restores it, and rebuilds a lost appliance from a backup.
What a backup contains
- The whole database (users, tokens, configuration, settings, administrators and the audit log) and its data key, optionally the node's network configuration, and a manifest, encrypted with age.
- Not included: the node's runtime records (authentication log, sessions, lockouts) – a restore starts them afresh – and the appliance's own key-encryption key. A backup can therefore be restored only with its passphrase or with the backup key it was encrypted to.
Step 1. Create a backup key (age key pair)
Daily backups are encrypted to an age recipient: the public half of a key pair whose private half (the backup key) you keep off the appliance. Create the pair on your own computer, not on the appliance, with the age-keygen tool from age:
age-keygen -o totpradius-backup.keyThe file looks like this (example, not a real key):
# created: 2026-10-26T09:00:00+01:00
# public key: age1qyqszqgpqyqszqgpqyqszqgpqyqszqgpqyqszqgpqyqszqgpqyqs3290gq
AGE-SECRET-KEY-1QYQSZQGPQYQSZQGPQYQSZQGPQYQSZQGPQYQSZQGPQYQSZQGPQYQSZQGPQ0A0A0A- The
age1…public key goes into the appliance (Step 2). - The
AGE-SECRET-KEY-1…line is the backup key: the only way to restore daily backups. The appliance never has it. Keep the key file offline and safe, for example in a password manager or a safe, with a second copy in another place.
Step 2. Turn on daily backups
Open Settings → General settings → Backup (superadmins only):
► Daily backup – on by default. It needs an age recipient: without one no daily backup is made.
► Hour (0–23) – the backup runs once a day after this hour, in UTC (default 2).
► Copies kept – the newest N daily backups are kept (1–60, default 7).
► Age recipient (public key) – paste the age1… key from Step 1, for example age1qyqszqgpqyqszqgpqyqszqgpqyqszqgpqyqszqgpqyqszqgpqyqs3290gq.
Press Save.
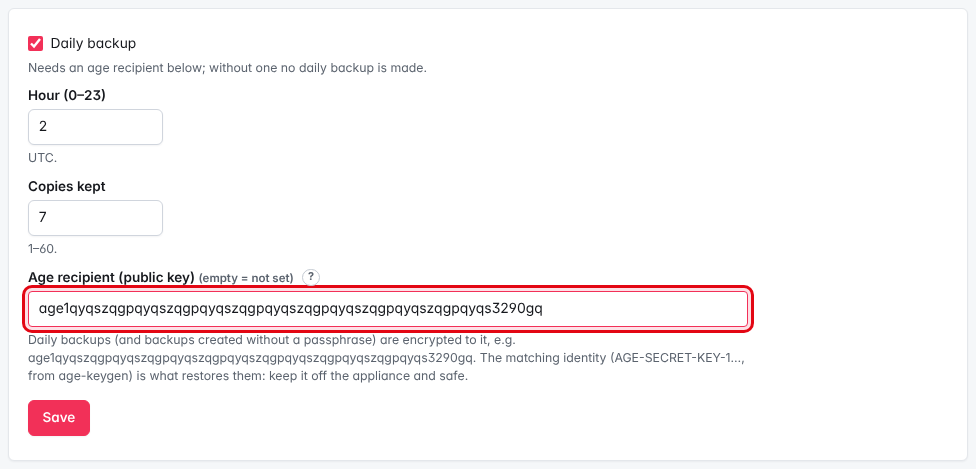
A backup needs free space for a copy of the database and the archive (about twice the database). When that is missing, the oldest daily backup is deleted first if that is enough; otherwise the day is skipped and the dashboard says so. When the disk is critically full the appliance keeps only the newest 2 backups.
Step 3. Create a backup now
- Re-authenticate: Settings → My account security → Re-authenticate.
- Open Settings → Backups (export & restore).
- Under Create a backup now, either
- enter a Passphrase of at least 12 characters, for example
Example-Backup-Passphrase-2026, and repeat it in Repeat passphrase – anyone with the file and the passphrase can restore it; keep the passphrase in a password manager; or - leave both fields empty – the backup is encrypted to the configured age recipient, like the daily backups.
- enter a Passphrase of at least 12 characters, for example
- Press Create backup.
The list shows every backup on this node with file name, time, size and SHA-256.
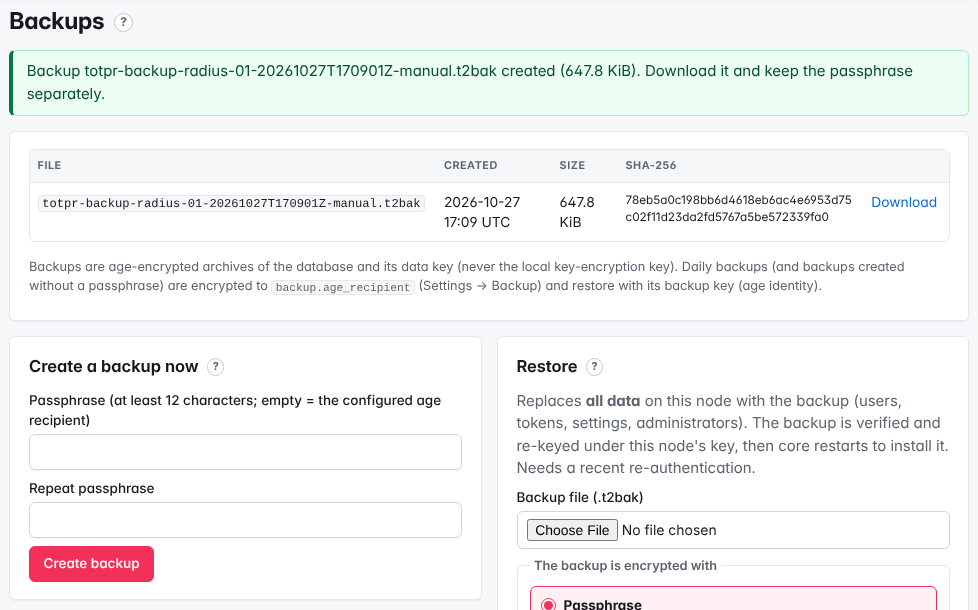
Press Download and store the files outside the appliance: the appliance keeps only its local copies, and copies them nowhere else by itself.
Restore a backup
- Re-authenticate: Settings → My account security → Re-authenticate.
- Open Settings → Backups (export & restore) → Restore.
- Backup file (.t2bak): choose the file.
- The backup is encrypted with:
- Passphrase for backups created on this page with a passphrase – type it in Passphrase;
- Backup key (age identity) for daily backups and backups created without a passphrase – paste the key file from Step 1 into Backup key (age identity) (the whole file, comment lines included, or just its
AGE-SECRET-KEY-1…line). The key is used for this restore only: it is not stored, logged or shown again.
- Optional: tick also restore this node's network settings (node.toml). The node configuration is then staged as a separate file; network settings are not changed automatically.
- Type
RESTOREin Type RESTORE to confirm and press Restore.
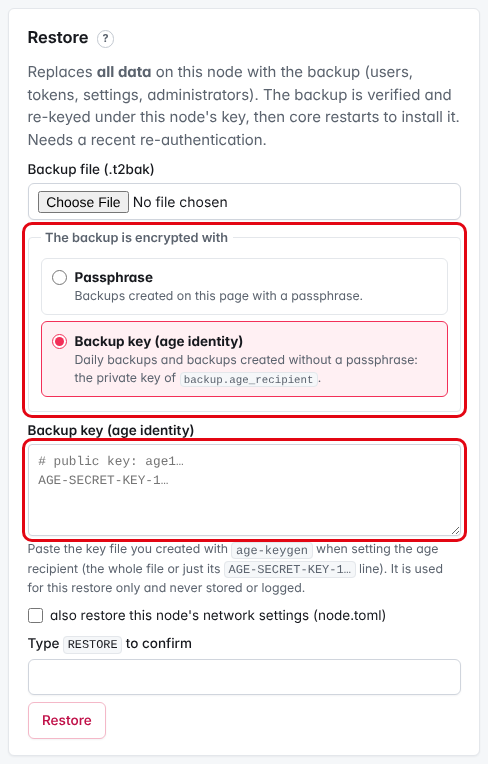
The appliance decrypts and checks the backup, re-keys it under this node's key and installs it when the core service restarts (automatically). During the restart the console shows Restarting after the restore ("The backup was restored: the appliance is restarting the database to install it …"); the page reloads itself every 5 seconds. Sign in again when the login page appears, with the administrators of the backup.
- When the wrong kind of key is given, the appliance says which one the file needs ("This backup was encrypted to a backup key …" or "… with a passphrase …").
- A backup key that does not belong to the backup is refused with "This backup key does not match the backup" and the public key of the key you pasted, so you can compare it with the recipient configured when the backup was made.
- A backup from a newer TOTPRadius version cannot be restored.
- Restore is refused on a cluster replica: restore the primary; the replicas resynchronise by themselves (each fetches a full copy and restarts once).
Restore from the VM console
When nobody can sign in to the web console, the VM console menu 8. Restore from backup restores a backup that is still in this appliance's local backup folder (daily backups and backups created on this page):
- With a console PIN, unlock the menu with the PIN (or the recovery code).
- Choose the backup (newest first; the list shows the date, size and which key it needs).
- Type its passphrase, or type or paste its backup key (the
AGE-SECRET-KEY-1…line; the case does not matter). The key is masked; F3 shows it. If your hypervisor console cannot paste text, restore the backup in the web console instead. - Optional: F2 also restores this node's network settings (off by default).
- Type
RESTOREand press Enter.
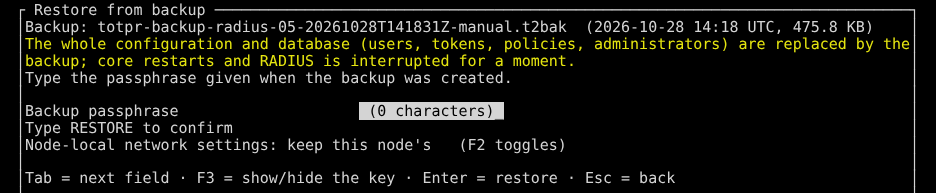
It works like a restore in the web console (same checks, refused on a replica, the core service restarts and installs it) and is reported to all superadmins and on the dashboard. A backup file kept elsewhere can only be restored in the web console (upload). See The VM console and console PIN.
The restore is recorded in the audit log of the restored data (backup.restored: administrator, file name and SHA-256, key used, source node, backup time); Verify hash chain on the audit page passes after a restore. If the restored database cannot be installed, the previous data stays in place and the audit log gets backup.restore.failed.
Disaster recovery on a new appliance
When the appliance is lost, all you need is a downloaded backup file and its key (the backup key for a daily backup):
- Deploy a new appliance VM (see Installation and initial configuration) and complete the first-boot setup: network and a first administrator.
- Sign in, re-authenticate and open Settings → Backups (export & restore).
- Under Restore, upload the backup file, choose Backup key (age identity) and paste the key file.
- Type
RESTOREand press Restore. The core restarts with the restored data; sign in with the administrators of the backup. - Reinstall the licence: the new VM is a different machine and the dashboard shows a licence warning (users keep working meanwhile). See Purchasing and adding user licenses.
The restored settings include the age recipient, so the new appliance's daily backups use the same backup key.
Troubleshooting
| What you see | What to check |
|---|---|
| No daily backups in the list | Settings → General settings → Backup: Daily backup ticked and an Age recipient (public key) set. Without a recipient no daily backup is made. |
| Dashboard: daily backup skipped | Not enough free disk space. Download and delete old backups, lower the authentication log size, or grow the virtual disk. |
| "This backup key does not match the backup" | The pasted key belongs to another recipient: compare its public key with the one configured when the backup was made. |
| Licence warning after a restore on a new VM | Install the licence again on the new machine. |
27. TOTPRadius online updates
TOTPRadius 0.4 updates itself as a whole: a signed update bundle (.t2upd) from Token2 replaces the system image, the appliance reboots into it, and if the new version does not start correctly it returns to the previous one by itself. The VM, its settings and your data stay where they are, so a new download is only needed for new installations.
You can install updates by hand (upload a .t2upd file) or let the appliance find and download them from Token2's update server. Online updates are off by default: until you choose another mode, the appliance never contacts the update server.
How an update works
- The bundle's signature and version are checked: only newer versions (or signed rollbacks) are accepted.
- A pre-update backup is taken when an age recipient is configured (Settings → General settings → Backup, see Backups).
- The new image is written to the inactive system slot; the appliance keeps running on the current one.
- You reboot (or, in mode Automatic, the appliance reboots inside the maintenance window). The new image starts as a trial.
- A health check waits up to 5 minutes for the core service (RADIUS, database with every migration applied) and the admin console. Only then is the new version marked good. Otherwise the appliance reboots and, after the trial attempts are used up, starts the previous version again.
RADIUS is unavailable during the reboot. NAS devices with a second RADIUS server (for example a cluster replica) fail over.
Step 1. Choose the update mode
Open Settings → System, card Updates, and expand Update settings (the same fields are under Settings → General settings → System → Online updates). These are cluster-wide settings: change them on the primary.
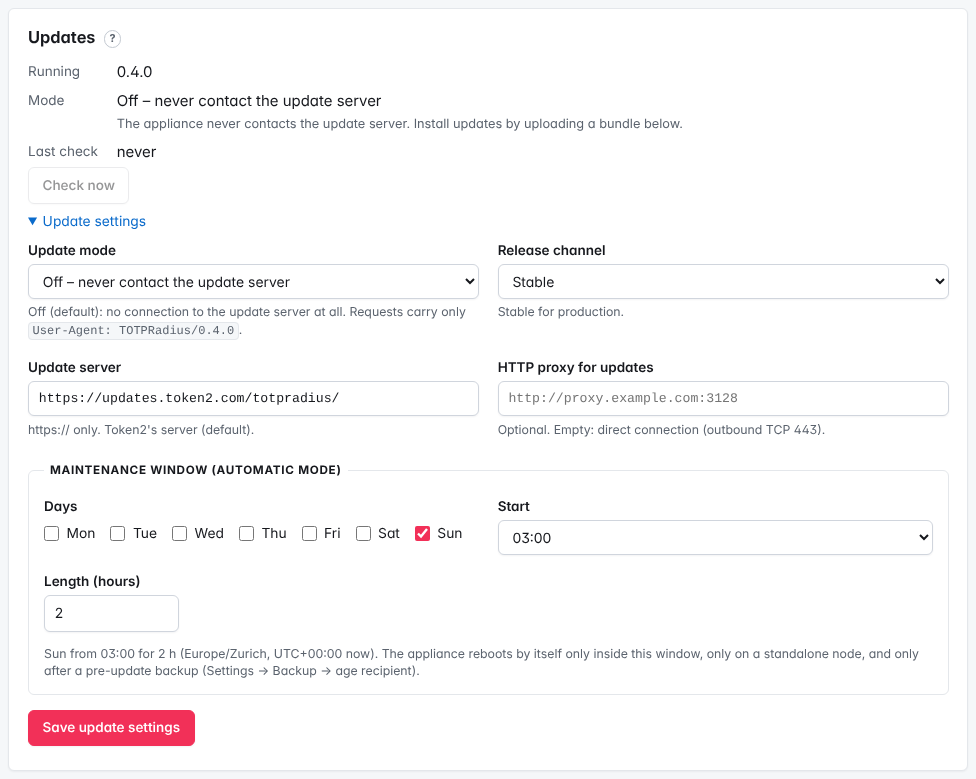
► Update mode:
| Mode | Checks daily | Downloads and stages | Reboots |
|---|---|---|---|
| Off – never contact the update server (default) | no | no | no |
| Notify – check daily, install with one click | yes | when you click Download and install | when you click Reboot to install |
| Download – also download and stage; you reboot | yes | yes, automatically | when you click Reboot to install |
| Automatic – also reboot in the maintenance window | yes | yes, automatically | yes, inside the maintenance window |
► Release channel – Stable for production; Beta (test appliances only).
► Update server – default https://updates.token2.com/totpradius/; https only. A mirror must serve the same signed files.
► HTTP proxy for updates – optional, for example http://proxy.example.com:3128. Empty: direct connection (outbound TCP 443 to the update server must be allowed).
► Maintenance window (automatic mode) – Days, Start and Length (hours) (1–24) in the appliance time zone; default Sunday, 03:00, 2 hours. A window may run past midnight: Sunday, 23:00, 3 hours ends on Monday at 02:00.
Press Save update settings.
Typical choices:
- Single appliance, hands-off: mode Automatic, window Sunday 03:00 for 2 hours, and an age recipient for unattended pre-update backups.
- Cluster: mode Download on all nodes; reboot the replicas first, then the primary (see Clusters).
- Change control: mode Notify. Read the release notes on the card, then use Download and install and Reboot to install in your approved slot.
- No Internet access: keep mode Off and install bundles from a file (Step 3).
Step 2. Install an online update
Automatic checks run about once a day at a random minute, never during the first 10 minutes after a start. Check now asks the server immediately (not in mode Off). The card shows the last check, its result and the next check.
When a new version is available, the dashboard shows a notice (a red one for a security update) and the Updates card shows the version, its size and the release notes.
- Mode Notify: press Download and install and confirm. The appliance downloads the bundle, takes the pre-update backup and stages the new version on the inactive slot; it keeps running. (Modes Download and Automatic do this by themselves.)
- The card then says that the new version "is installed on the inactive slot". Type
REBOOTand press Reboot to install.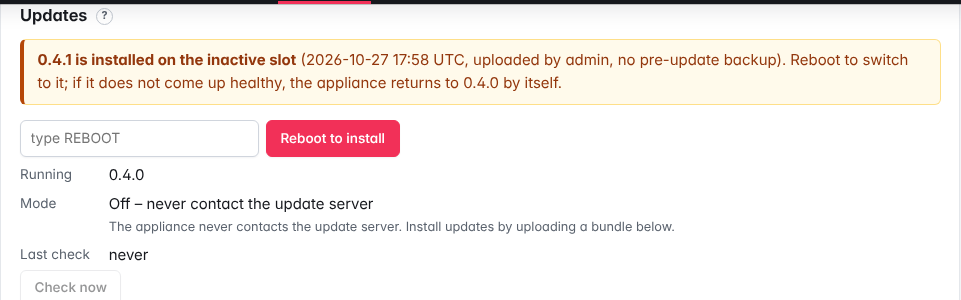
- After the reboot the card and the dashboard say Updated from 0.4.x to 0.4.y. Press Dismiss.

If the new version did not start correctly, the card says that the appliance "went back to" the previous version by itself, and the audit log has system.update.failed. That version is not installed automatically again; Token2 publishes a fixed release instead. If the newest release needs an intermediate version first, the intermediate one is offered.
When does mode Automatic reboot?
Only when all of these hold:
- an update is staged, has not been booted yet, and was staged less than 14 days ago;
- a pre-update backup was taken (an age recipient is configured; without one, updates are only staged);
- the node is not part of a cluster;
- the time is inside the maintenance window, and the node has not rebooted automatically in the last 6 hours.
Step 3. Install an update from a file (no Internet access)
- Download the
.t2updbundle from the download page on a machine with Internet access. - Re-authenticate: Settings → My account security → Re-authenticate.
- On Settings → System, card Update from a file, choose the file in Bundle and press Upload and install.
- The bundle is verified, the pre-update backup is taken and the image is staged. On slow storage this takes a few minutes: the System page then says that the update is still being verified and written; reload the page later.
- When the Updates card says that the new version is installed on the inactive slot, type
REBOOTand press Reboot to install (see Step 2).
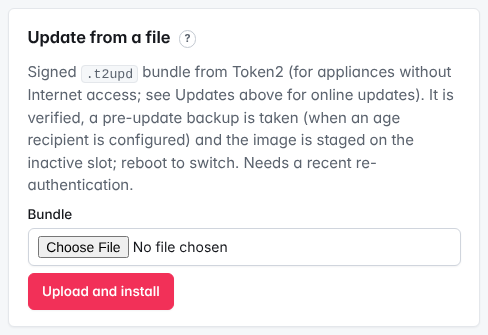

An update needs free disk space of about 2.2 × the bundle size (for example about 1 GB for a 425 MB bundle); otherwise it is refused with a message saying how much is needed.
Clusters
All nodes of a cluster must run the same version: replication pauses between nodes with different versions until they match again. Mode Automatic therefore never reboots a cluster node by itself: it downloads and stages the update and the card says so.
- When the dashboard says an update is staged, reboot one replica (Reboot to install on its System page).
- Wait until it is back on Settings → Cluster of the primary.
- Repeat for the other replicas, then reboot the primary last.
What the appliance sends to the update server
Only plain HTTPS GET requests for static files, with the header User-Agent: TOTPRadius/<version>: <server>/<channel>/index.json, index.json.sig and, when a bundle is downloaded, the bundle file. No node id, licence, host name, user count or other data is sent, and nothing is uploaded. The server learns your public IP address and version, as with any download.
A spoofed server cannot push anything: the release index is signed with Token2's release key and checked against keys built into the verified, read-only system image. A bad signature, an index for another channel, an expired index or an index older than one already accepted is refused, and the card says why. The bundle must have exactly the size and SHA-256 listed in the signed index, and its own signature and version rules are checked again before anything is written.
Every check, download, installation, reboot and result is recorded in the audit log (system.update.*).
28. The TOTPRadius VM console and console PIN
The VM console is the appliance's text screen in the hypervisor (vSphere web console, Hyper-V Virtual Machine Connection, VirtualBox window, Proxmox console …). It shows the appliance status and offers a small menu for the tasks that must work even when nobody can sign in to the web console. This guide describes the menu and how to protect it with a console PIN.
totpradius / totpradius, with sudo). 0.4 has no Linux login, no default password and no root shell: the system is a read-only image verified at every boot.First boot
On the first boot, before any administrator exists, the console opens the First-boot setup: it shows the DHCP address, lets you set a static address (N) and then shows the one-time setup code for the web setup. See Installation and initial configuration.
The status screen
The status screen shows the node name, its addresses, the version, the time and whether it is synchronised, the licence, the replication state, the disk usage and the state of every service, and an available update. Errors are shown in red. Keys: r refreshes, s restarts a service.
The menu
Press any other key on the status screen (for example Esc) to reach the menu. Use ↑ / ↓ and Enter, or the number keys.

► 1. Status – the status screen.
► 2. Network setup – fields Interface, Address/prefix (10.0.0.20/24), Gateway (10.0.0.1; it must lie inside the address/prefix network), DNS (comma separated) (10.0.0.2, 10.0.0.3) and Hostname. F2 toggles DHCP / static, Tab moves, Enter applies. The new settings are active at once; press Y to keep them, otherwise they are rolled back automatically after 60 seconds. More options (VLAN, IPv6, a portal-only second interface, firewall allow-lists) are on Settings → System in the web console.
► 3. Reset admin 2FA / password – break-glass recovery when no administrator can sign in. Enter the Admin username (leave it empty for the first superadmin) and press Enter: the administrator's second factors are removed and a temporary password is shown once. They sign in with it, choose a new password and enrol a second factor again.
► 4. Create setup code – a new one-time setup code, valid for 1 hour, for the web setup.
► 5. SSH access – key-only SSH for Token2 support: Public key (ssh-ed25519 …) and Allowed CIDRs (comma, empty = any); Enter enables, F2 disables. The same is on Settings → System → SSH support access.
► 6. Reboot / shut down – R reboots, S shuts down.
► 7. Restart a service – 1 = core (RADIUS is interrupted for a few seconds), 2 = admin console and APIs, 3 = VPN / self-service portal, 4 = firewall (reload the rules). Normally never needed.
► 8. Restore from backup – restores a backup that is still in the appliance's local backup folder (daily backups and backups created on Settings → Backups (export & restore)) when nobody can sign in to the web console. Choose the backup (newest first; the list shows date, size and which key it needs), type its passphrase or its backup key (AGE-SECRET-KEY-1…; F3 shows it), optionally press F2 to also restore this node's network settings, type RESTORE and press Enter. It works like a restore in the web console and replaces all data; see Backups and disaster recovery. A backup file kept elsewhere can only be restored in the web console.
Why set a console PIN
Without a PIN, anyone who can open the VM console in the hypervisor can reset an administrator and take over the admin console. The console is not disabled, because it is the recovery path when nobody can sign in. With the PIN on, the status screen stays visible ("Menu locked – press Enter and type the console PIN"); everything else needs the PIN.
Step 1. Turn the console PIN on
- Sign in as a superadmin and re-authenticate: Settings → My account security → Re-authenticate.
- Open Settings → System, card VM console. The badge shows Console PIN: off.
- Enter 6 to 12 digits in Console PIN (6–12 digits), for example
482913, and again in Repeat the PIN. Digits only, so it types the same on every keyboard layout and hypervisor console. - Press Turn the console PIN on.
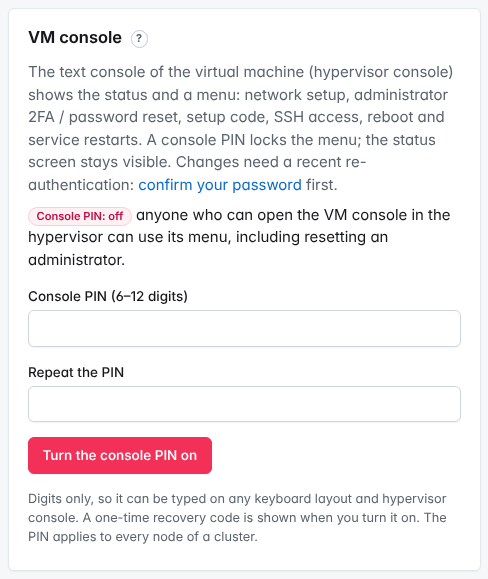
The page then shows the recovery code, only once. Print it or store it offline, separately from the PIN.
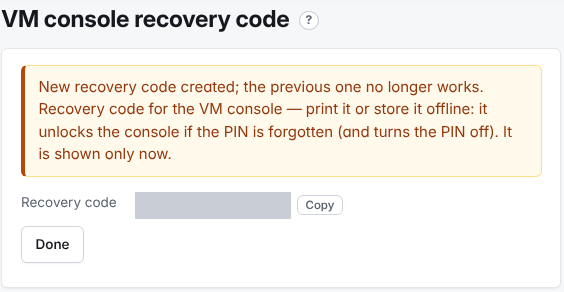
The PIN applies to every node of a cluster. Only a slow hash is stored.
Step 2. Use the console with the PIN
- On the locked console press Enter.
- Type the PIN at Console PIN and press Enter.

The menu locks again after 5 minutes without a key press, or when you press L.
After each wrong PIN the console waits before the next try (1 s, 2 s, 4 s … at most 5 minutes); after 10 wrong attempts in a row it locks for 15 minutes and shows that on the screen. Restarting the console does not reset the counter. Every attempt is audited; a lockout is also reported to all superadmins.
Change the PIN, new recovery code, PIN off
On Settings → System → VM console (superadmin, recent re-authentication) with the PIN on:
► New console PIN (6–12 digits) + Repeat the new PIN → Change PIN.
► New recovery code – shows a new code once; the current recovery code stops working.
► Type OFF and press Turn the console PIN off.
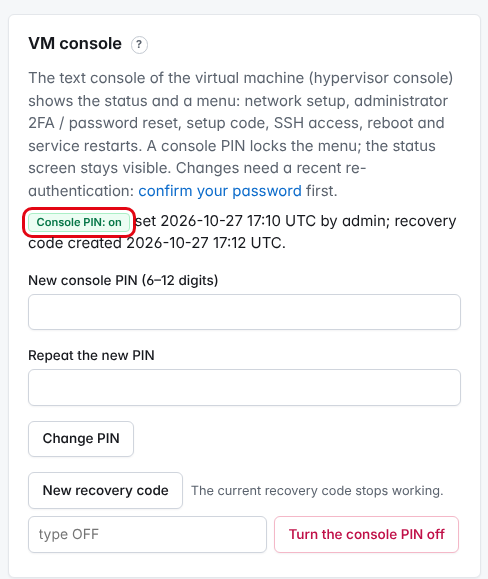
Every change is recorded in the audit log (console.pin.enable, console.pin.change, console.pin.disable, console.recovery.regenerate).
Forgotten PIN
- On the locked console press F ("Forgot PIN?").
- Type the Recovery code and press Enter. The console unlocks once and the PIN is turned off; all superadmins are alerted and the dashboard shows it.
- Set a new PIN in the web console (Step 1); it shows a new recovery code.
If both the PIN and the recovery code are lost, an administrator who can still sign in turns the PIN off or sets a new one on the System page (this also gives a new recovery code). If nobody can sign in either, there is no other way in: the appliance has no root shell, and SSH support access is limited to diagnostics. Restoring a backup on a new virtual machine does not help by itself, because a backup contains the console PIN and the same administrators. It helps only with a backup taken before the PIN was turned on, or one that contains an administrator you can still sign in as (then turn the PIN off there); see Backups and disaster recovery. Otherwise contact Token2 support.
29. TOTPRadius cluster (primary and replicas)
Several TOTPRadius appliances can form a cluster: one primary and up to 8 replicas. All nodes answer RADIUS and can host the portals, so your VPN gateways and other NAS devices can list them as primary and secondary RADIUS servers and keep working when one appliance is down.
How it works
- Configuration and identity changes (users, tokens, NAS clients, policies, settings, administrators …) are made on the primary and replicated to the replicas over mutual TLS (port 8443 by default), signed and applied in order.
- On a replica the configuration is read-only (a banner says so); changes are refused with "make changes on the primary". Sign-ins, TOTP code checks, temporary VPN credentials and clearing lockouts keep working on replicas.
- HOTP codes are checked on the primary only (HOTP and HID-HOTP keys, whose counter must not move on two nodes at once). A user who has only HOTP tokens is rejected by a replica (
otp_primary_only) and cannot sign in while the primary is down. See HOTP and HID-HOTP keys. - Used codes, temporary-credential use, drift and initial-login counters are exchanged between the nodes, so a code accepted on one node cannot be replayed on another (see Strict OTP for the remaining window).
- Lockouts: failed attempts are counted on each node separately, so the delay after repeated failures applies per node. A temporary lock (the failure limit reached, by default 20 failures in 15 minutes) is passed to the other nodes within about 5 seconds (best effort): a user locked on one node is soon locked on all of them.
- All nodes must run the same version.
- Replicas share the primary's licence and are not counted separately.
Before you start
- Two (or more) TOTPRadius 0.4 appliances with the same version, each installed and with its network configured (see Installation and initial configuration). The future replica needs only its first administrator; everything else comes from the primary.
- TCP port 8443 open between the nodes (Settings → System → Firewall allow-lists, listener replication).
- Example values: primary
radius.example.com(10.0.0.20), replicaradius2.example.com(10.0.0.21).
Step 1. Create a join token on the primary
- On the primary (or the standalone appliance that becomes the primary), re-authenticate: Settings → My account security → Re-authenticate.
- Open Settings → Cluster. A standalone node shows the role standalone and "No peers: this node runs on its own".
- Under Add a replica:
- Address replicas dial (host:port; needed when the listener is bound to 0.0.0.0): the primary's address and replication port, for example
10.0.0.20:8443; - Valid for (minutes): how long the token can be used, default
60(1–1440).
- Address replicas dial (host:port; needed when the listener is bound to 0.0.0.0): the primary's address and replication port, for example
- Press Create join token.
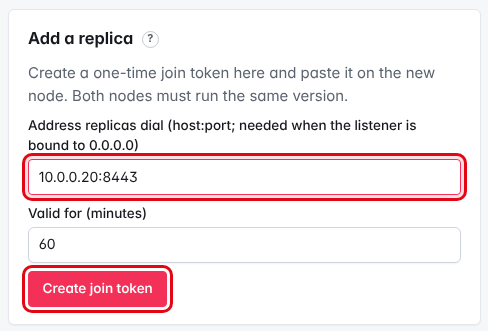
Copy the token. It is shown only once and works only once.
Step 2. Join the primary from the new node
- On the new node, sign in with its own first administrator and re-authenticate.
- Open Settings → Cluster → Join a primary.
- Paste the token into Join token, type
JOINin Type JOIN to confirm and press Join.
The node replaces all its data with the primary's, installs it and restarts its core service. Sign in again with an administrator account of the primary: the new node's own administrator no longer exists.
Step 3. Add the replica to your NAS devices
Add the replica's address as a second RADIUS server on every NAS device, with the same shared secret (the NAS clients are replicated), and allow it in the device's and the appliance's firewall. Example for SSH with pam_radius (/etc/pam_radius_auth.conf), see MFA-protected SSH access to Ubuntu servers:
# server[:port]    shared_secret      timeout (s)
10.0.0.20          <shared secret>    10
10.0.0.21          <shared secret>    10
where 10.0.0.20 is the primary and 10.0.0.21 the replica. When one appliance is down, users still sign in through the other – except users with only HOTP tokens, who need the primary. List the primary first on NAS devices used by HOTP users.
Cluster status
Settings → Cluster shows the node's Role, Epoch, Primary, Lag (changes not yet applied), Last contact, Last change, the replication Listener and the Certificate SHA-256. The Nodes list shows every peer with its address, last contact and applied change. Errors are shown in red and on the dashboard.
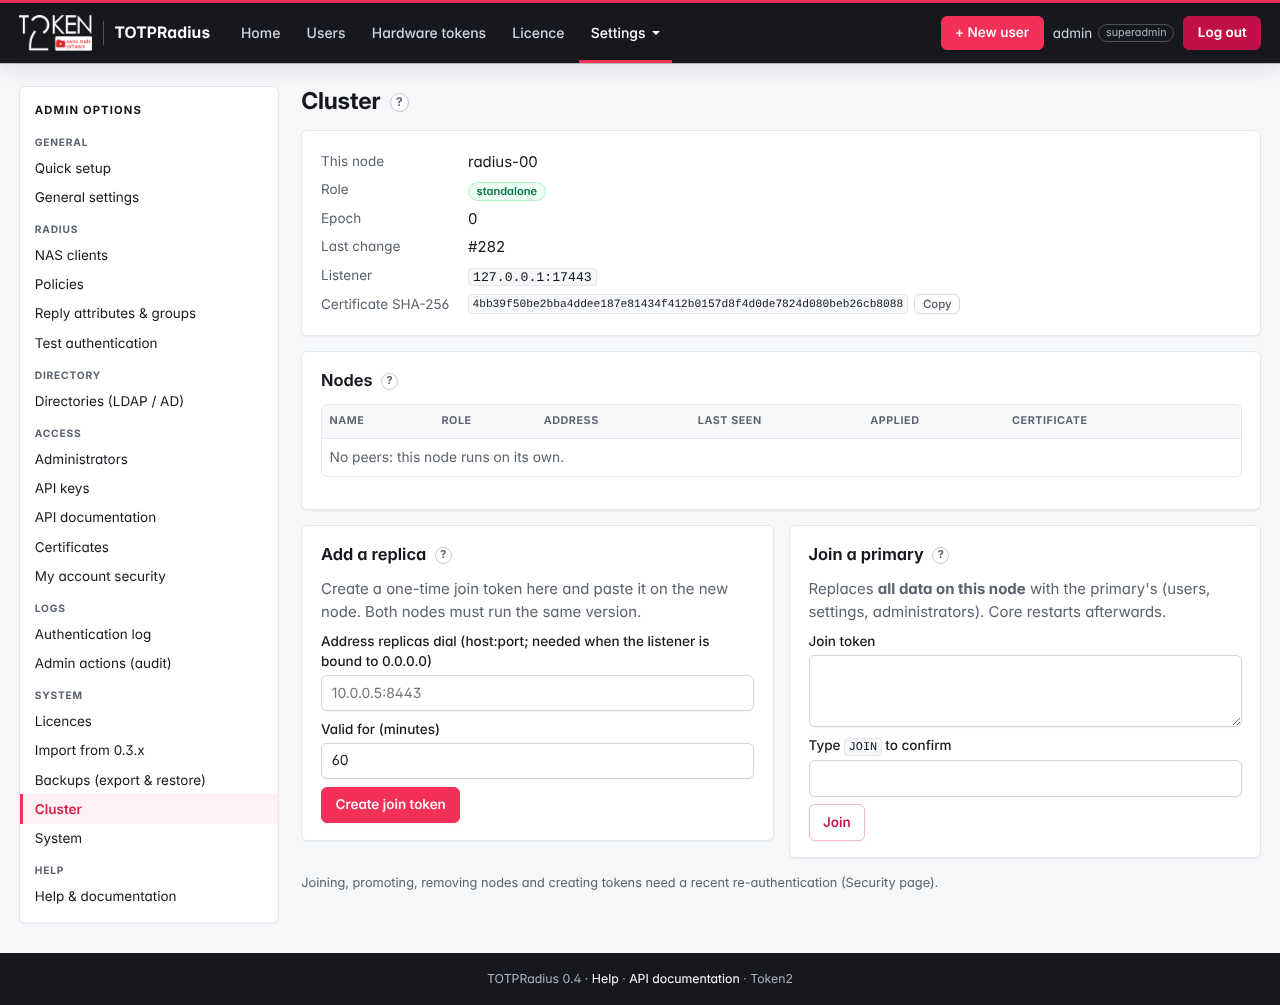
The primary keeps its change log for 7 days or 1 million changes (Settings → General settings → Replication). A replica that was offline for longer resynchronises automatically with a full snapshot and restarts its core service.
When the primary is lost: promote a replica
- On a replica, re-authenticate and open Settings → Cluster → Promote this node.
- Type the node's name in Type this node's name (…) to confirm and press Promote to primary.
The replica becomes the primary with a new epoch; the other replicas follow it. The old primary is fenced when it comes back: it refuses writes. There is no automatic failover and no automatic failback.
To use the old primary again: on the new primary remove it from the cluster (Remove in the Nodes list), install it afresh and join it as a replica. A fenced node offers no join form.
Remove a node
On the primary, Remove in the Nodes list deletes a peer: its certificate is no longer accepted.
Strict OTP across a cluster
Replicas learn about used codes within about a second. If that small window matters, tick Strict mode OTP across a cluster: only the primary node accepts codes in the policy (Settings → Policies). A code then cannot be replayed on another node, but replicas cannot authenticate while the primary is unreachable.
Updates, backups and other tasks in a cluster
- Updates: update the nodes one at a time – replicas first, the primary last – and check on Settings → Cluster that each one is back before the next. Replication pauses between nodes with different versions. See Online updates.
- Backups: take them on the primary. A restore on a replica is refused: restore the primary and the replicas resynchronise. See Backups.
- Enrolment codes are kept per node: issue them on the primary.
- Clear lockout acts only on the node you are signed in to. Another node that still holds the lock passes it back, so in a cluster a cleared lock can return until it has expired on every node (15 minutes by default). This is a known limitation of 0.4.
- Do not revert a cluster node to a hypervisor snapshot: it rolls back what the other nodes already replicated.
Troubleshooting
| Problem | What to check |
|---|---|
| Joining fails | Different versions on the two nodes; the token expired or was already used; port 8443 blocked; wrong address in Address replicas dial. |
| Changes "disappear" on a replica | They were refused (read-only configuration): make them on the primary. |
| A user is locked again shortly after Clear lockout | Another node still holds the temporary lock and passed it back (see Lockouts). Wait until it expires (Settings → General settings → Lockout), or clear it on every node. |
| A node shows a replication error on the dashboard | Settings → Cluster: Last replication error, last contact and lag of each node; firewall between the nodes. |
30. Upgrading from TOTPRadius 0.3.x to 0.4
TOTPRadius 0.4 is a new appliance, not an update of 0.3.x: there is no in-place upgrade, and a 0.3.x backup cannot be restored as a 0.4 backup. Instead, you install a fresh 0.4 appliance next to the old one and run the one-time Import from 0.3.x. It creates the users (with their tokens, hardware token inventory, 0.3.x local passwords and FIDO2 keys), the NAS clients, a "Migrated" policy, directories, reply attributes, administrators, the API v1 key, certificates and settings. Nothing in the uploaded files is executed.
Before you start
- The old 0.3.x appliance, running, with root access on its console or over SSH.
- A new TOTPRadius 0.4 appliance with its first administrator created and nothing else configured (see Installation and initial configuration). Example values below: old appliance
10.0.0.10, new applianceradius.example.com(10.0.0.20). - The old appliance's MAC address ("Host ID" on its General settings → License page), for the licence conversion request.
- Import on the primary or a standalone node: a replica cannot import. Add replicas after the import (see Cluster).
Step 1. Collect the data on the 0.3.x appliance
The most complete input is the archive written by Token2's collector script t2r-collect.sh: it contains the database dump, the lic/* files, clients.conf, extra settings, FIDO2 user files and certificates. The new appliance serves the script at /static/t2r-collect.sh (no sign-in needed); the Import page shows its SHA-256.
- On the new appliance open Settings → Import from 0.3.x and copy the SHA-256 of the collector.
- On the old appliance, as root, download and check the script, then run it:
Wherecurl -kfsSo t2r-collect.sh https://10.0.0.20/static/t2r-collect.sh sha256sum t2r-collect.sh sh t2r-collect.sh migratecurlis missing, usewget --no-check-certificate -qO t2r-collect.sh https://10.0.0.20/static/t2r-collect.sh. The-k/--no-check-certificateoptions are needed while the new appliance still has its self-signed certificate: that is why you compare the printed SHA-256 with the one on the Import page. - The script writes
t2r-migrate-<host>-<time>.tar.gz(mode 0600). Copy it to your PC, for example withscpor WinSCP.
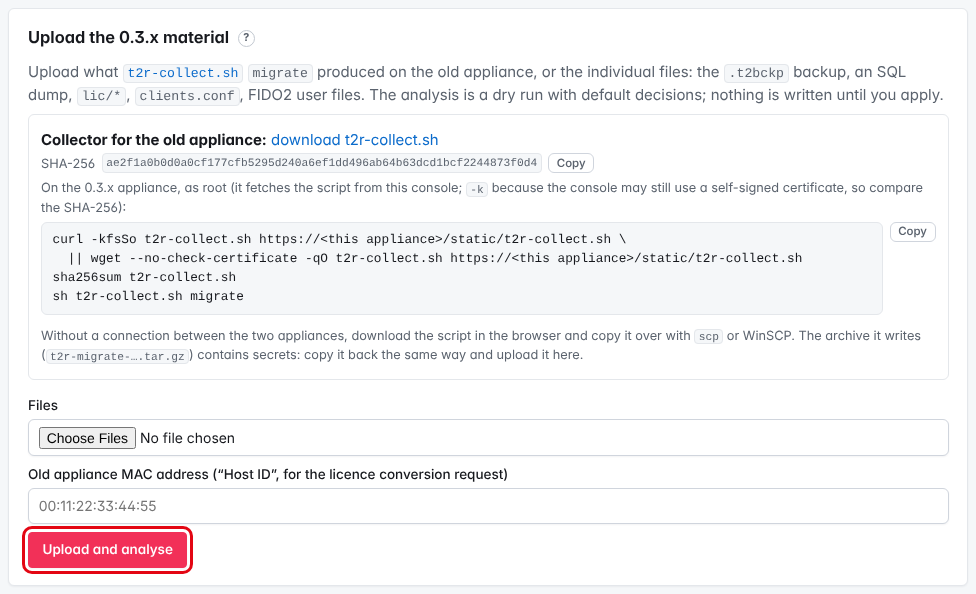
- If the old appliance cannot reach the new one (Web Admin Access IP range, firewall), download
t2r-collect.shin the browser and copy it to the old appliance withscpor WinSCP. - The script is plain, readable shell.
sh t2r-collect.sh diagwrites a support bundle without secrets instead. - Instead of the archive you can upload individual files: the
.t2bckpfull backup (0.3.x Export/Import → Backup and Restore → Download full backup), an SQL dump of thetotpradiusdatabase,lic/*files,clients.conf, FIDO2 user files. A.t2bckpalone misses hardware tokens with internal ids 5–100 (a 0.3.x backup bug); the report says so. Prefer the collector archive, or complete the inventory afterwards with the hardware token CSV import.
Step 2. Upload and analyse
- On the new appliance, Settings → Import from 0.3.x: under Files choose the
t2r-migrate-….tar.gzarchive (or the individual files). - Enter the Old appliance MAC address ("Host ID", for the licence conversion request), for example
00:11:22:33:44:55. - Press Upload and analyse. The upload runs in chunks; the analysis is a dry run with the default decisions – nothing is written yet.
Step 3. Read the report and adjust the decisions
The report lists what would be created, Changed behaviour (intentional differences of 0.4 that apply to your data), Not mapped (with the reason), Mapped settings and a Checklist. It never contains secrets.
Under Decisions, each option has a safe default; change one only after reading the report:
| Decision | Default | Notes |
|---|---|---|
| Require Message-Authenticator on migrated NAS clients | off | Recommended (BlastRADIUS protection), but older NAS devices that do not send it are then rejected. Enable it per NAS client after checking. |
| Import "none" placeholder users | off | Users without seed, password or contact are skipped. |
| Install the imported web certificates | off | Activates the admin (443) and portal (9443) certificates from the backup when they come with their private key. |
| Keep 0.3.x "Trusted IP range" for Calling-Station-Id | off | Copies the range into every NAS client's trusted station ranges. Only safe when the NAS itself sets Calling-Station-Id. |
| Make NAS clients inside the trusted range password-only | off | Every user through these NAS clients signs in without a code. The report lists the affected clients. |
| Override the user-name handling derived from 0.3.x ("Keep prefix and suffix", "Multidomain") | off | Otherwise derived from the 0.3.x settings. |
Press Dry run with these decisions after every change and repeat until the result is right.
Changed behaviour you will see
- Codes are compared strictly (exactly N digits) and are single use everywhere.
- The code is checked before the LDAP password; group restrictions match exact names instead of parts of names.
- Initial logins require the first factor (password).
- The SMS / e-mail fallback is a second-prompt option with its own code; it is left off after the import.
- 0.3.x local passwords keep working and are upgraded to argon2id at the next login.
- NAS clients get the old shared secret and are marked rotate secret.
- Temporary VPN credentials are not migrated: users issue new ones.
- OTP-only policies that used Allow initial login get the option Initial logins accept any password (0.3.3 behaviour – insecure, migration only), off after the import; new policies never offer it (see Authentication modes and methods).
- FIDO2 keys and the portal host name. Security keys are bound to a host name without port. The importer sets Settings → General settings → Portals → Portal host name from the 0.3.x portal URL with the port removed (
https://vpn.example.com:9443→vpn.example.com), or from the keys when the URL gives none. Working 0.3.x keys belong to the bare host name and keep working in 0.4 on any port. The report lists keys stored for another host name (they work only after you set the portal host name to it; otherwise those users register their keys again) and appliances whose keys use more than one host name.
Step 4. Apply the import
- Re-authenticate: Settings → My account security → Re-authenticate (password and current code).
- Back on the import run, type
IMPORTin Type IMPORT to write the result of the last dry run and press Apply import. Everything is written in one transaction.
Step 5. Request the licence conversion
0.3.x licences cannot be read by 0.4. After the import a 60-day grace period at the old user count starts automatically. Click Download the licence conversion request (Import page or Licence page) and send the file to Token2 support; install the converted licence you receive before the grace period ends. See Purchasing and adding user licenses.
Step 6. Check, then switch the devices
- Point a test NAS (or Settings → Test authentication) at the new appliance and test a few users of each kind: see Testing TOTPRadius authentication.
- Rotate the NAS shared secrets (Settings → NAS clients) and turn on require Message-Authenticator per NAS client once the device sends it.
- Migrated administrators set a new password and a second factor at their first sign-in.
- Install the converted licence.
- Switch the NAS devices to the new appliance's address, or give the new appliance the old address (Settings → System → Network, or the console menu) after shutting the old one down.
- Press Mark in production (lock the importer) on the Import page. Unlocking is possible later and is recorded in the audit log.
Where the 0.3.x General settings went
The importer maps the 0.3.x single-page settings the same way as Quick setup:
| 0.3.x (General settings) | 0.4 object | 0.4 field |
|---|---|---|
| RADIUS secret | NAS client | Shared secret |
| Endpoint IP and subnet | NAS client | Source addresses (0.0.0.0 = any) |
| LDAP enabled, password and code in one field ("LDAP proxy") | Policy | First factor = the directory, password and code in one field |
| — (OTP only) | Policy | First factor = none: the code is the password |
| Allow initial login | Policy | Allow initial login |
| LDAP Group | Policy | Required group (exact CN) |
| LDAP server | Directory | LDAP server URLs (a bare host = ldap://host:389) |
| Username format | Directory | Bind template (%username%) |
| LDAP search string | Directory | Search base |
ldaps-cert / ca.pem | Directory | CA certificate or pinned server certificate |
| Allow LDAP enrollment, Allow re-enrollment, intro text | Settings → General settings → Portals | LDAP enrolment portal options |
| — (one global configuration) | Settings → General settings → RADIUS | Default policy (the imported "Migrated" policy) |
Troubleshooting
| Message | What to do |
|---|---|
| The importer refuses a database that already holds users | Import into a fresh appliance (or restore a backup taken before your tests). |
| "Licence limit exceeded" right after the import | Install the converted licence, or wait for the grace period to apply (it raises the limit to the old count). |
| The import is refused on a replica | Import on the primary or a standalone node, then pair the replicas. |
Hardware tokens missing after importing a .t2bckp | Known 0.3.x backup gap (internal ids 5–100): use the collector archive or the hardware token CSV import. |
PART VII · WEB API
31. Token2 TOTPRadius appliance Web API
TOTPRadius 0.4 offers two HTTP APIs on the admin listener (https://radius.example.com/, TCP 443):
- API v1 – the 0.3.x endpoints
/createuser,/validateand/simpleapi(also/api.php), byte-compatible, for Citrix StoreFront and existing scripts. Authenticated with an API v1 key. - API v2 – a JSON REST API under
/api/v2/with proper HTTP status codes, paging and idempotency keys. Authenticated with bearer tokens limited by scopes and source networks. Use it for new integrations.
The complete reference for both is built into the appliance: Settings → API documentation (and /api/v2/openapi.json for Postman, Insomnia or code generators).
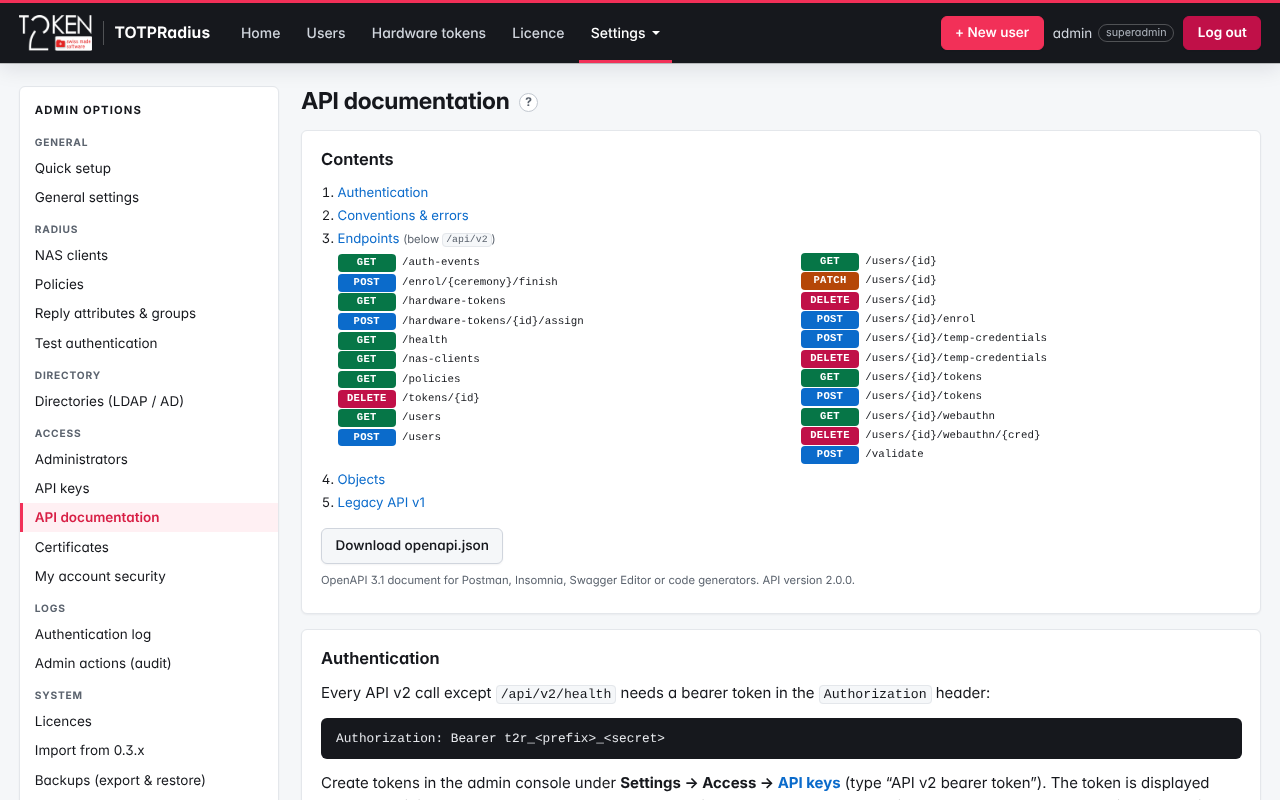
Create an API key
- Open Settings → API keys (superadmin; creating a key needs a recent re-authentication).
- Under New key enter a Name (for example
Citrix StoreFront) and choose the Type: API v1 key (StoreFront, /validate, /createuser) or API v2 bearer token (scoped). - For a v2 token tick only the v2 scopes the integration needs (table below).
- Optional: Allowed networks (empty = any), for example
10.0.0.0/8, 192.0.2.10, and Expires after (days, optional). - Press Create and copy the key: it is shown once.
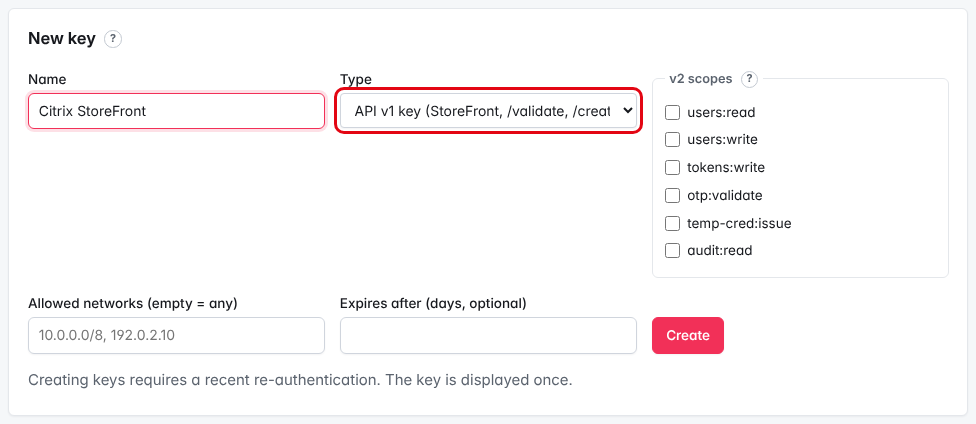
The list shows prefix, scopes, allowed networks, number of calls, last use and expiry. Edit name, scopes and networks, tick disabled to stop a key for a while, or Delete it. To rotate a key, create a new one, switch the client, then delete the old one.
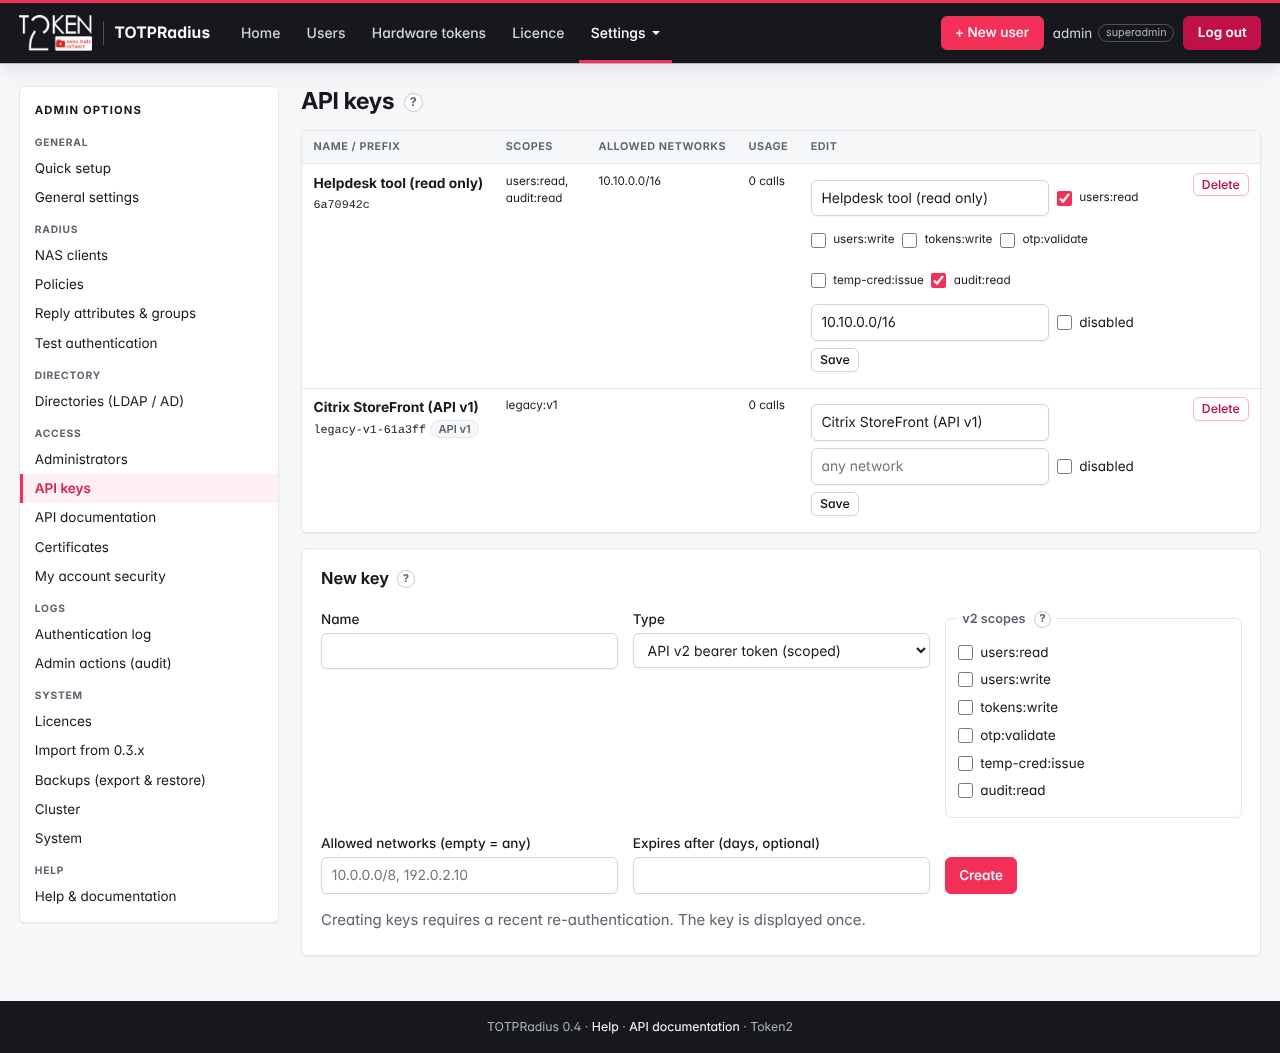
API v1 (0.3.x compatible)
API v1 is on by default and can be switched off under Settings → General settings → API → API v1 (0.3.x compatible). The appliance serves API v1 over HTTPS only: it has no plain-HTTP listener, so clients must use https://. (The 0.3.x option Allow http is still shown there; it only concerns requests forwarded by a reverse proxy, which 0.4 does not support. Leave it off.) Requests take query parameters and are answered with HTTP 200 and the 0.3.x body formats.
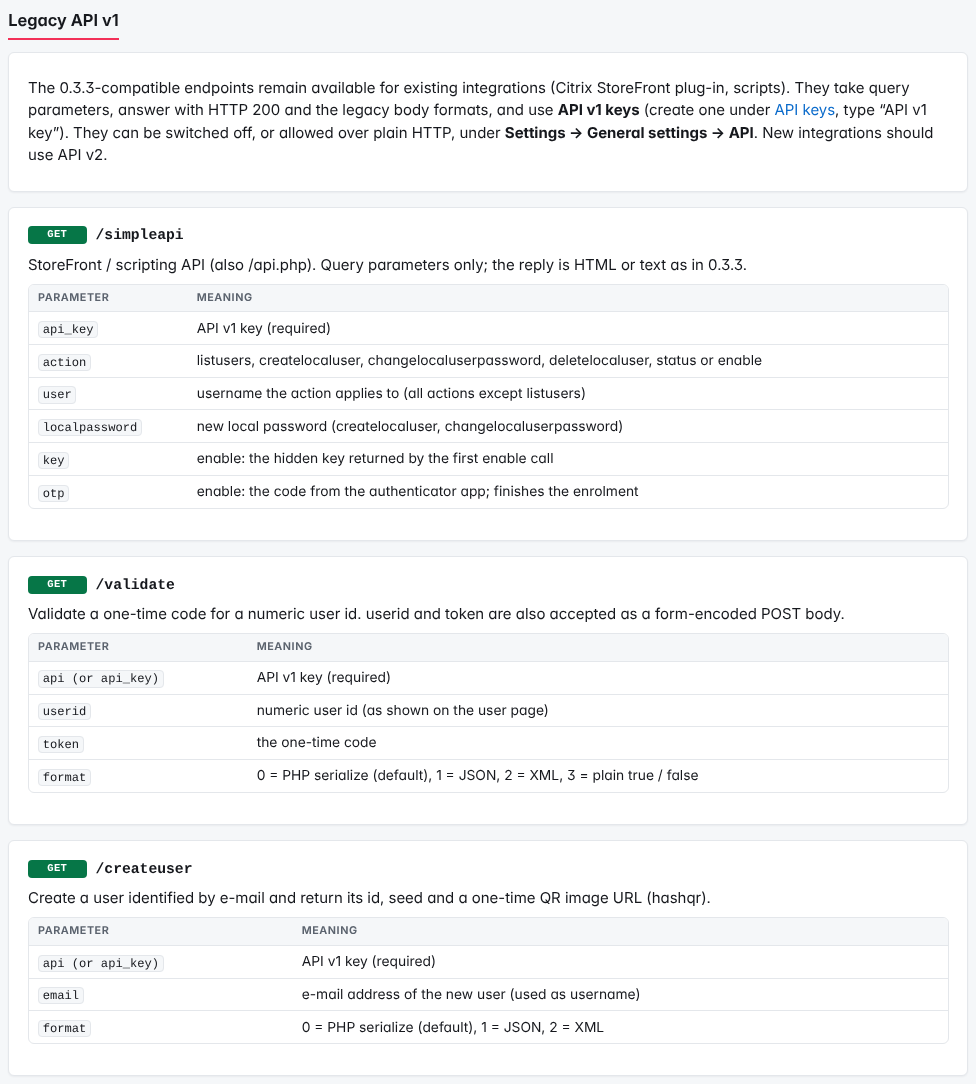
Create a user
GET https://radius.example.com/createuser?api=[API v1 key]&email=[email]&format=[response format]► api (or api_key) – the API v1 key.
► email – the new user's e-mail address, also used as the user name.
► format – 0 PHP serialized (default), 1 JSON, 2 XML.
The 0.3.x parameters phone, type and pin are accepted and ignored. Response (format 1, seed shortened):
{"code":["0","11"],"description":"executed with success","success":"true","response":"user created",
 "userid":"27","hash":"<base32 seed>","hashqr":"https:\/\/radius.example.com\/qr\/<one-time token>"}
userid is the numeric user id to store with your own user record; hash is the seed for the authenticator app. hashqr is a one-time link to a QR image on the appliance, valid 600 seconds by default (Settings → General settings → API → QR code link lifetime (seconds)).
hashqr, which sent the seed to a third party. 0.4 serves the QR code itself, once.Validate a code
GET https://radius.example.com/validate?api=[API v1 key]&userid=[numeric user id]&token=[code]&format=[response format]► userid – the numeric user id (shown on the user page and returned by /createuser); userid and token may also be sent as a form-encoded POST body.
► format – 0 PHP serialized (default), 1 JSON, 2 XML, 3 plain true / false.
Use the validation value ("true") to decide whether the user is authenticated:
{"description":"executed with success","code":["","33","34"],"validation":"true","success":"true","type":null}
{"code":["","22"],"success":"false","type":null}
{"code":["","21","22"],"success":"false","description":"error","response":"failed with error","error":" API KEY OR SITE ID NOT KNOWN ","type":null}
(valid code; wrong code; wrong API key). Replay protection, drift and lockout apply exactly as for RADIUS: a code accepted once is refused afterwards.
Users and local passwords (/simpleapi, /api.php)
GET https://radius.example.com/simpleapi?api_key=[API v1 key]&action=listusers
GET https://radius.example.com/api.php?api_key=[API v1 key]&action=createlocaluser&user=kiosk2&localpassword=[password]
GET https://radius.example.com/api.php?api_key=[API v1 key]&action=changelocaluserpassword&user=kiosk2&localpassword=[new password]
GET https://radius.example.com/api.php?api_key=[API v1 key]&action=deletelocaluser&user=kiosk2| action | Result |
|---|---|
listusers | JSON list: [{"userid":"1","username":"asmith","regtime":"1793120701"}, …] |
createlocaluser | Success: user created; refused when the licence is full ("Licensed user limit reached. Update license"); passwords need at least 6 characters |
changelocaluserpassword | Success: user password changed, or Error: password too short (we expect at least 6 chars), Error: user does not exist |
deletelocaluser | Success: user deleted or Error: user does not exist |
status, enable | the HTML fragments used by the Citrix StoreFront plug-in (TOTP status bar and enrolment); see Citrix StoreFront |
A wrong or missing key returns wrong API key.
createlocaluser and changelocaluserpassword keep the 0.3.x minimum of 6 characters and its exact error text, so that existing 0.3.x integrations keep working. Everywhere else – the console, API v2 and the user's own change on /vpn/local/ – local passwords need the Minimum local password length under Settings → General settings → Users (default 10)./fetchusers (the 0.3.x master/slave replication; replaced by the cluster). It answers "Replication protocol not supported by this version". 0.4 security fixes: user names must match exactly, the code is not checked after a wrong key, and replay protection and lockout apply.API v2
Send the token in the Authorization header. JSON in and out, times in Unix seconds, lists paged with cursor / next_cursor, POST requests accept an Idempotency-Key header, errors use HTTP status codes and {"error": {"code": "…", "message": "…"}}.
curl -H "Authorization: Bearer t2r_<prefix>_<secret>" "https://radius.example.com/api/v2/users?search=asmith&limit=20"{"items":[{"id":"01a17e52-8b6e-779d-ab8e-3e75e285d78f","numeric_id":1,"username":"asmith","display_name":"Alice Smith",
"email":"[email protected]","status":"active","single_factor":false, … }],"next_cursor":null,"total":1}Validate a code (scope otp:validate):
curl -X POST -H "Authorization: Bearer t2r_…" -H "Content-Type: application/json" \
     -d '{"username":"asmith","otp":"123456"}' https://radius.example.com/api/v2/validate
{"valid":false,"reason":"otp_invalid"}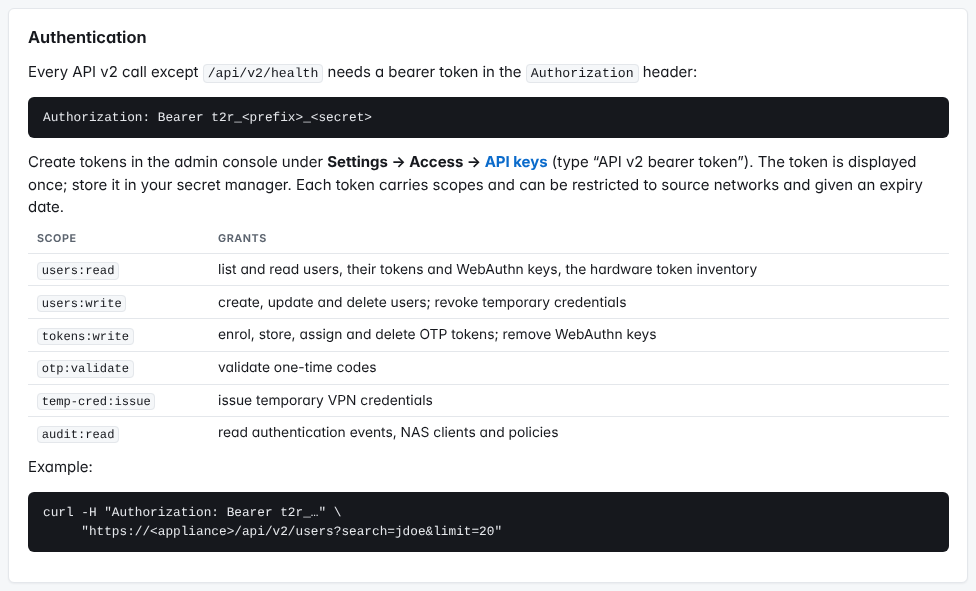
| Scope | Allows |
|---|---|
users:read | list and read users, their tokens and security keys, the hardware-token inventory; NAS clients and policies (read-only) |
users:write | create, change and delete users (includes reading users); revoke a user's temporary VPN credentials (DELETE /api/v2/users/{id}/temp-credentials) |
tokens:write | enrol authenticator apps, store known seeds, assign hardware tokens, delete tokens, remove security keys |
otp:validate | POST /api/v2/validate |
temp-cred:issue | issue temporary VPN credentials (POST /api/v2/users/{id}/temp-credentials); revoking them needs users:write |
audit:read | authentication events, NAS clients and policies (read-only) |
Main endpoints: GET/POST /api/v2/users, GET/PATCH/DELETE /api/v2/users/{id}, POST /api/v2/users/{id}/enrol + POST /api/v2/enrol/{ceremony}/finish, GET/POST /api/v2/users/{id}/tokens, GET /api/v2/hardware-tokens, POST /api/v2/hardware-tokens/{id}/assign, POST /api/v2/validate, GET /api/v2/auth-events, GET /api/v2/health (no authentication). The full list with parameters is on the API documentation page.
API v2 can be switched off under Settings → General settings → API → API v2. In a cluster, send write calls to the primary; replicas refuse them. Local passwords set through API v2 follow Minimum local password length (default 10). A code checked with /api/v2/validate or API v1 validate is used up when it matches, like on RADIUS.
Troubleshooting
| Response | What to check |
|---|---|
v1: wrong API key / API KEY OR SITE ID NOT KNOWN | Wrong or deleted key, or a v2 token used for v1. |
v1: 404 not found | API v1 is switched off under Settings → General settings → API. |
v2: 401 / 403 | Missing or wrong token, missing scope, request from outside Allowed networks, expired or disabled key. |
v2: 429 | Too many requests; retry later. |
"reason":"replay" | The code was already used (by RADIUS or the API); wait for the next code. |
PART VIII · DEVICE INTEGRATION GUIDES
32. Hardware tokens for two-factor authentication with FortiGate
 Two-factor authentication with FortiGate can be implemented natively with FortiToken, a hardware or mobile OTP generator that requires additional Fortinet licences. FortiGate also accepts external RADIUS servers as the authentication source, so two-factor authentication can be implemented with the Token2 TOTPRadius appliance as a more cost-effective alternative, with Token2 hardware tokens or any TOTP app.
In this guide FortiGate uses TOTPRadius in LDAP proxy mode: users type their Active Directory password immediately followed by the 6-digit code in the normal password field (Winter2026!123456). For simplicity the guide configures accounts with administrative access to the FortiGate; the same RADIUS server can be used for SSL VPN and IPsec user groups.
About LDAP proxy
The setup in this guide is based on:
- A FortiGate with full admin access (the FortiGate screenshots show a FortiGate VM64 virtual appliance)
- TOTPRadius 0.4 with the built-in 5 free user licences
- A mobile app (Google Authenticator, Microsoft Authenticator, Token2 TOTP+ …), a classic or programmable Token2 TOTP token, or a Token2 key with HID-HOTP
- Example values: TOTPRadius
radius.example.com(10.0.0.20), FortiGate192.0.2.1(address it sends RADIUS from), domain controllerdc1.example.com, userjdoe
Step 1. Configure TOTPRadius
Open the TOTPRadius admin console and go to Settings → Quick setup (the 0.4 page with the 0.3.x "General settings" fields). Full description: Quick setup.
- Under 1. RADIUS:
► RADIUS secret – Generate a strong one (shown once after saving; you will enter it in FortiGate in Step 2).
► Endpoint IP and subnet –
192.0.2.1, the FortiGate interface address that reaches TOTPRadius.► Allowed methods – PAP only (an AD password can only be checked with PAP).
► Require Message-Authenticator – keep it ticked (BlastRADIUS protection). Untick it only if the FortiGate's requests show up as Message-Authenticator required but missing under Settings → NAS clients → Dropped requests.
- Under 2. Login mode: LDAP password + code in one field, and Allow initial login
0. - Under 3. LDAP:
► LDAP enabled – ticked.
► LDAP server –
ldaps://dc1.example.com(several servers: one per line, or separated by spaces or commas). Press Fetch certificate and Trust this CA for LDAPS.► Username format – keep
%username%and add your UPN suffix or NetBIOS prefix:%username%@example.comorEXAMPLE\%username%.► LDAP search string – for example
DC=example,DC=com(or empty / Detect).► LDAP Group – leave empty (not needed for this integration), or enter a group name to restrict access.
Check with Test LDAP (test user and password, without the code).
- Under 4. LDAP enrollment (self-service): tick Allow LDAP enrollment if users should enrol their second factor themselves.
- Press Save and copy the Generated RADIUS secret.
FortiGate HQ, Source addresses / networks 192.0.2.1, Allowed methods pap, Policy an LDAP policy such as AD password + code (one field), require Message-Authenticator ticked) – see LDAP configuration.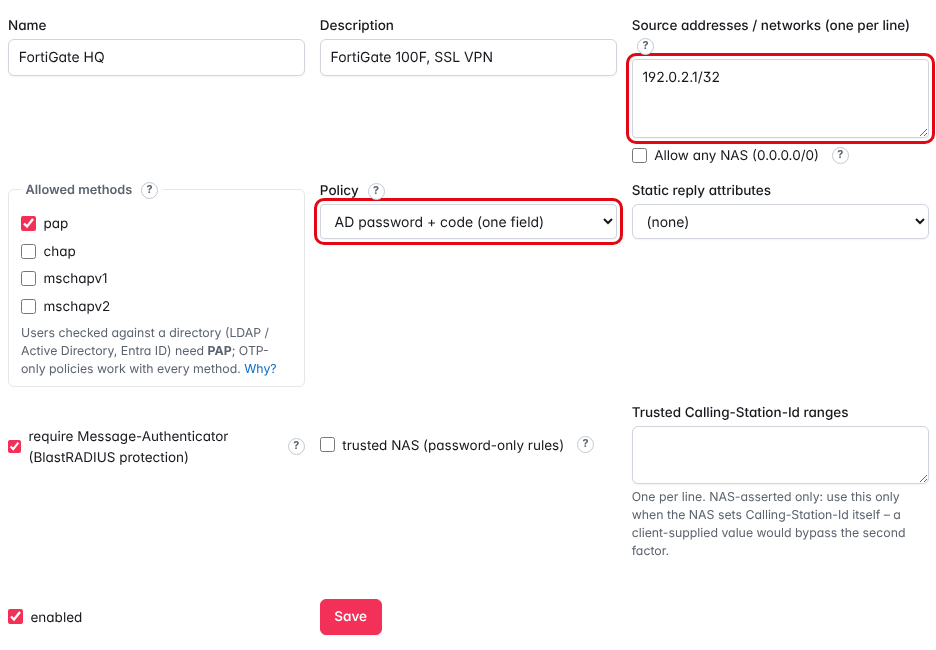
Step 2. Create a RADIUS server entry and a user group on FortiGate
Navigate to User & Authentication → RADIUS Servers, click + Create New and fill in:
► Name – the name of the appliance, for example TOTPRadius.
► Authentication method – PAP.
► NAS IP – leave empty.
► IP/Name – the IP address of the TOTPRadius appliance, 10.0.0.20.
► Secret – the RADIUS secret generated in Step 1.
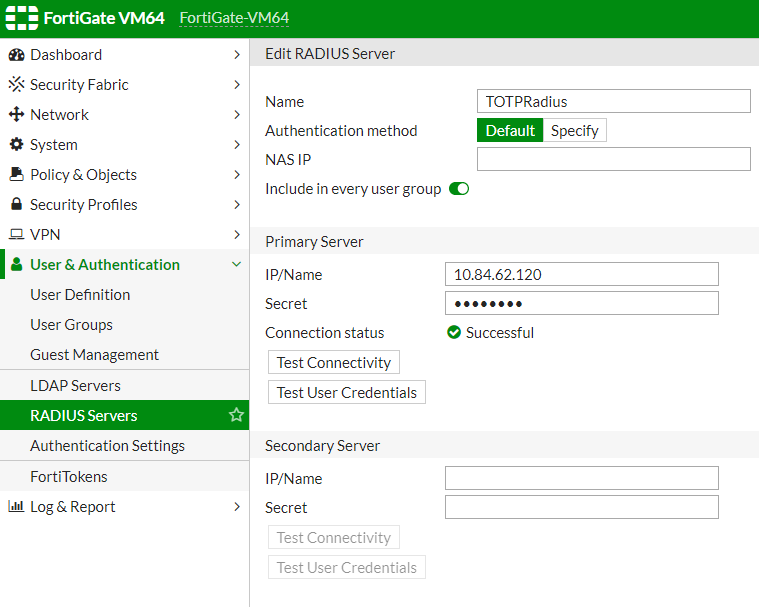
The same on the FortiOS command line, including a longer remote authentication timeout:
config user radius
    edit "TOTPRadius"
        set server "10.0.0.20"
        set secret <shared secret>
        set auth-type pap
    next
end
config system global
    set remoteauthtimeout 60
end
Navigate to User & Authentication → User Groups and click + Create New:
- Name: the group allowed to use TOTPRadius authentication, for example
TOTP - Type: Firewall
- Remote Groups: click Add and select
TOTPRadiusfrom the Remote Server list - Click OK
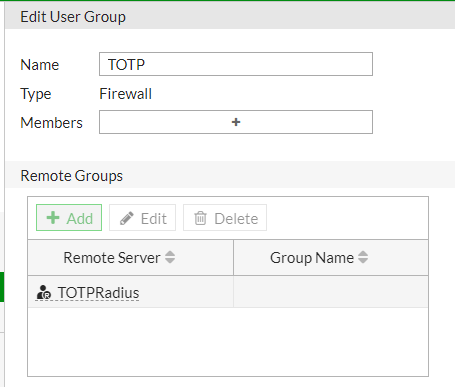
Fortinet-Group-Name from TOTPRadius (reply attributes by group membership) and add a group match (config match, set group-name) to the FortiGate user group.Step 3. Enable administrative access for TOTPRadius users
Navigate to Security → Administrators and click + Create New → Administrator:
- Username: the same as the LDAP user name, for example
jdoe - Type: Match a user on a remote server group
- Remote User Group:
TOTP - Set a backup password (used as a fallback if the RADIUS server is unreachable)
- Administrator Profile: for example
super_admin
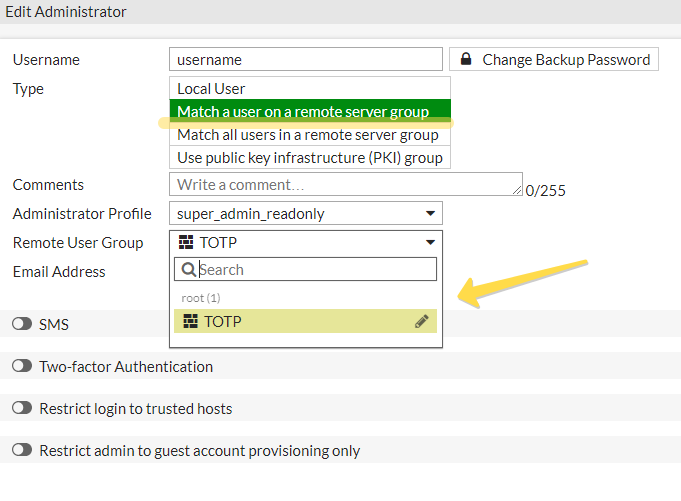
Step 4. Give the user a second factor
In TOTPRadius press + New user, enter the User name (jdoe, as typed at the FortiGate) and choose under Enrol a token now:
- Authenticator app – after saving a QR code is shown; the user scans it with Google Authenticator, Microsoft Authenticator, Token2 TOTP+ or another RFC 6238 app, and you enter one current code to activate it.
- Hardware token from the inventory – enter the token's Serial number (for example
60000104). Import the tokens' seed file first under Hardware tokens; see Managing hardware tokens. - Key with HID-HOTP (counter-based) – a Token2 key that types its code; see HOTP and HID-HOTP keys.
For existing users use Assign a hardware token or Store a known seed on the user page. With a programmable token you can burn the seed onto the token by scanning the QR code with one of the NFC Burner apps. If you enabled LDAP enrollment, users can also enrol themselves at https://radius.example.com/ldap-enroll/ (or on the external portal /vpn/ldap/).
Test
- In TOTPRadius open Settings → Test authentication, choose the FortiGate's NAS client (Quick setup or FortiGate HQ), enter
jdoe, the AD password and the current code, and press Test. The last line must read Access-Accept. - On the FortiGate CLI (with a new code):
diagnose test authserver radius TOTPRadius pap jdoe Winter2026!123456 - Log in to the FortiGate web interface with the user name and the AD password immediately followed by the 6-digit code.
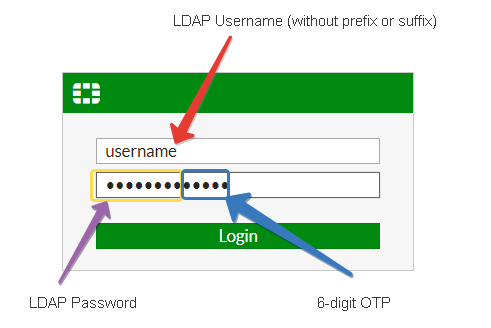
More: Testing TOTPRadius authentication.
remoteauthtimeout long enough for users to type the code.Troubleshooting
| Reason in the authentication log | What to check |
|---|---|
| No entry, FortiGate reports a timeout | The FortiGate's source address differs from the endpoint, or Message-Authenticator is missing: see Settings → NAS clients → Dropped requests (last 24 h). |
ldap_chap_unsupported, method_not_allowed | The RADIUS server entry does not use PAP (set auth-type pap). |
otp_missing | The user typed only the password. |
otp_invalid | Wrong code; check the token clock with the drift tool on the user page. |
first_factor_invalid | The code was right, the AD password wrong, or the Username format does not match the domain. |
unknown_user | The user name typed at the FortiGate does not exist on TOTPRadius. |
33. Token2 hardware tokens for two-factor authentication with Palo Alto NGFW
 Palo Alto Networks Next-Generation Firewalls (NGFW) give security teams complete visibility and control over all networks using traffic identification, malware prevention and threat intelligence technologies.
Multi-factor authentication with Palo Alto NGFW can be implemented with MFA vendors such as Duo, Okta or PingID. Palo Alto also accepts external RADIUS servers as the authentication source, so two-factor authentication can be implemented with the Token2 TOTPRadius appliance as a more cost-effective alternative.
In this guide the Palo Alto NGFW uses TOTPRadius in LDAP proxy mode for GlobalProtect VPN: users type their Active Directory password immediately followed by the 6-digit code in the normal password field. An optional variant with a separate code prompt is shown at the end.
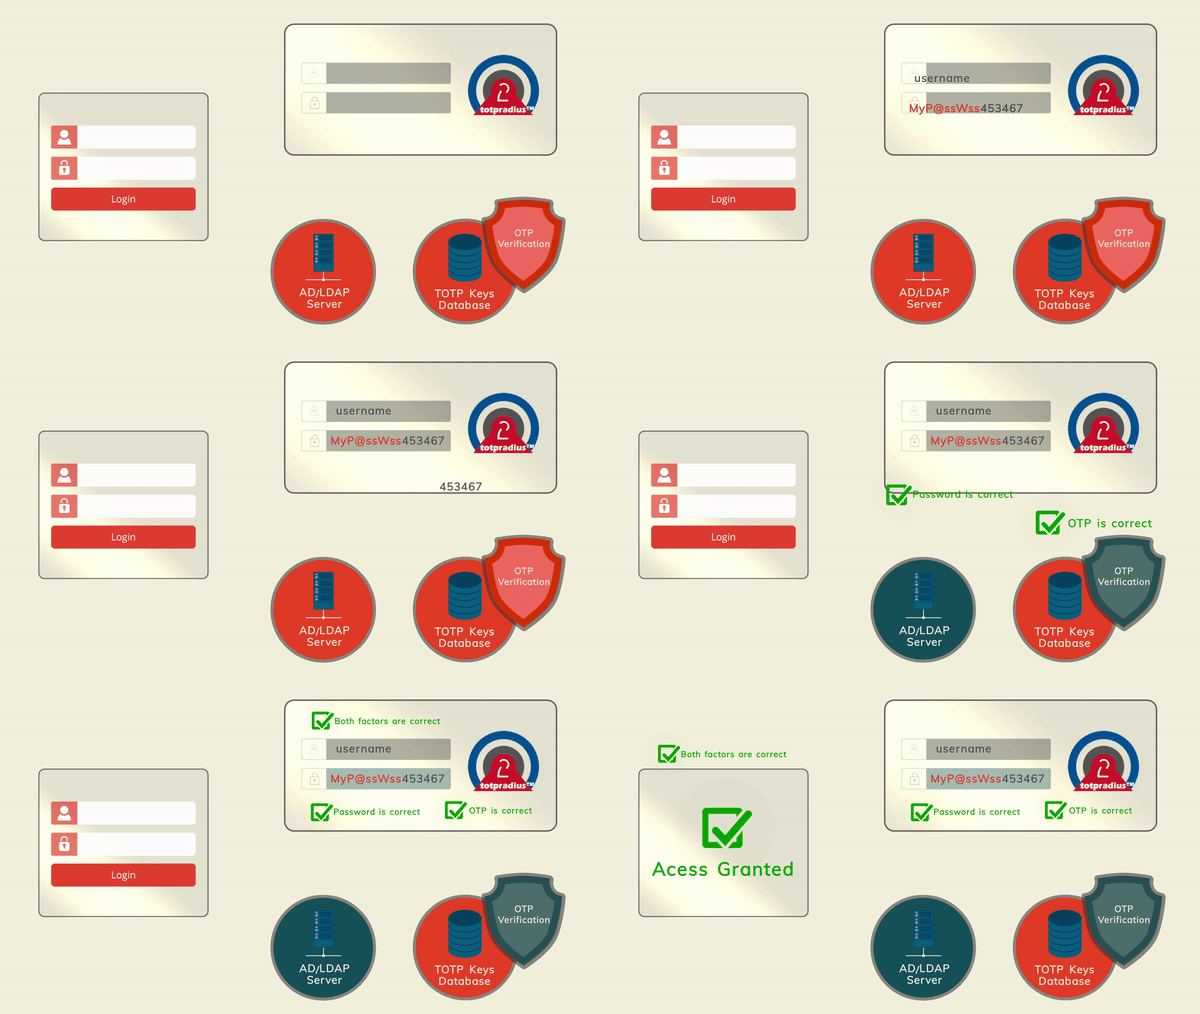
TOTPRadius splits the password field, checks the code first and, if it is correct, checks the password against Active Directory, so wrong codes never lock AD accounts.
The setup in this guide is based on
- A Palo Alto NGFW (the screenshots show a PA VM-100 virtual appliance) with preconfigured GlobalProtect Gateway and Portal
- TOTPRadius 0.4 with the built-in 5 free user licences
- A mobile app, a classic or programmable Token2 TOTP token, or a Token2 key with HID-HOTP
- Example values: TOTPRadius
radius.example.com(10.0.0.20), firewall203.0.113.5(address it sends RADIUS from), domain controllerdc1.example.com, userjdoe
Step 1. Configure TOTPRadius
Open Settings → Quick setup (the 0.4 page with the 0.3.x "General settings" fields; full description: Quick setup):
- 1. RADIUS: ► RADIUS secret – Generate a strong one; ► Endpoint IP and subnet –
203.0.113.5; ► Allowed methods – PAP only; ► Require Message-Authenticator – keep it ticked, untick it only if the firewall's requests are listed as Message-Authenticator required but missing under Settings → NAS clients → Dropped requests. - 2. Login mode: LDAP password + code in one field; Allow initial login
0. - 3. LDAP: ► LDAP enabled ticked; ► LDAP server
ldaps://dc1.example.com(then Fetch certificate → Trust this CA); ► Username format%username%@example.comorEXAMPLE\%username%; ► LDAP search stringDC=example,DC=com(or empty / Detect). Check with Test LDAP. - 4. LDAP enrollment (self-service): tick Allow LDAP enrollment if users should enrol their second factor themselves.
- Press Save and copy the Generated RADIUS secret.
203.0.113.5, Allowed methods pap, an LDAP Policy, require Message-Authenticator ticked).Step 2. Create a RADIUS server profile
Navigate to Device (1) on the top menu, click RADIUS (2) under Server Profiles on the left and then +Add (3):
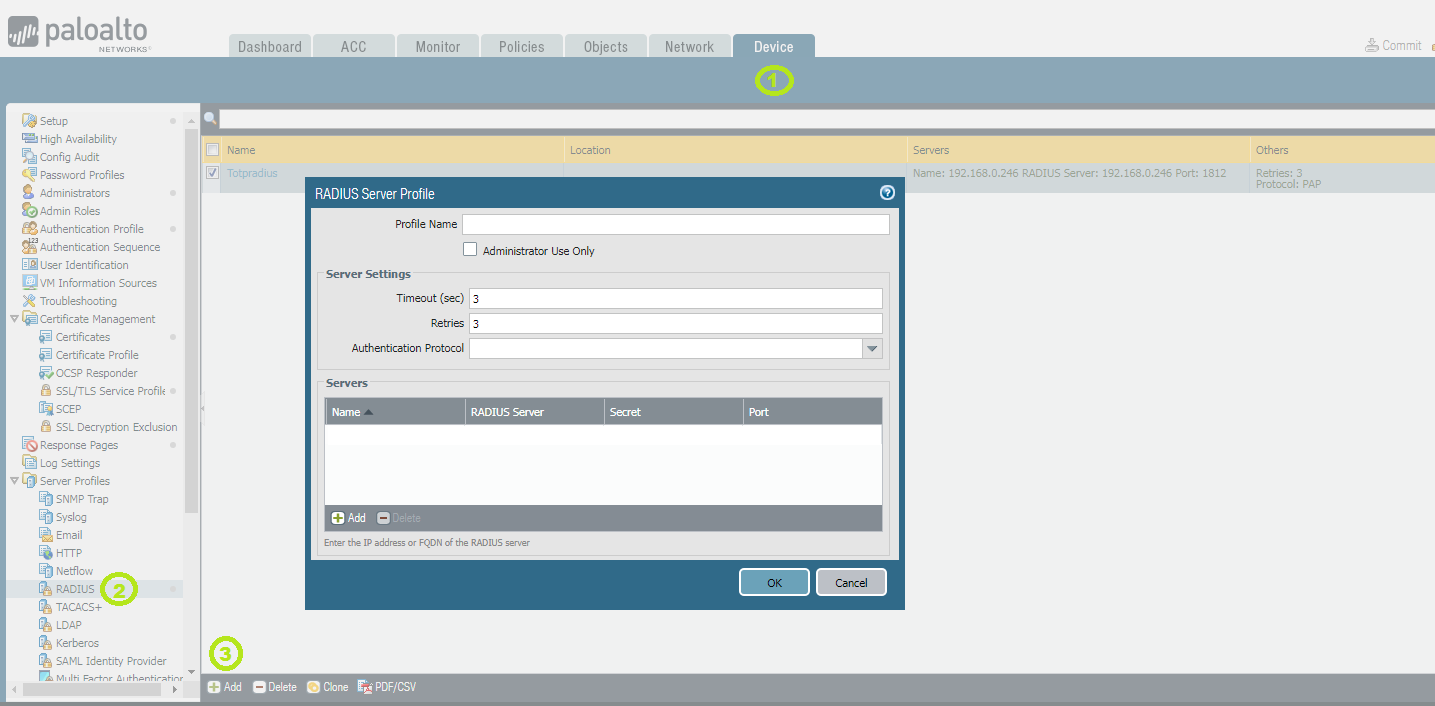
► Profile Name – for example Totpradius.
► Timeout (sec) – longer than the TOTPRadius directory timeout (5 seconds per LDAP call), for example 30; with the second-prompt variant long enough for users to type the code.
► Authentication Protocol – PAP.
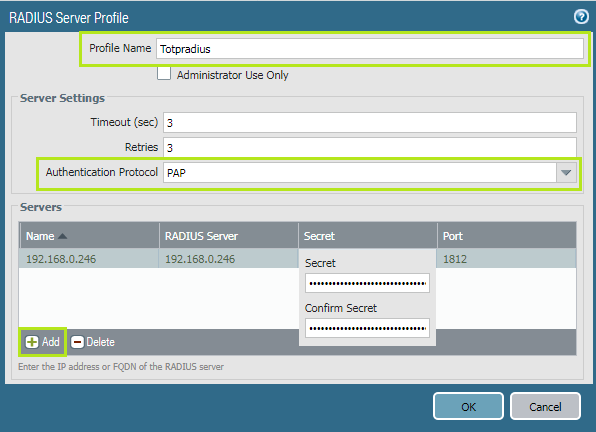
On the Servers list click + Add:
► Name – any name for the TOTPRadius server.
► RADIUS Server – the IP address or FQDN of TOTPRadius, 10.0.0.20.
► Secret – the RADIUS secret generated in Step 1 (in 0.3.x it was in the Main Settings section).
► Port – 1812.
Click OK. Do not forget to commit the changes:

Step 3. Use the RADIUS profile for GlobalProtect client authentication
Navigate to Network (1), click Gateways (2) on the left and click the gateway's name (3):
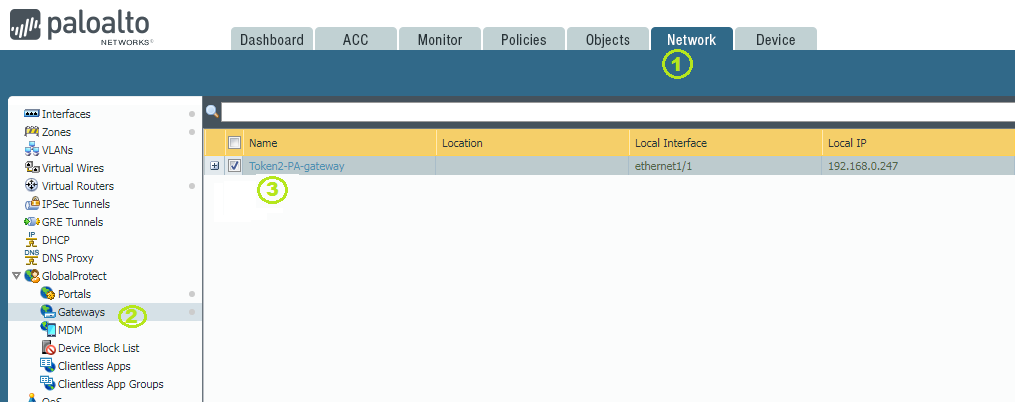
This opens the GlobalProtect Gateway Configuration:
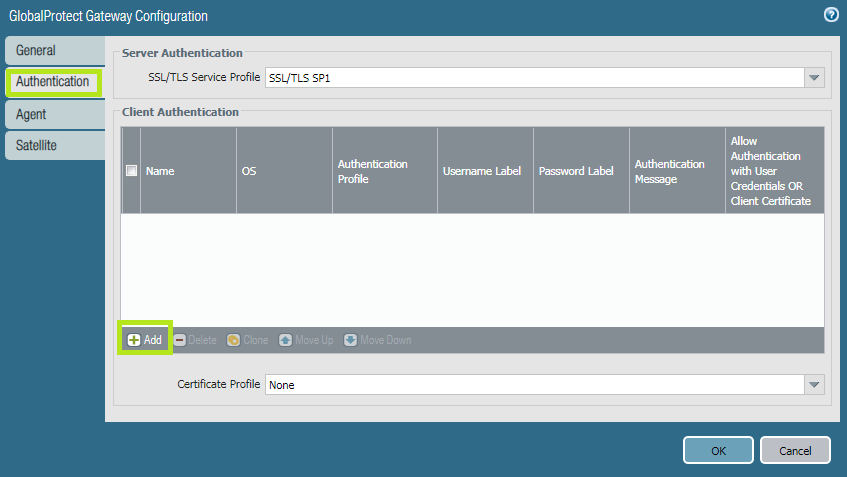
Click Authentication, then +Add. Fill in Name and select New Authentication Profile from the Authentication Profile drop-down list:
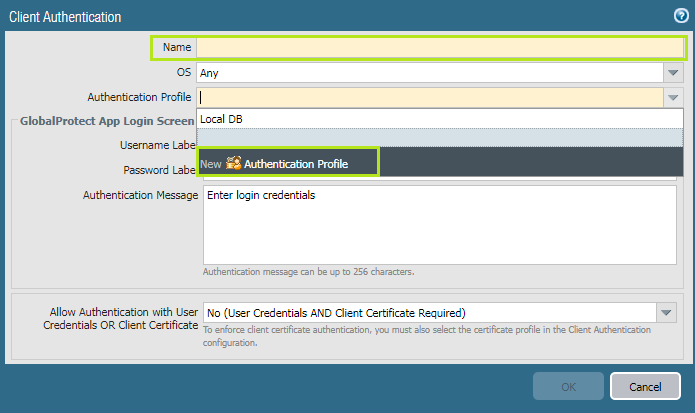
On the Authentication tab select Type RADIUS and as Server Profile the RADIUS profile from Step 2:
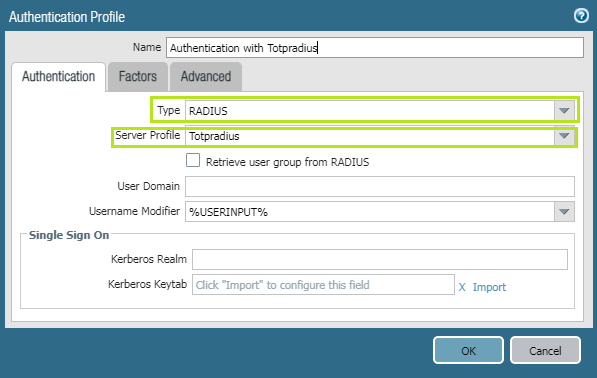
Click OK, then OK again. Repeat the same steps for the GlobalProtect Portal client authentication, and commit.
Step 4. Give the user a second factor
In TOTPRadius press + New user, enter the User name (the LDAP user name, for example jdoe) and choose under Enrol a token now:
- Authenticator app – a QR code is shown after saving for Google Authenticator, Microsoft Authenticator, Token2 TOTP+ or another RFC 6238 app; enter one current code to activate it.
- Hardware token from the inventory – the token's Serial number, for example
60000104(import the seed file under Hardware tokens first; see Managing hardware tokens). - Key with HID-HOTP (counter-based) – see HOTP and HID-HOTP keys.
With a programmable token, burn the seed by scanning the QR code with one of the NFC Burner apps. With LDAP enrollment enabled, users can enrol themselves at https://radius.example.com/ldap-enroll/.
Test
- In TOTPRadius open Settings → Test authentication, choose the firewall's NAS client, enter
jdoe, the AD password and the current code, and press Test. The last line must read Access-Accept. See Testing TOTPRadius authentication. - Connect with the GlobalProtect client: user name, and in the password field the AD password immediately followed by the 6-digit code.
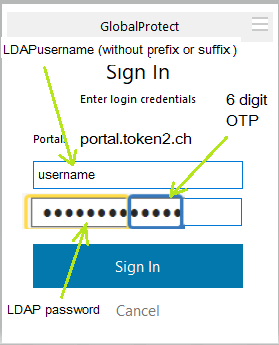
Optional: code in a second prompt
GlobalProtect can show a second prompt for the code (RADIUS Access-Challenge). Then users type only the AD password first and the code when asked:
- In TOTPRadius set Quick setup 2. Login mode to LDAP password, then code prompt (or Either to accept both), or give the firewall's NAS client a policy such as AD password, then code prompt.
- Make sure the RADIUS server profile's Timeout (sec) leaves the user enough time to type the code (the second prompt is valid for 120 seconds).
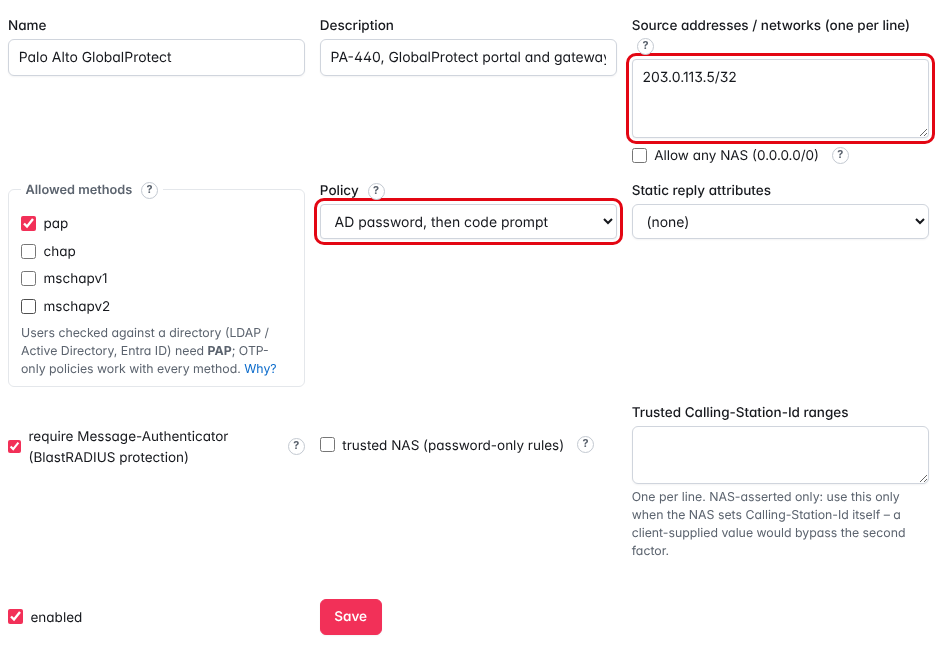
For group-based policies on the firewall, TOTPRadius can return PaloAlto-User-Group; see reply attributes by group membership.
Troubleshooting
| Reason in the authentication log | What to check |
|---|---|
| No entry, GlobalProtect times out | The firewall's source address differs from the endpoint, or Message-Authenticator is missing: see Settings → NAS clients → Dropped requests (last 24 h). Also check the profile timeout. |
ldap_chap_unsupported, method_not_allowed | The server profile does not use PAP. |
otp_missing | Password without code in one-field mode, or the client did not show the second prompt. |
otp_invalid | Wrong code; check the token clock with the drift tool. |
first_factor_invalid | The AD password is wrong, or the Username format does not match. |
state_mismatch | The code was sent after the second prompt expired (120 s) or from another session. |
34. TOTPRadius - Cisco Meraki Client VPN
Meraki Client VPN with two-factor authentication and self-enrolment of the second factor
Meraki Client VPN does not natively support two-factor authentication; a third-party solution is required. TOTPRadius checks the Active Directory password and a one-time code that the user types into the VPN password field (Winter2026!123456), the 0.3.x "LDAP proxy" mode.
Before you start
- A TOTPRadius 0.4 appliance (see Installation and initial configuration).
- Example values used in this guide: appliance
radius.example.com(10.0.0.20), Meraki MX198.51.100.10(the address it sends RADIUS from), domain controllerdc1.example.com, userjdoein groupVPN Users.
Self-enrolment
Different from Citrix StoreFront, Meraki Client VPN has no standard way of calling the TOTPRadius API. Users can enrol their own authenticator on the self-service portals (https://radius.example.com/ldap-enroll/ inside the network, https://vpn.example.com:9443/vpn/ldap/ from outside) – see Self-service enrolment. Enrolment through the VPN itself is possible with VPN connection entries prepared with Microsoft Connection Manager Administration Kit (CMAK); detailed instructions are here.
Step 1. Configure TOTPRadius
- Open Settings → Quick setup.
- 1. RADIUS: choose Generate a strong one (shown once after saving) for the RADIUS secret, and enter the Meraki MX address in Endpoint IP and subnet:
198.51.100.10. Under Allowed methods keep only PAP – Meraki Client VPN sends PAP. Keep Require Message-Authenticator on (see the note below). - 2. Login mode: choose LDAP password + code in one field. Keep Allow initial login at
0unless users must reach the enrolment page through the VPN.
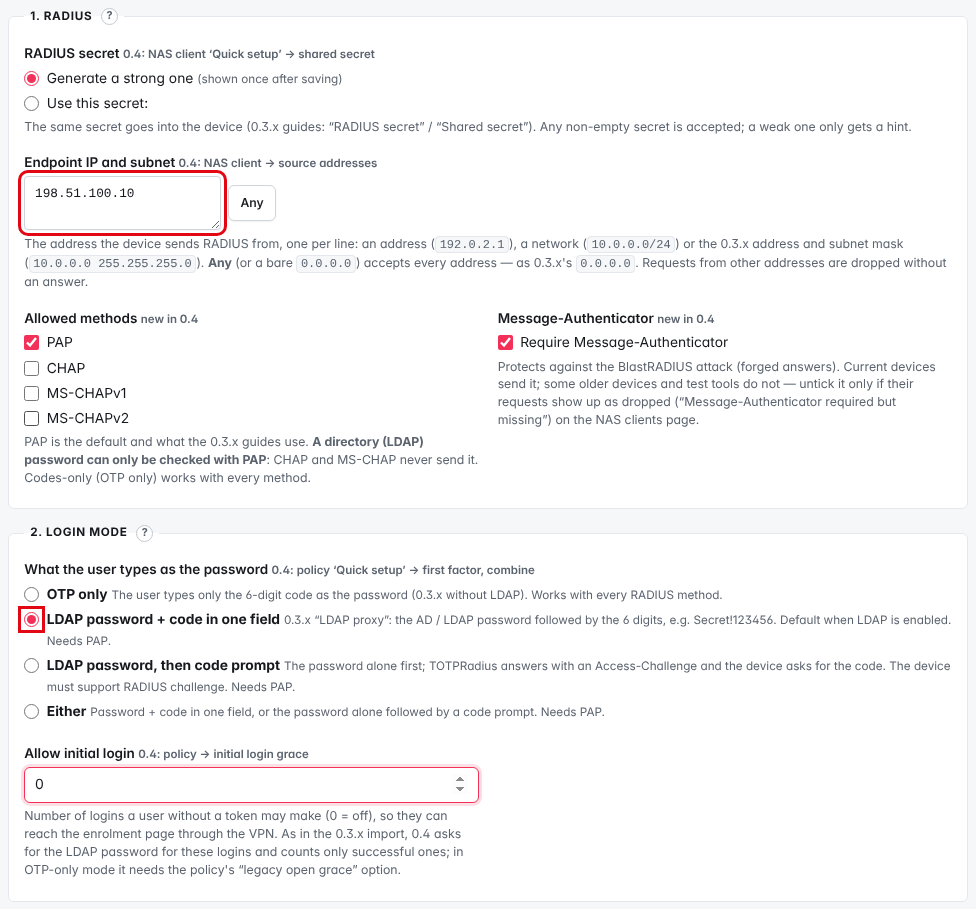
- 3. LDAP: tick LDAP enabled; LDAP server
ldaps://dc1.example.com; Username format%username%@example.com(orEXAMPLE\%username%); LDAP search stringdc=example,dc=com(or press Detect); optionally LDAP GroupVPN Users. For LDAPS press Fetch certificate and Trust this CA. Check with Test LDAP and a test user. - 4. LDAP enrollment (self-service): tick Allow LDAP enrollment to let users enrol themselves; optionally Allow re-enrollment and an intro text.
- Press Save and copy the generated RADIUS secret: it is shown once (it can be shown again on the NAS client page after entering your password).
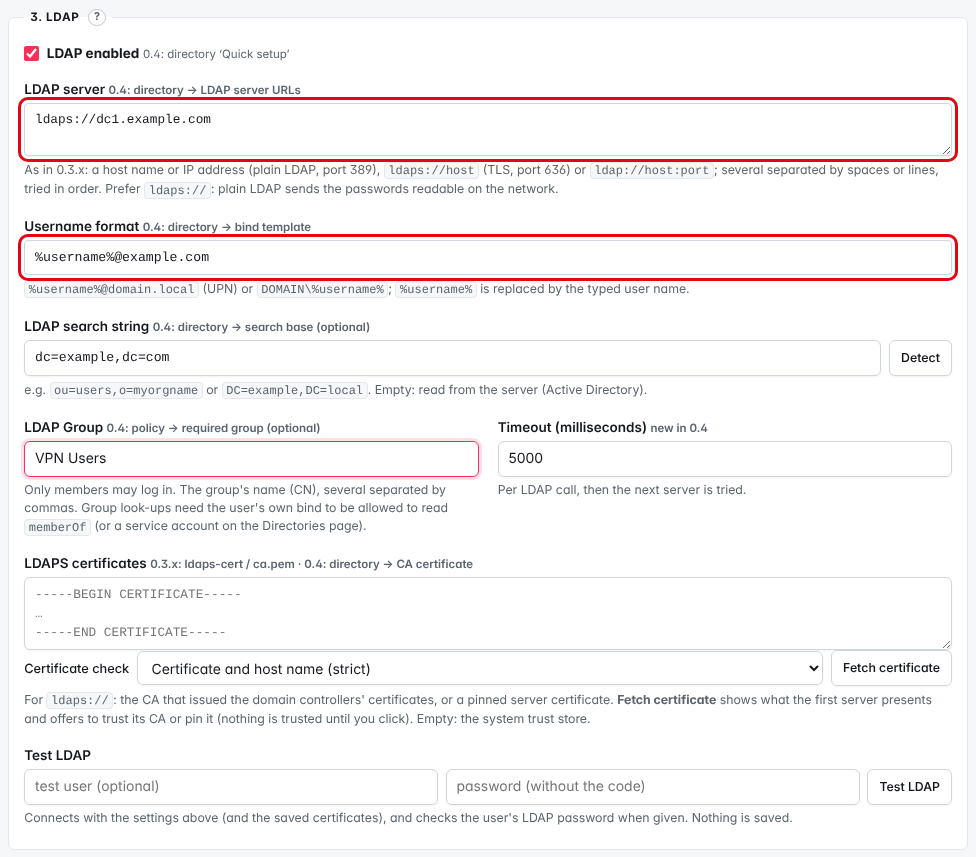
Step 2. Configure the Meraki Dashboard
Once the TOTPRadius appliance has been configured, configure Client VPN to use it:
► Log onto the Cisco Meraki Dashboard and navigate to Security & SD-WAN → Client VPN (older dashboards: Configure → Client VPN).
► Select the option to enable the Client VPN server.
► Set the Client VPN subnet: a unique IP subnet offered to clients connecting to the MX security appliance.
► Specify the DNS servers.
► Enter a shared secret that client devices use to establish the VPN connection. This is a different value from the RADIUS shared secret.
► Select RADIUS as the authentication method and click Add a RADIUS server.
► Enter the TOTPRadius IP address (10.0.0.20), port 1812, and the RADIUS secret generated in Step 1.
► Click Save changes.
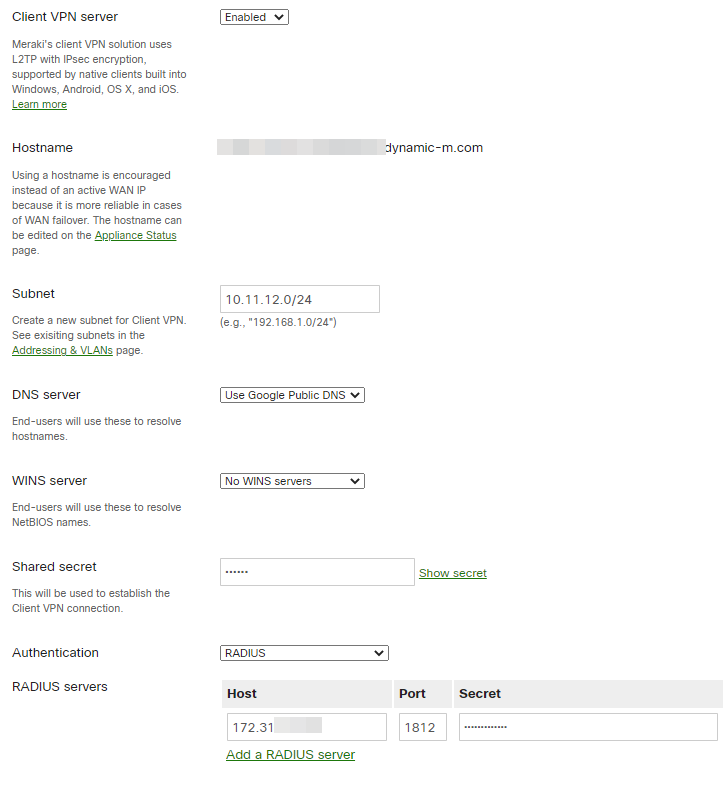
For high availability add a second RADIUS server: a replica of a TOTPRadius cluster.
Step 3. Add the users and their tokens
- Self-enrolment: users sign in with their Windows password on
https://radius.example.com/ldap-enroll/orhttps://vpn.example.com:9443/vpn/ldap/and scan the QR code with an authenticator app (Token2 TOTP+, Microsoft Authenticator …), or associate a hardware token by serial number. - By the administrator: + New user, user name
jdoe, Enrol a token now: Authenticator app (the QR code is shown after saving), Hardware token from the inventory (choose a free token by serial number), or Key with HID-HOTP. For existing users use Assign a hardware token on the user page. Programmable tokens can be burned from the QR code with one of the NFC Burner apps.
Client configuration
No additional software is required on client devices. Cisco Meraki Client VPN uses L2TP over IPsec, which is supported by the built-in clients of almost all devices. Refer to the Meraki Client VPN documentation for client configuration. Users type their Windows password immediately followed by the 6-digit code into the password field.
Test
- Open Settings → Test authentication. Choose Act as NAS client = the Meraki client (Quick setup, or the NAS client you created for the MX), enter User-Name
jdoe, the AD password and the current Code, and press Test. The last line must read Access-Accept. - Then connect from a client with the Meraki VPN entry.
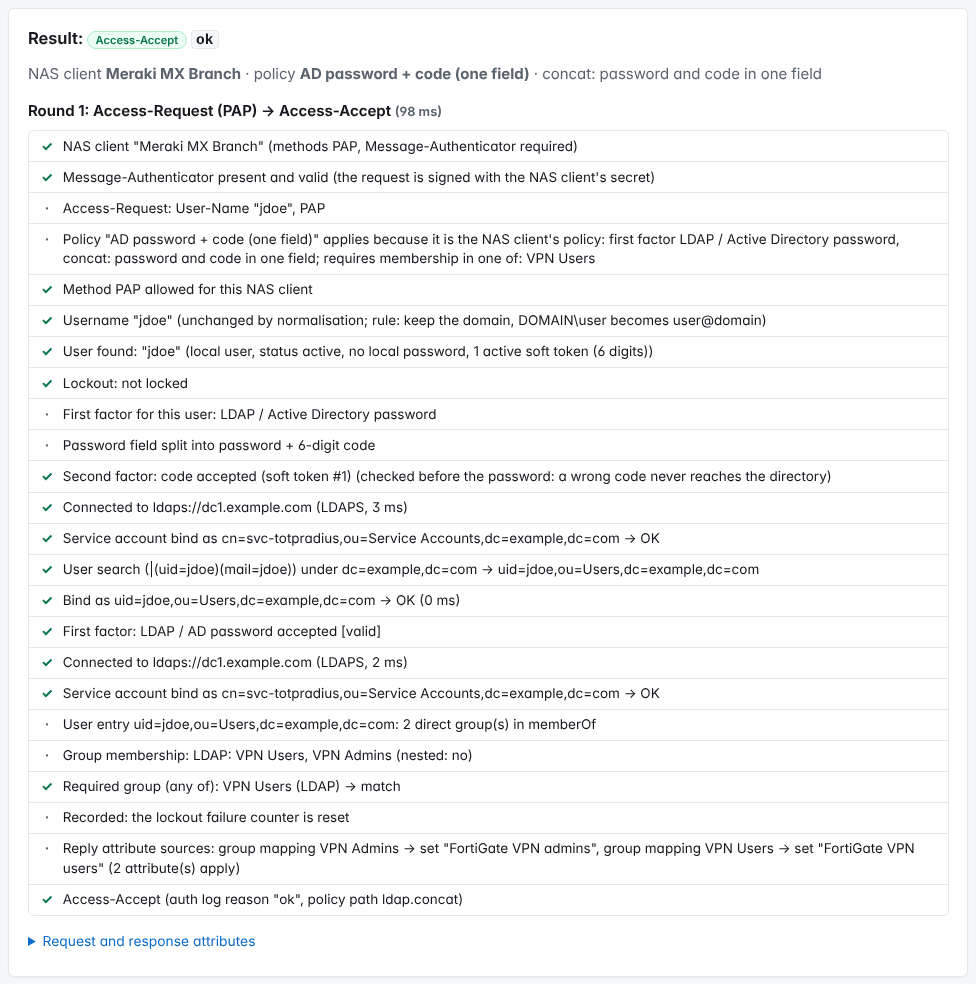
Details: Testing authentication.
Troubleshooting
| Reason in the authentication log | What to check |
|---|---|
| no entry at all | The MX's source address is not the endpoint you entered, the firewall blocks UDP 1812, the RADIUS secret differs, or Message-Authenticator is missing: see Dropped requests (last 24 h) on the NAS clients page. |
otp_missing, otp_malformed | The user typed only the password, or not exactly 6 digits after it. |
otp_invalid | Wrong code: check the phone's clock or the token drift (drift tool on the user page). |
first_factor_invalid | Wrong AD password. A different shared secret does not show up here: with Require Message-Authenticator on, the request is dropped and listed under Settings → NAS clients → Dropped requests (last 24 h) as Message-Authenticator wrong (no log entry). |
group_not_allowed | The user is not in the LDAP group (VPN Users). |
ldap_chap_unsupported | The VPN uses CHAP / MS-CHAP: the AD password can only be checked with PAP. |
unknown_user, no_token | The user does not exist on TOTPRadius or has no active token yet: enrol one. |
35. TOTPRadius Two-factor authentication for Citrix Storefront with self-enrolment
NetScaler Gateway checks the Active Directory password itself (primary authentication) and asks TOTPRadius for the one-time code as secondary RADIUS authentication. The optional StoreFront integration package adds a status bar to StoreFront, through which users enable TOTP for themselves using the TOTPRadius API.
Before you start
- A TOTPRadius 0.4 appliance (see Installation and initial configuration).
- Example values: appliance
radius.example.com(10.0.0.20), NetScaler subnet IP (the address it sends RADIUS from)192.0.2.30, userasmith.
Step 1. Configure TOTPRadius (code only)
NetScaler sends only the code in the second password field, so TOTPRadius checks the code alone (OTP only).
- Open Settings → Quick setup.
- 1. RADIUS: Generate a strong one (shown once after saving); Endpoint IP and subnet
192.0.2.30; Allowed methods PAP; keep Require Message-Authenticator on unless NetScaler's requests are dropped (see Troubleshooting). - 2. Login mode: OTP only. Untick LDAP enabled in section 3 (NetScaler checks the AD password itself).
- Press Save and copy the generated RADIUS secret.
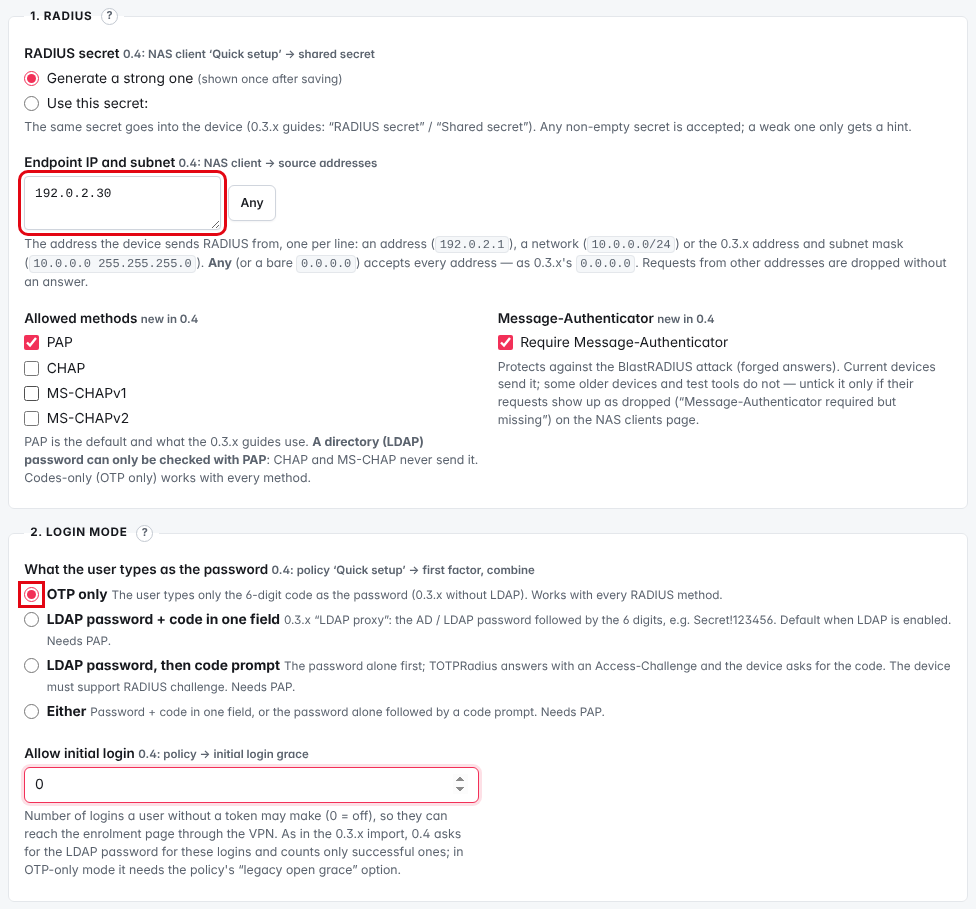
Step 2. Configure NetScaler Gateway to use TOTPRadius
To enable two-factor authentication on NetScaler Gateway, specify TOTPRadius as secondary authentication for the XenApp/XenDesktop site.
Log in to the NetScaler admin panel as nsroot and click Configuration → XenApp and XenDesktop sites → Configured Virtual Servers. Click Edit next to the site you want to configure two-factor authentication for.
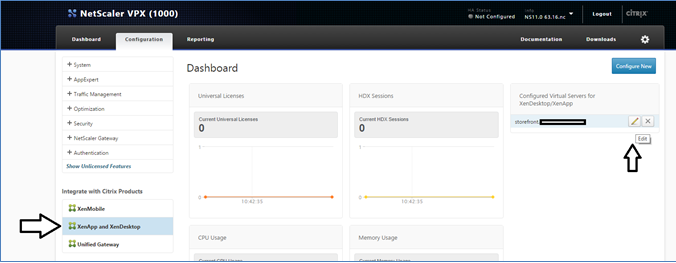
Click the edit icon on the Authentication box.
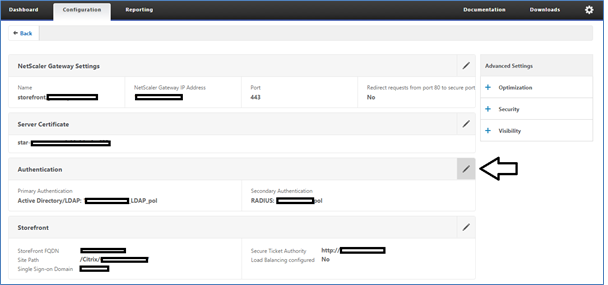
Set Secondary Authentication Method to RADIUS and enter the TOTPRadius settings: IP address 10.0.0.20, port 1812, and the RADIUS secret generated in Step 1.
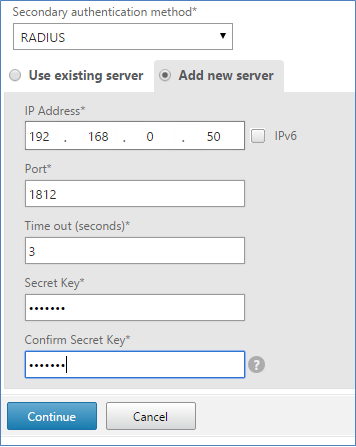
Click Continue, then Done. NetScaler now asks for two passwords (Password 2 is the code).
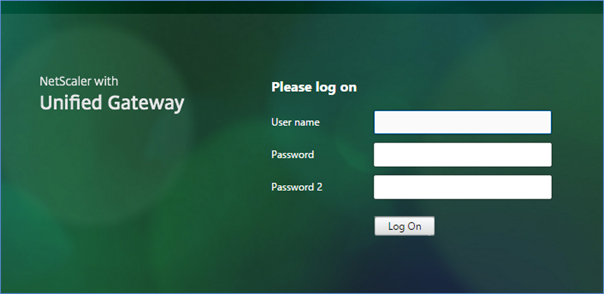
EXAMPLE\asmith or [email protected], TOTPRadius may receive a name that differs from the enrolled user. In 0.4 user names match exactly, so such a request normally fails with unknown_user – but on a migrated policy with the legacy initial-login option of Step 4 it could be accepted. Setting the policy's Domain prefix and suffix to Strip maps all spellings to asmith.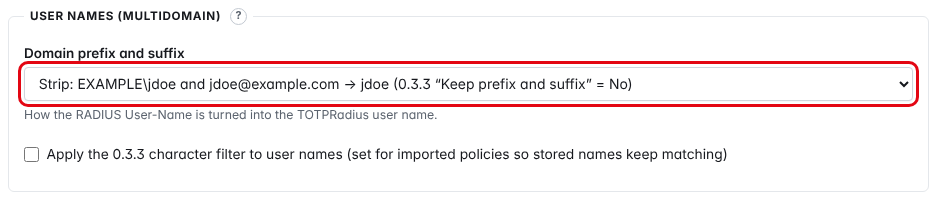
Step 3. Install the StoreFront integration package (self-enrolment)
The StoreFront package talks to TOTPRadius through API v1 (the 0.3.x-compatible API). First create a key for it:
- Open Settings → API keys, New key: Name
Citrix StoreFront, Type API v1 key (StoreFront, /validate, /createuser), optionally Allowed networks = the StoreFront servers' addresses. Press Create and copy the key (shown once). - Make sure the StoreFront servers reach the appliance's admin address over HTTPS (TCP 443) and trust its certificate (Certificates, slot admin).
Download the TOTPRadius StoreFront integration package and run the installer as administrator on every StoreFront server of the cluster.
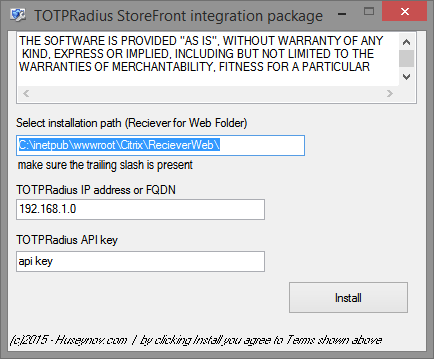
► Specify the folder where your Receiver for Web website is located, with a trailing slash.
► Enter the address of the TOTPRadius appliance. Use the host name of the admin certificate (for example radius.example.com) if DNS is configured on all three components (NetScaler, TOTPRadius and StoreFront).
► Enter the API v1 key created above.
<YOUR_WEB_URL>/DomainPassthroughAuth/test.aspx: the page shows the current user's domain, user name and authentication type.Step 4. How users get their first token
The StoreFront status bar appears only after the user has logged in, and the NetScaler logon already asks for the code. In 0.3.x, Allow initial login let users without a token log on once and enable TOTP in StoreFront. In 0.4, initial logins check the password – and an OTP-only policy, as used here, has no password to check. So with 0.4 the user needs a token before the first NetScaler logon:
Recommended: enrol on the self-service portal before the first logon
Users enrol on the self-service enrolment portal with their Windows password – https://radius.example.com/ldap-enroll/ inside the network or https://vpn.example.com:9443/vpn/ldap/ from outside (see Self-service enrolment) – or the administrator enrols them. The portal checks the directory password, so nobody can enrol a token for someone else's account. Keep Allow initial login at 0. The StoreFront status bar then shows the TOTP status and lets users re-enrol where allowed.
Appliances migrated from 0.3.x: the legacy initial-login option
validate; StoreFront checks the password itself).If the appliance was imported from a 0.3.x appliance that used Allow initial login in OTP-only mode, the migrated OTP-only policy shows the extra option Initial logins accept any password (0.3.3 behaviour – insecure, migration only) (off after the import). New policies, including the Quick-setup policy, do not offer it. Only on such a migrated policy can you keep the 0.3.x behaviour while users move to the enrolment portal: open Settings → Policies, the migrated policy of the NetScaler's NAS client, set Allow initial login to 1 and tick the option.

Enrolment process in StoreFront
StoreFront uses API calls to check whether the current user has TOTP enabled on the TOTPRadius server.
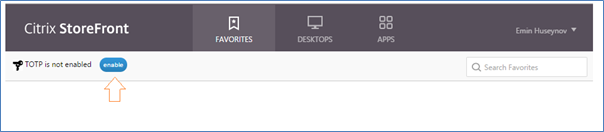
To enable TOTP, users click enable, then OK on the next pop-up.
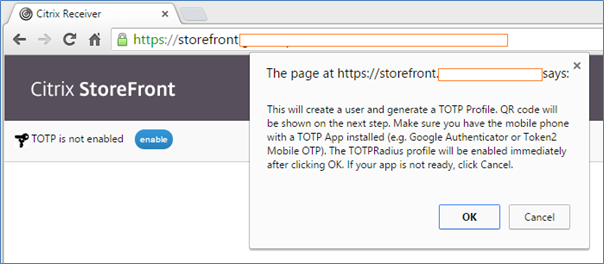
StoreFront then calls TOTPRadius, which shows a QR code; the user scans it with a TOTP app (Token2 TOTP+, Google Authenticator, Microsoft Authenticator …) and confirms with the code. At the next logon the user enters the code from the app in Password 2. Users who enrolled themselves appear on the TOTPRadius Users page and can be edited, disabled, banned or deleted by administrators.
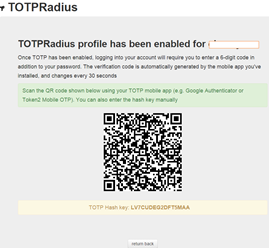
Test
- Open Settings → Test authentication, choose the NetScaler's NAS client, enter User-Name
asmithand the current Code (no password: OTP only), and press Test. The last line must read Access-Accept. - Then log on through NetScaler with the AD password and the code.
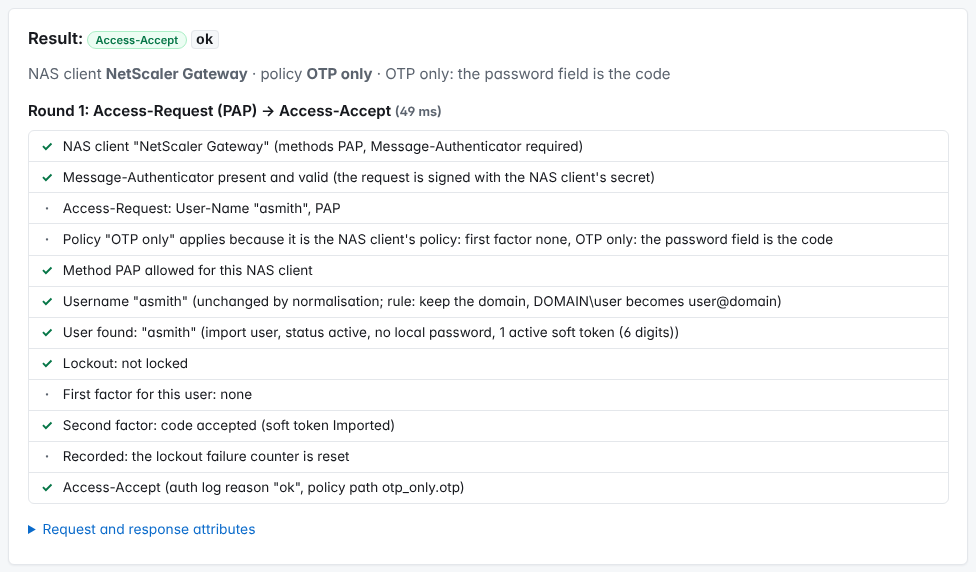
Troubleshooting
| Reason in the authentication log | What to check |
|---|---|
| no entry at all | NetScaler sends from another address (often the SNIP, not the NSIP), the firewall blocks UDP 1812, or Message-Authenticator is missing: see Dropped requests (last 24 h) on the NAS clients page; untick Require Message-Authenticator for this client if needed. |
unknown_user | The user name differs from the TOTPRadius user (domain prefix or suffix): send the user name only, or use Strip. |
no_token | The user has no token yet: let the user enrol on the self-service portal (Step 4). |
otp_invalid, replay | Wrong or reused code; check the phone's clock. |
StoreFront bar: wrong API key | The API v1 key in the package is wrong, deleted or restricted to other networks. |
36. How to Set Up 2-Factor Authentication in VMware Horizon View with TOTPRadius
VMware Horizon (View) lets users reach a virtual desktop from anywhere – from the office, from home or from any other place with a network connection to the Horizon infrastructure.
This guide describes how to secure external connections and allow only specific users or groups to connect to Horizon from outside, using two-factor authentication with hardware tokens or mobile apps through our TOTPRadius solution.
Prerequisites
- vSphere infrastructure correctly configured for Horizon
- Horizon correctly configured (Connection Server, Security Server / Unified Access Gateway)
- A TOTPRadius 0.4 appliance (see Installation and initial configuration)
- Administrative access to both TOTPRadius and Horizon
- Example values: appliance
radius.example.com(10.0.0.20), Connection Server192.0.2.40, domain controllerdc1.example.com, usernsatoin groupVPN Users
Step 1. Configure TOTPRadius
Horizon sends the AD password and the code together in one field, so TOTPRadius checks both: the 0.3.x "LDAP proxy" mode.
- Open Settings → Quick setup.
- 1. RADIUS: Generate a strong one (shown once after saving); Endpoint IP and subnet = the Connection Server's address,
192.0.2.40(one per line if you have several); Allowed methods PAP; keep Require Message-Authenticator on unless Horizon's requests are dropped. - 2. Login mode: LDAP password + code in one field; Allow initial login
0. - 3. LDAP: LDAP enabled, LDAP server
ldaps://dc1.example.com, Username format%username%@example.com, LDAP search stringdc=example,dc=com, optionally LDAP GroupVPN Users; Fetch certificate → Trust this CA; check with Test LDAP. - 4. LDAP enrollment (self-service): tick Allow LDAP enrollment if users should enrol themselves.
- Press Save and copy the generated secret.
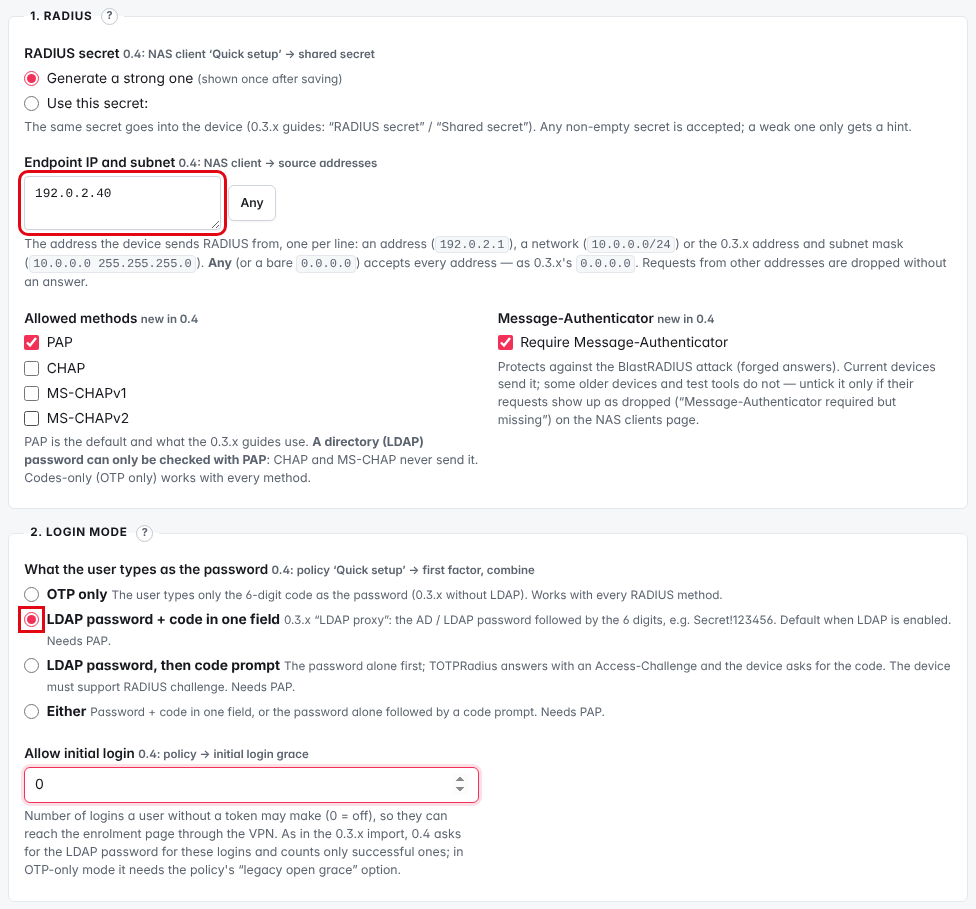
Step 2. View Connection Server setup
Connect to the Horizon Connection Server administration console as administrator.
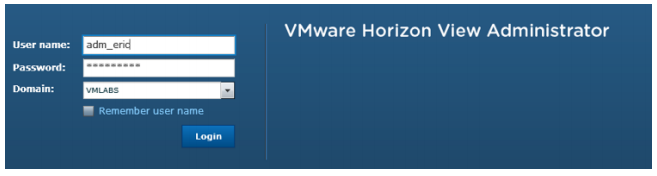
Select the Connection Server you want to use:
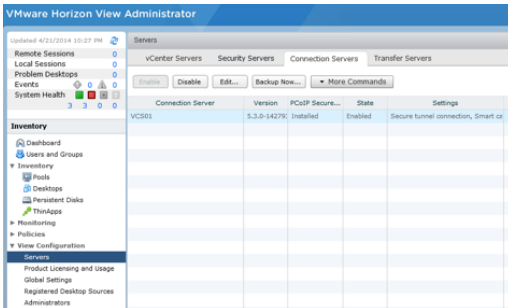
On the Authentication tab, select RADIUS as Advanced Authentication:
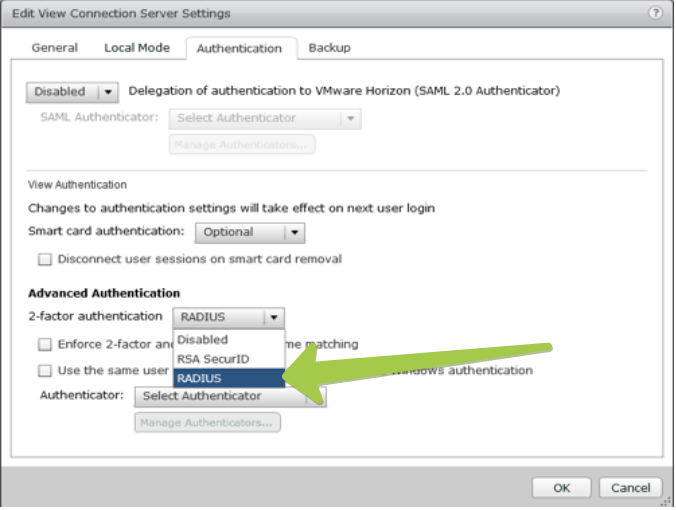
- Check Enforce 2-factor and Windows user name matching.
- Select Create New Authenticator.
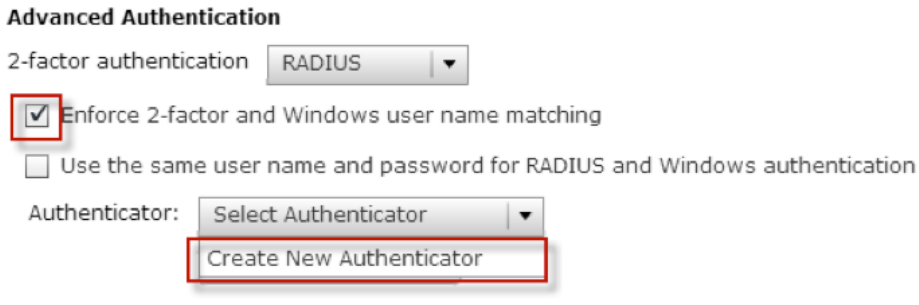
- Specify the Label, for example
TOTPRadius. - Specify the Hostname/Address: the FQDN or IP address of TOTPRadius (
10.0.0.20), authentication port 1812, authentication type PAP. - Specify the Shared secret: the RADIUS secret generated in Step 1.
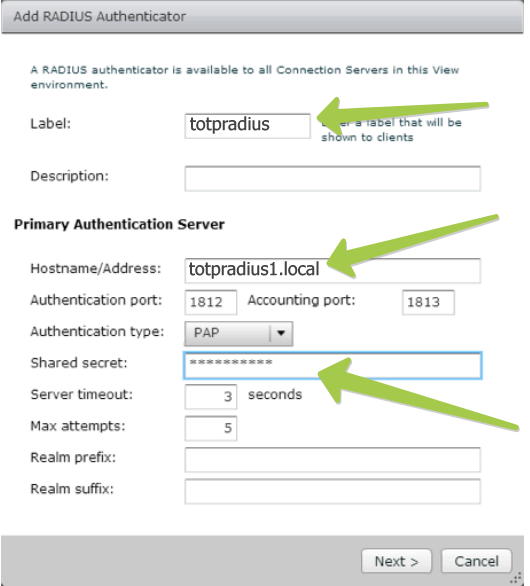
For production, add a second RADIUS server: a replica of a TOTPRadius cluster.
Step 3. Add users
Horizon now uses TOTPRadius for two-factor authentication; users need a token. There are two methods:
Self-enrolment
Guide your users to https://radius.example.com/ldap-enroll/ (inside the network) or https://vpn.example.com:9443/vpn/ldap/ (from outside, if the portal is published). They sign in with their Windows password and scan a QR code, or associate a hardware token by serial number. See Self-service enrolment.
Creating users in the admin console
Click + New user, enter the Windows user name and choose Enrol a token now: Authenticator app (the QR code for Token2 TOTP+, Microsoft Authenticator, Google Authenticator or any RFC 6238 app is shown after saving), Hardware token from the inventory (choose the token's serial number) or Key with HID-HOTP. For an existing user open Assign a hardware token on the user page. Programmable tokens can be burned from the QR code with one of the NFC Burner apps.
Test
- Open Settings → Test authentication, choose the Horizon NAS client (Quick setup), enter the user, the AD password and the current code, and press Test. The last line must read Access-Accept.
- Then connect with the Horizon client: enter the user name and, in the password field, the AD password immediately followed by the code (no space). For example password
Winter2026!and code123456:Winter2026!123456.
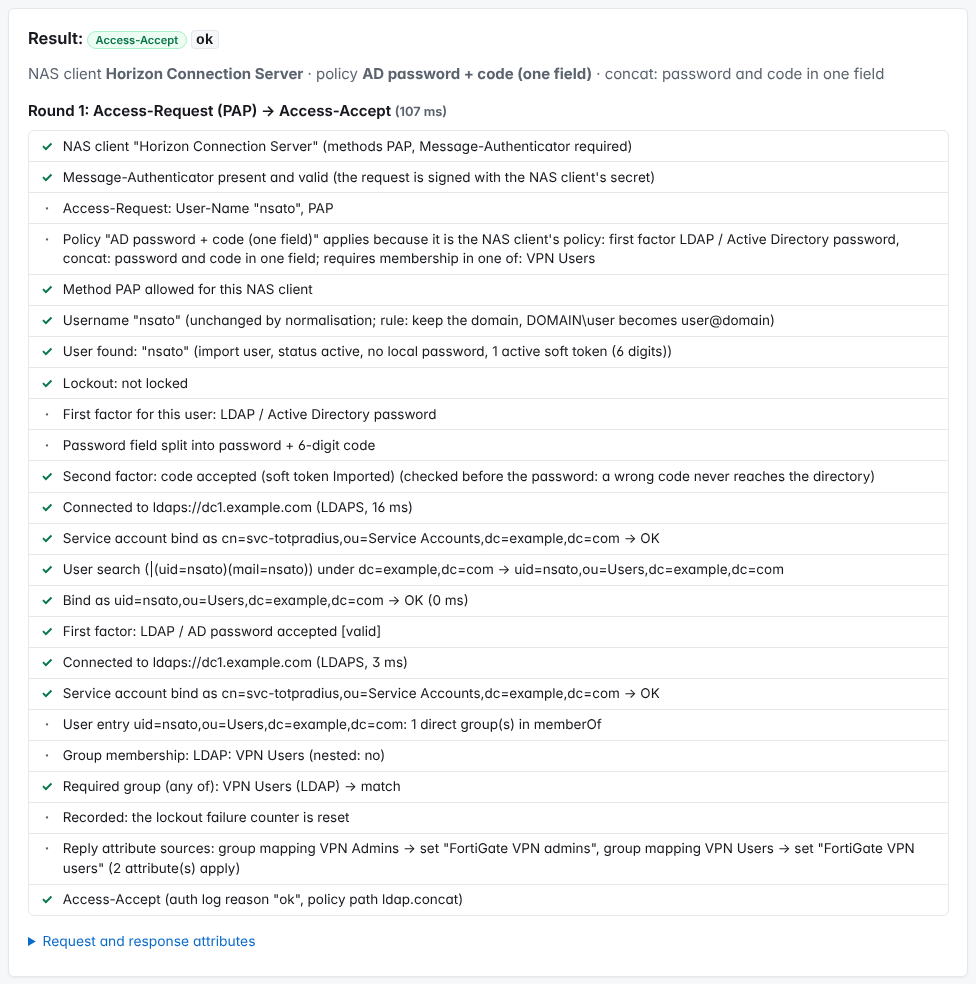
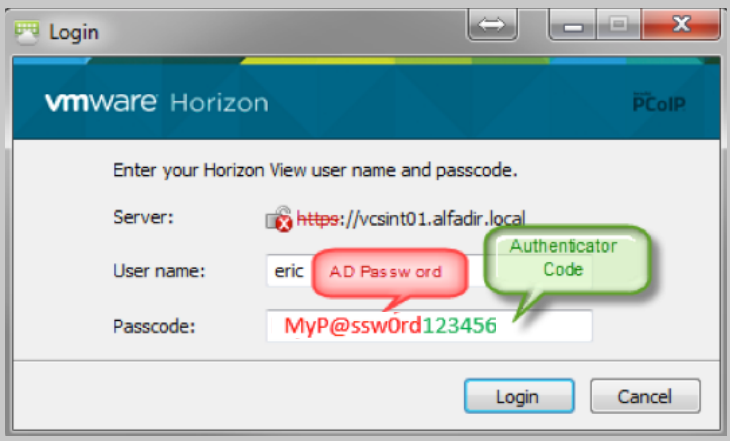
If everything works, the second logon screen appears and you type your AD password only again. This is a design of Horizon for any two-factor method, not caused by TOTPRadius.
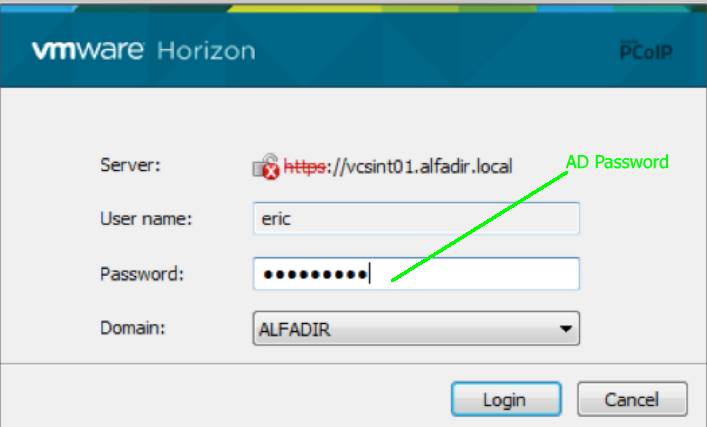
Troubleshooting
| Reason in the authentication log | What to check |
|---|---|
| no entry at all | Wrong endpoint address, UDP 1812 blocked, or Message-Authenticator missing: see Dropped requests (last 24 h) on the NAS clients page. |
otp_missing, otp_malformed | The code was not appended to the password, or not exactly 6 digits. |
otp_invalid | Wrong code; check the phone's clock or the token drift. |
first_factor_invalid | Wrong AD password. A different shared secret does not show up here: with Require Message-Authenticator on, the request is dropped and listed under Settings → NAS clients → Dropped requests (last 24 h) as Message-Authenticator wrong (no log entry). |
group_not_allowed | The user is not in the LDAP group. |
unknown_user | The user has no TOTPRadius record yet (enrol a token) or Horizon sends another spelling (EXAMPLE\user): add an alias or adjust the policy's user-name rule. |
37. Using TOTPRadius with Barracuda CloudGen Firewall

Barracuda CloudGen Firewall can be configured to support MFA in several modes. This guide configures two-factor authentication for the SSL VPN with Microsoft Active Directory as the first factor and TOTPRadius as the second. An additional component such as TOTPRadius is needed if you want to use classic hardware tokens or self-enrolment.
The guide is based on
- Active Directory on Windows Server (domain controller
dc1.example.com) - TOTPRadius 0.4 with the built-in 5 free user licences (
radius.example.com, 10.0.0.20) - A classic or programmable Token2 TOTP hardware token, a TOTP app, or a Token2 key with HID-HOTP
- Barracuda CloudGen Firewall (the screenshots show a VF1000 appliance; management interface
192.0.2.50in this guide)
TOTPRadius configuration
Once TOTPRadius is installed and initialised, open Settings → Quick setup (the 0.4 page with the 0.3.x "General settings" fields; full description: Quick setup):
► RADIUS secret – Generate a strong one (shown once after saving).
► Endpoint IP and subnet – 192.0.2.50, the address the Barracuda firewall sends RADIUS from. (Optional in 0.3.x; in 0.4 requests from other addresses are not answered unless you choose Any.)
► Allowed methods – PAP; ► Require Message-Authenticator – keep it ticked; untick it only if the firewall's requests are listed as Message-Authenticator required but missing under Settings → NAS clients → Dropped requests.
► Login mode – LDAP password + code in one field.
► Allow initial login – 0.
► LDAP enabled – ticked; ► LDAP server – ldaps://dc1.example.com (then Fetch certificate → Trust this CA) or the IP address for plain LDAP; ► Username format – %username%@example.com or EXAMPLE\%username%.
► Allow LDAP enrollment – tick it to allow self-enrolment. In the same section you can allow re-enrollment and set the intro text of the enrolment page.
Press Save and copy the Generated RADIUS secret.
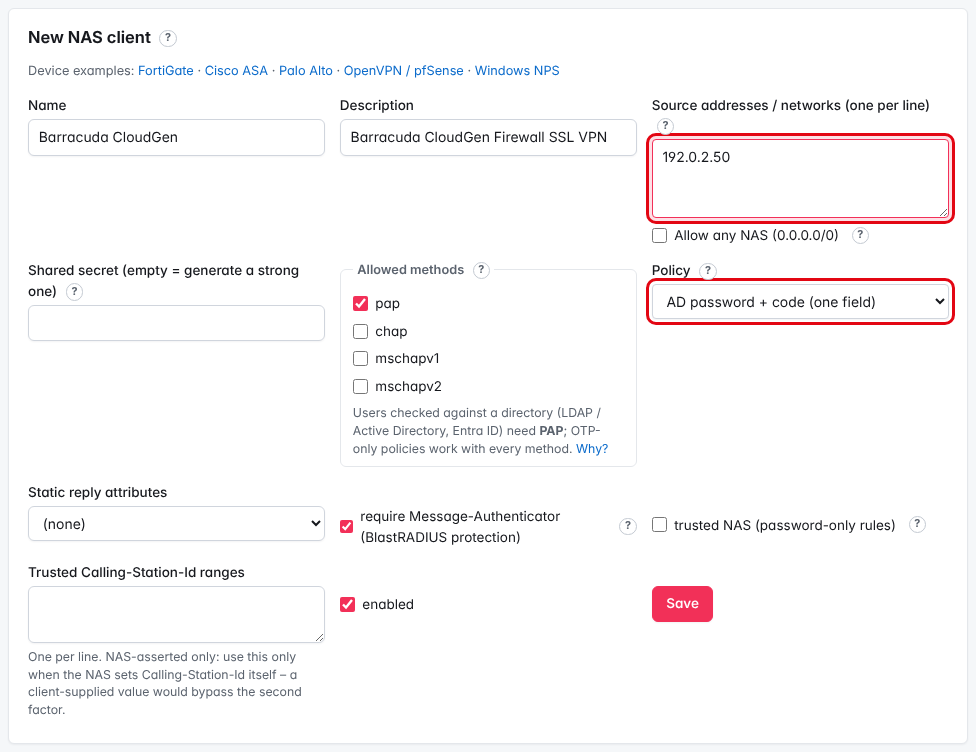
Give the user a second factor
There are two ways:
- Self-enrolment. Users sign in at
https://radius.example.com/ldap-enroll/with their AD password and enrol a TOTP app (Google Authenticator, Microsoft Authenticator …), or associate a hardware token from the inventory. With programmable tokens you can burn the seed by scanning the QR code with one of the NFC Burner apps. See self-service enrolment methods. - By the TOTPRadius administrator. Press + New user, enter the AD user name and choose under Enrol a token now an Authenticator app, a Hardware token from the inventory (serial number) or a Key with HID-HOTP.
http://<ip>/ldap-enroll. In 0.4 it uses HTTPS; hardware tokens are imported into the inventory (Managing hardware tokens) and assigned by serial number.Configure Barracuda CloudGen Firewall
Configure a RADIUS server
- Log in to the Barracuda CloudGen Firewall with Barracuda NextGen Admin:
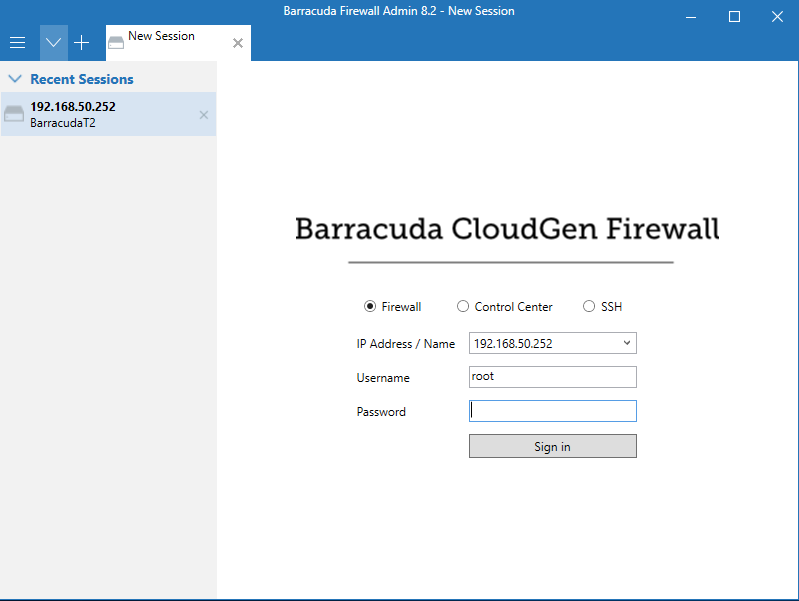
- Select Configuration > Configuration Tree > Box > Infrastructure Services > Authentication Service.
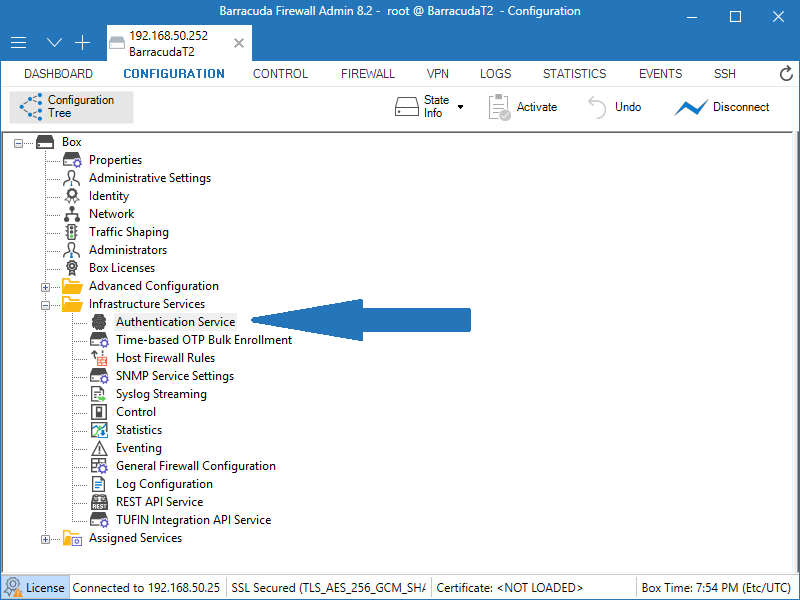
- From the navigation menu, select RADIUS Authentication.
- Click Lock.
- From the Configuration Mode section of the navigation menu, select Advanced View.
- In the Radius Authentication section, from the Activate Scheme drop-down list, select Yes.
- From the Method drop-down list, select RADIUS.
- For Basic, click + to add a RADIUS server.
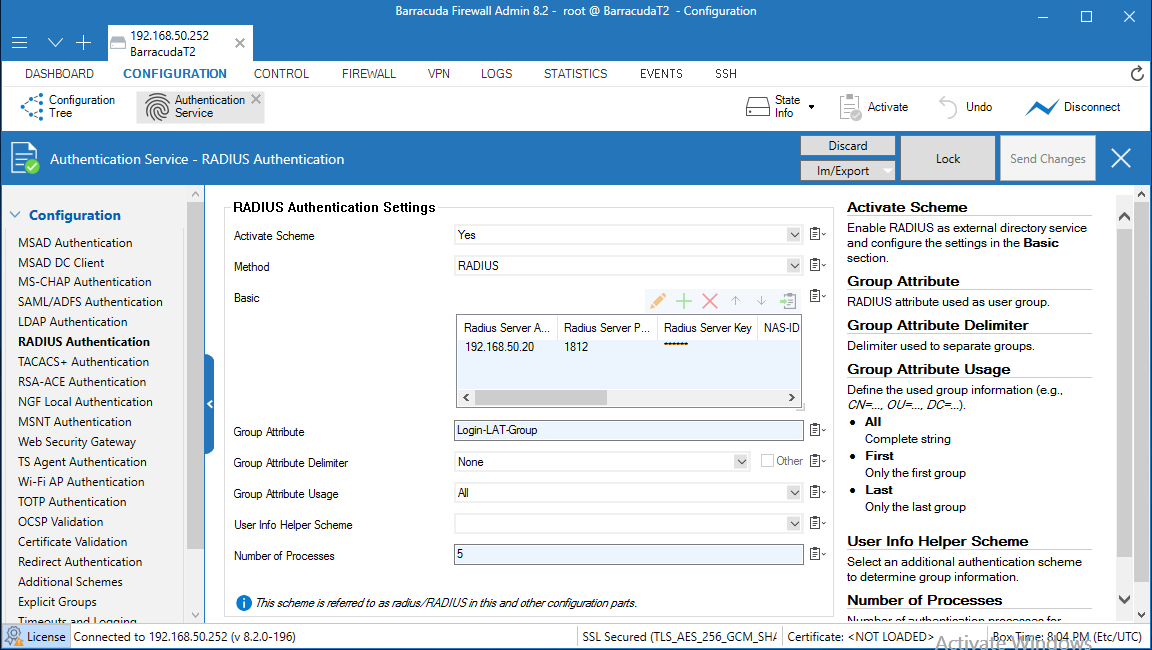
- In Radius Server Address, type the IP address of TOTPRadius (
10.0.0.20). - In Radius Server Port, type
1812. - For Radius Server Key, type the RADIUS secret generated in TOTPRadius.
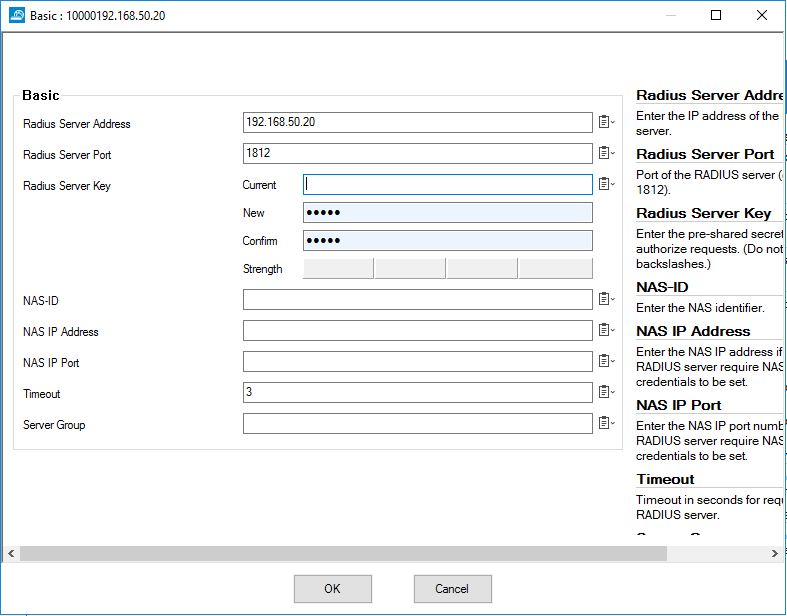
- Click OK. Leave the default values for the other settings.
- Click Send Changes.
- Click Activation Pending.
Create an SSL VPN server
- Select Configuration > Configuration Tree > Box > Assigned Services.
- Right-click Assigned Services and select Create Service.
- From the Enable Service drop-down list, select Yes.
- Type a Service Name. It must be unique and contain more than six characters; it cannot be changed later.
- From the Software Module drop-down list, select VPN Service.
- From the Service Availability drop-down list, select First + Second-IP.
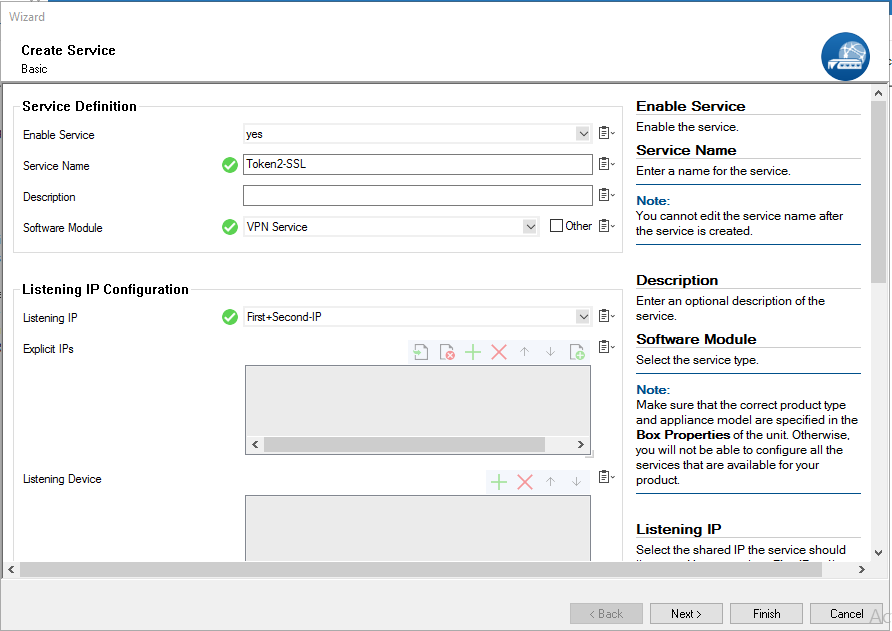
- Click Next.
- Leave the default settings on the Statistics and Access Notification pages.
- Click Finish.
- Click Activate.
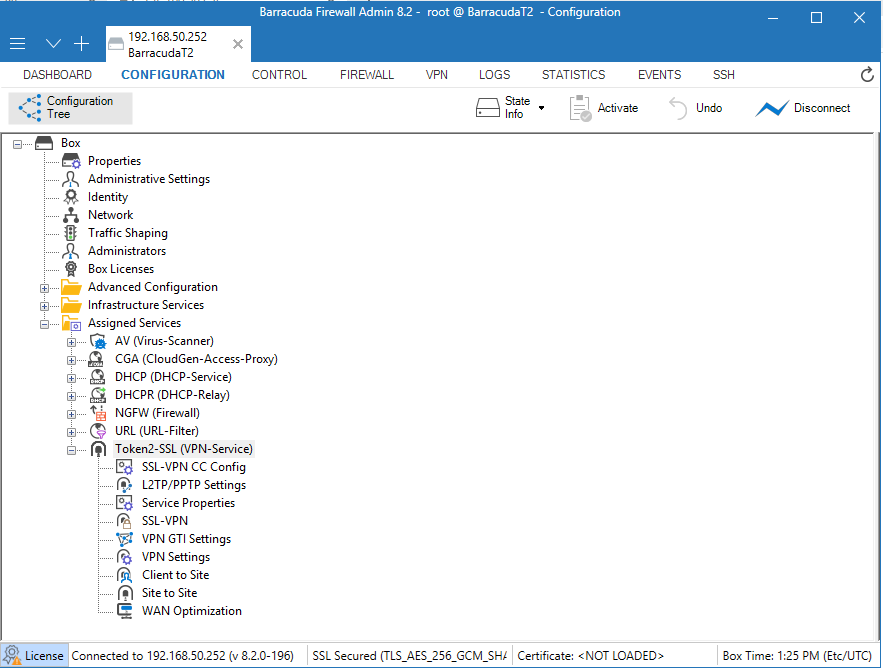
Disable port 443 for site-to-site and client-to-site VPN
- Select Configuration > Configuration Tree > Box > Assigned Services > VPN-Service > VPN Settings.
- Click Lock.
- Click Click here for Server Settings. The Server Settings window appears.
- Untick Listen on port 443.
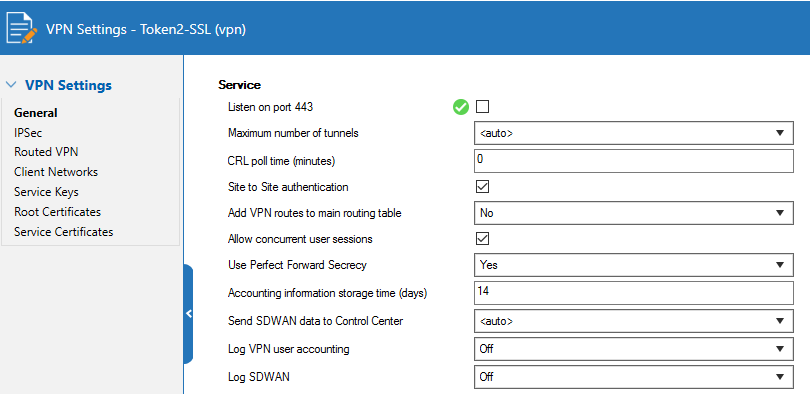
Configure the SSL VPN server settings
- Select Configuration > Configuration Tree > Box > Assigned Services > VPN-Service > SSL-VPN.
- From the Enable SSL VPN drop-down list, select Yes.
- Next to Listen IPs, click + and add the external IP address the SSL VPN listens on (usually the address used to connect to the internet).
- Select the Restrict to Strong Ciphers Only check box.
- From the Identification Type drop-down list, select Generated-Certificate.
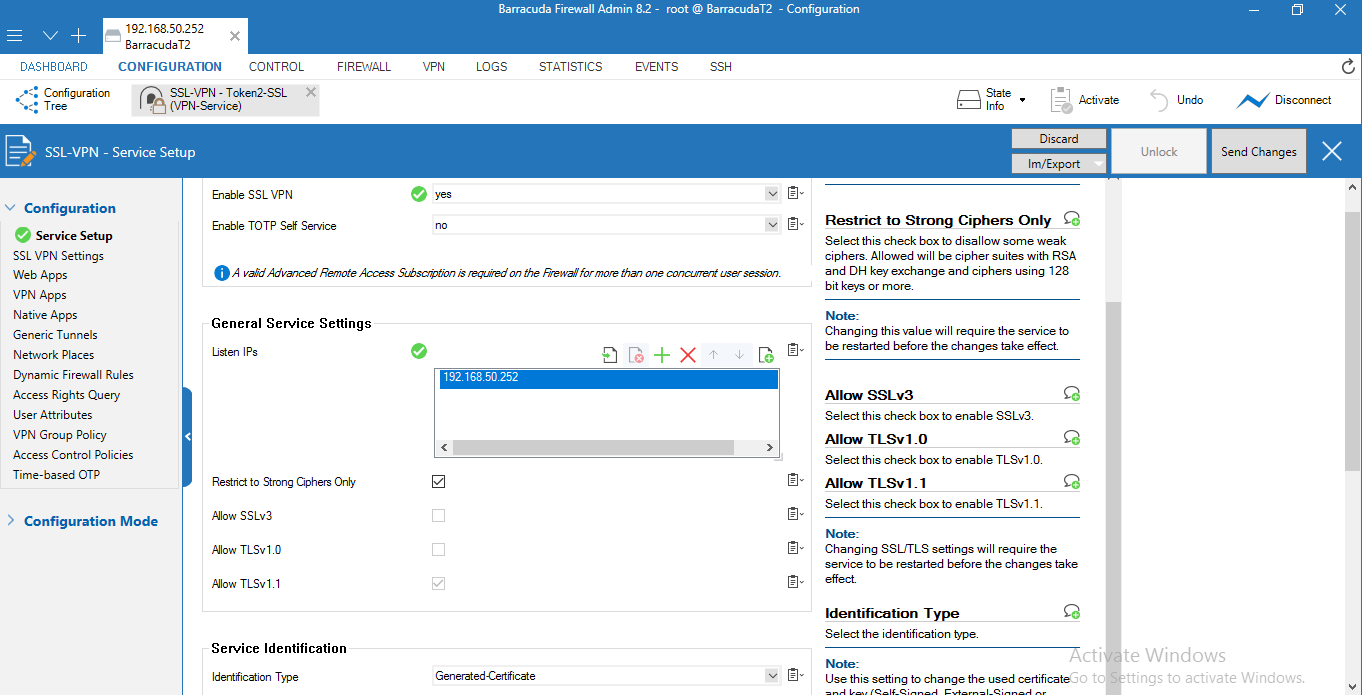
- From the navigation menu, select SSL VPN Settings.
- From the Identity Scheme drop-down list, select RADIUS.
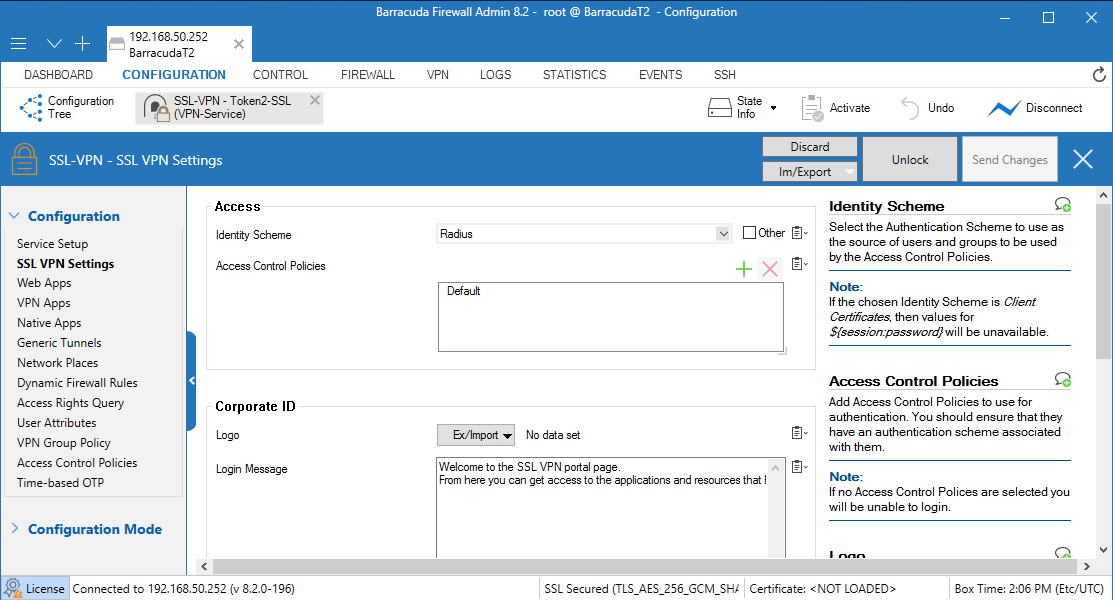
- Click Send Changes, then Activate.
- From the navigation menu, select Access Control Policies and edit the Default policy.
- Next to Authentication Schemes, click + and add RADIUS.
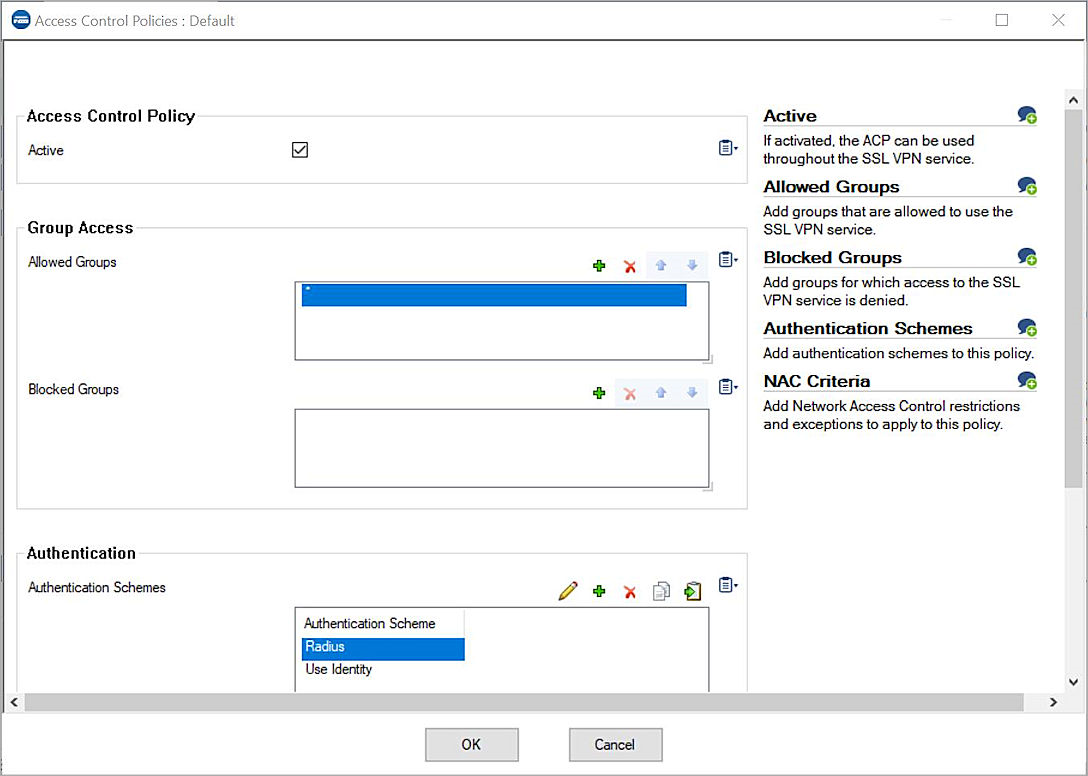
- Click OK, Send Changes and Activate.
Test the integration
- In TOTPRadius open Settings → Test authentication, choose the firewall's NAS client (Quick setup or your own), enter the user, the AD password and the current code, and press Test. The last line must read Access-Accept. See Testing TOTPRadius authentication.
- In Barracuda NextGen Admin select Configuration > Configuration Tree > Box > Assigned Services > VPN-Service > SSL-VPN > Native Apps, click + next to Native Apps and add an RDP App.
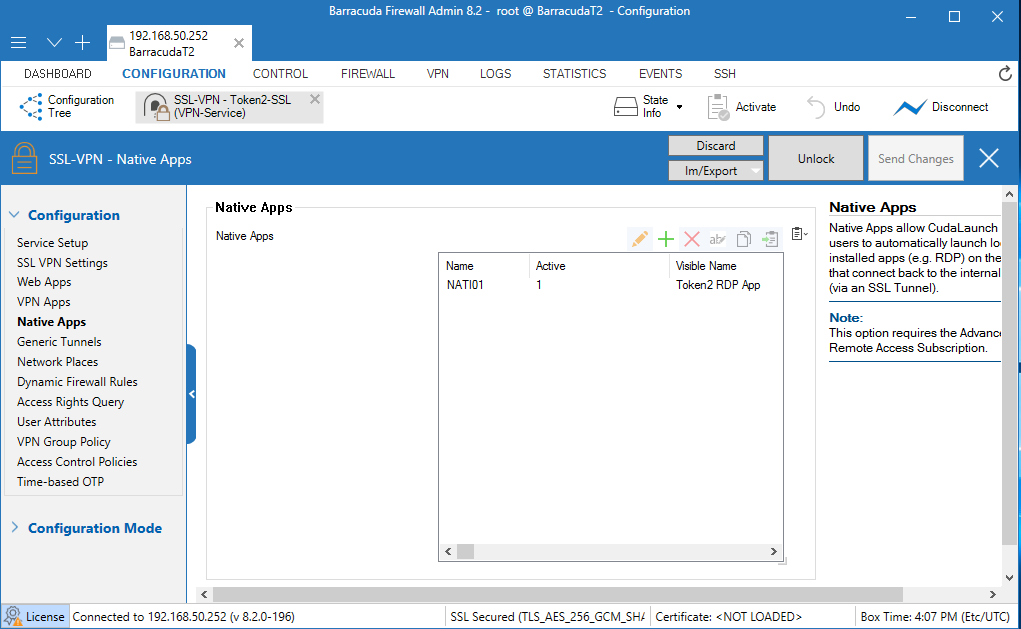
- Run the CudaLaunch client (download it from the Barracuda download portal), type the IP address of the firewall and click Connect.
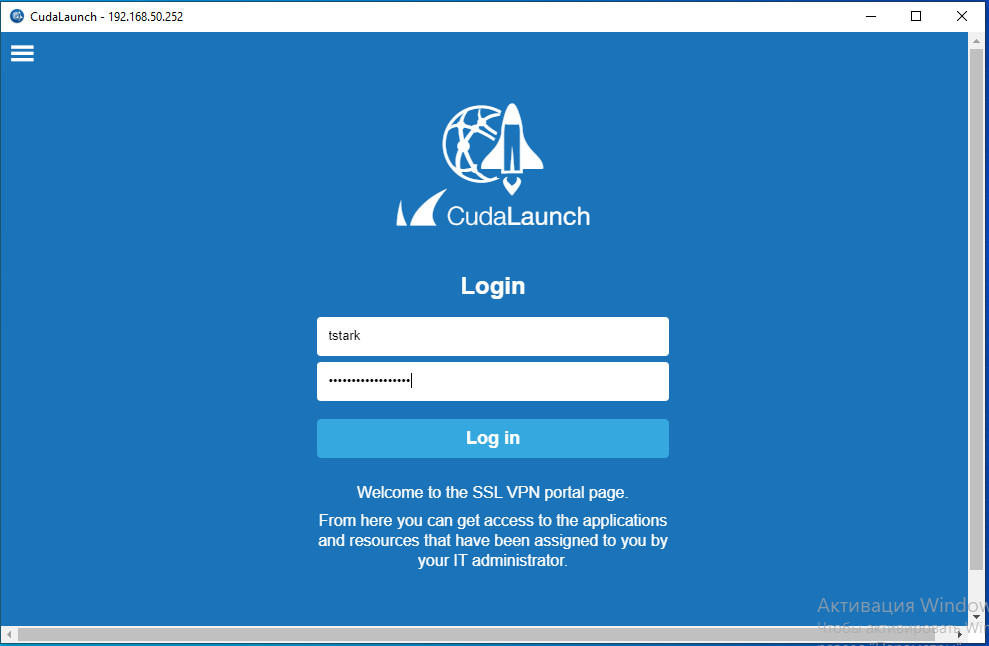
- In the Server certificate error dialog box, click Yes – only for a lab test; in production give the SSL VPN a trusted certificate so that this dialog does not appear.
- In Username, type the AD user name. In RADIUS Password, type the AD password followed by the code from the token, without a space. Example: password
Passwordand code123 789→Password123789. - Click Log in, then the RDP app to run it.
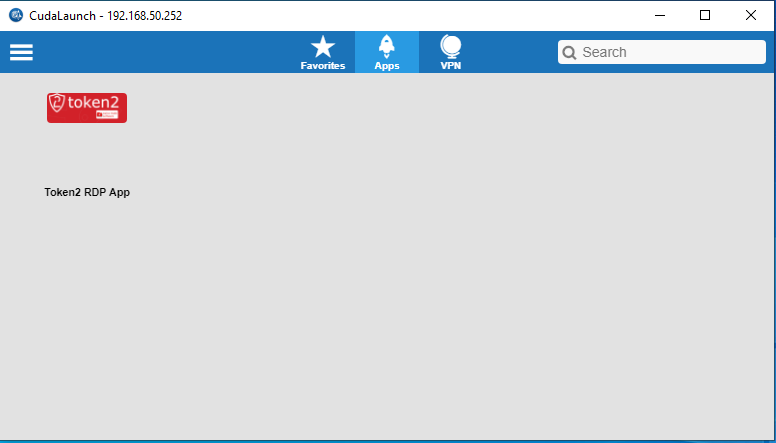
Troubleshooting
| Reason in the authentication log | What to check |
|---|---|
| No entry, CudaLaunch login times out | The firewall's source address is not covered by the endpoint, or Message-Authenticator is missing: see Settings → NAS clients → Dropped requests (last 24 h). |
otp_missing | The user typed only the password. |
otp_invalid | Wrong code; check the token clock with the drift tool on the user page. |
first_factor_invalid | Wrong AD password, a space typed between password and code, or Username format does not match the domain. |
ldap_chap_unsupported | The firewall does not use PAP. |
38. Hardware tokens for PPTP VPN on Windows Server using TOTPRadius

TOTPRadius can add hardware tokens as the second factor to a Windows Server (Routing and Remote Access) VPN. You can enrol the same tokens as in Entra ID (Azure MFA), so users can use one hardware token for Microsoft 365 and VPN access.
The Windows VPN server can use an external RADIUS server as the authentication source, so two-factor authentication can be implemented with the Token2 TOTPRadius appliance. In this guide TOTPRadius runs in LDAP proxy mode: users type their Active Directory password immediately followed by the 6-digit code in the normal password field.
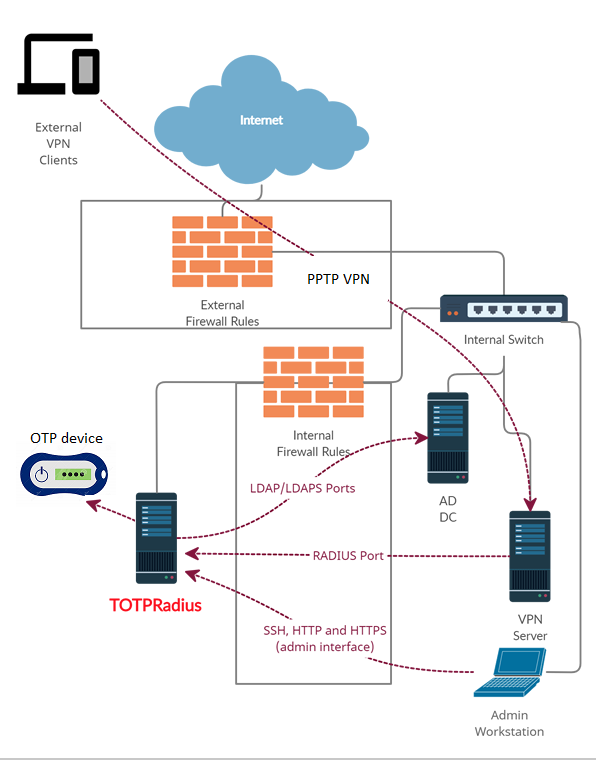
TOTPRadius splits the password field, checks the code first and, if it is correct, checks the password against Active Directory.
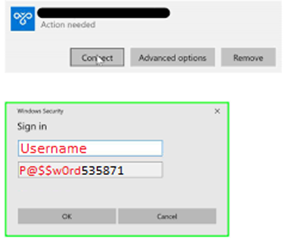

The setup in this guide is based on
- Active Directory on Windows Server (domain controller
dc1.example.com) - TOTPRadius 0.4 with the built-in 5 free user licences (
radius.example.com, 10.0.0.20) - A classic or programmable Token2 TOTP hardware token, a TOTP app, or a Token2 key with HID-HOTP
- Windows Server with the Routing and Remote Access role as VPN server (
192.0.2.40)
Step 1. Configure TOTPRadius
Open Settings → Quick setup (full description: Quick setup):
- 1. RADIUS: ► RADIUS secret – Generate a strong one; ► Endpoint IP and subnet –
192.0.2.40(the VPN server); ► Allowed methods – PAP only; ► Require Message-Authenticator – ticked (enable the matching option on the VPN server in Step 2). - 2. Login mode: LDAP password + code in one field; Allow initial login
0. - 3. LDAP: ► LDAP enabled ticked; ► LDAP server
ldaps://dc1.example.com(then Fetch certificate → Trust this CA); ► Username formatEXAMPLE\%username%or%username%@example.com; ► LDAP search stringDC=example,DC=com(or empty / Detect). Check with Test LDAP. - 4. LDAP enrollment (self-service): tick Allow LDAP enrollment if users should enrol their tokens themselves.
- Press Save and copy the Generated RADIUS secret for the VPN server.
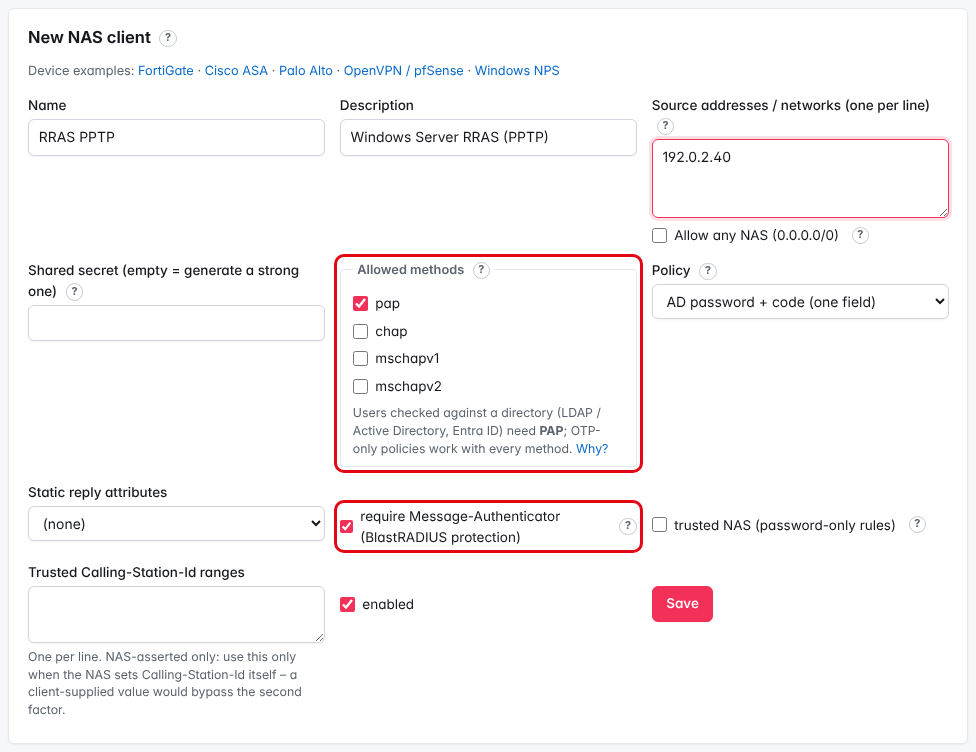
ldap_chap_unsupported). MS-CHAPv2 works only with OTP-only policies or local passwords on TOTPRadius, and only when the policy lists the VPN server under MS-CHAPv2 accepted from – see Authentication modes and methods.Step 2. Configure the RADIUS server in Routing and Remote Access
Right-click the VPN server name, click Properties, open the Security tab and click Configure next to RADIUS Authentication:
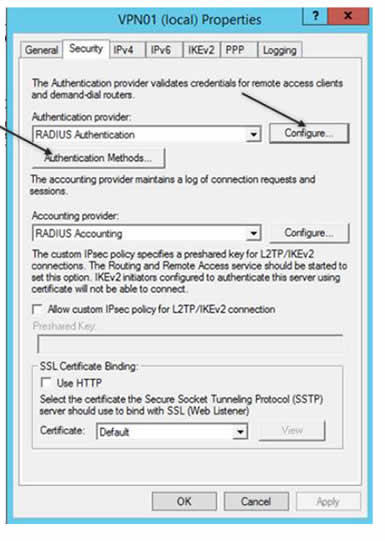
Add the RADIUS server: the TOTPRadius IP address 10.0.0.20 and the shared secret from Step 1. Tick Always use message authenticator (the screenshot below was taken with it unticked):
► Time-out (seconds) – longer than the directory timeout of TOTPRadius (5 seconds per LDAP call).
Then click Authentication Methods and leave only Unencrypted password (PAP):
Step 3. Give the user a second factor
There are two ways:
- Self-enrolment. With Allow LDAP enrollment on, users sign in at
https://radius.example.com/ldap-enroll/with their AD password and enrol an authenticator app, or associate a hardware token from the inventory with its serial number and two codes (Settings → General settings → Portals → Hardware tokens → Allow hwtoken). See self-service enrolment methods. - By the TOTPRadius administrator. Press + New user, enter the AD user name and choose under Enrol a token now an Authenticator app, a Hardware token from the inventory (serial number, for example
60000104) or a Key with HID-HOTP.
Import the hardware tokens' seed file first under Hardware tokens (Entra ID / Azure MFA CSV format; see Managing hardware tokens). With programmable tokens you can burn the seed by scanning the QR code with one of the NFC Burner apps.
http://<ip>/ldap-enroll and the token's secret was pasted into the user's Token key field. In 0.4 the page uses HTTPS and tokens are assigned by serial number.Test
- In TOTPRadius open Settings → Test authentication, choose the VPN server's NAS client, enter the user, the AD password and the current code, and press Test. The last line must read Access-Accept. See Testing TOTPRadius authentication.
- On the client, set the VPN connection to allow the unencrypted password (PAP) and connect with the user name and the AD password immediately followed by the 6-digit code.
Troubleshooting
| Reason in the authentication log | What to check |
|---|---|
| No entry, the client times out | VPN server address not covered by the endpoint, or Message-Authenticator missing: see Dropped requests (last 24 h). |
ldap_chap_unsupported | The VPN server or client uses MS-CHAPv2 / CHAP: allow only PAP. |
mschapv2_not_allowed | MS-CHAPv2 with an OTP-only or local-password policy that does not accept it from this NAS client. |
otp_missing | The user typed only the password. |
first_factor_invalid | Wrong AD password, or Username format does not match the domain. |
39. TOTPRadius : MFA for SSH access to Cisco switches

Cisco switches do not natively support two-factor authentication; a third-party solution is required. This guide configures two-factor authentication for SSH on a Cisco Catalyst 3750 switch, with the Active Directory password as the first factor and a TOTPRadius code as the second. It may suit other Catalyst models as well.
The guide is based on the following components:
- Active Directory (domain controller
dc1.example.com) - TOTPRadius 0.4 with the built-in 5 free user licences (
10.0.0.20) - Classic or programmable Token2 TOTP hardware tokens as the second factor; TOTP mobile apps can be used as well
- Cisco Catalyst 3750 series switch (management interface
192.0.2.77)
Step 1. Configure TOTPRadius
- Open Settings → Quick setup.
- 1. RADIUS: Generate a strong one (shown once after saving) (or Use this secret); Endpoint IP and subnet
192.0.2.77(the address the switch sends RADIUS from); Allowed methods PAP – IOS sends the login password with PAP; Require Message-Authenticator on unless the switch's requests are dropped (see Troubleshooting). - 2. Login mode: LDAP password + code in one field; Allow initial login
0(no logins without a token). - 3. LDAP: LDAP enabled, LDAP server
ldaps://dc1.example.com, Username format%username%@example.com(orEXAMPLE\%username%), LDAP search stringdc=example,dc=com, optionally LDAP Group (for exampleNetwork Engineers); Fetch certificate → Trust this CA; Test LDAP. - 4. LDAP enrollment (self-service): tick Allow LDAP enrollment if engineers should enrol themselves.
- Press Save and copy the RADIUS secret.
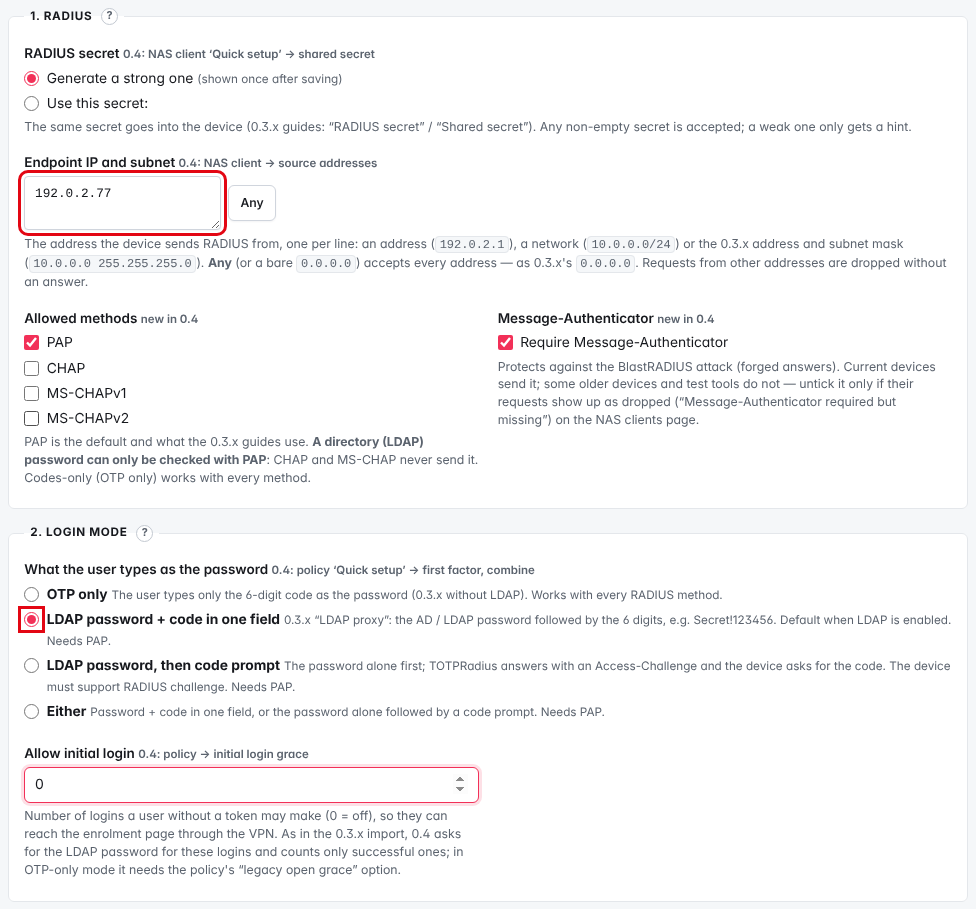
192.0.2.0/24 for all switches) with their own policy instead – see Quick setup.Optional – privilege level from TOTPRadius. To log engineers in directly at privilege level 15, create a reply attribute set with Cisco-AVPair = shell:priv-lvl=15 under Settings → Reply attributes & groups and attach it to the switches' NAS client or to a group mapping (for example group Network Engineers); on the switch add aaa authorization exec default group radius local. See Reply attributes by group membership.
Step 2. Configure the Cisco Catalyst 3750 switch
Once TOTPRadius is configured, set the switch to use it as RADIUS server. The switch's web interface is limited, so use the command line:
aaa new-model
aaa authentication login default group radius local
radius-server host 10.0.0.20 auth-port 1812 acct-port 1813 key <RADIUS secret>
► aaa new-model activates AAA on the switch.
► aaa authentication login default group radius local uses RADIUS for logins; local keeps a local account as fallback when TOTPRadius is unreachable (keep one local emergency account).
► radius-server host … points to TOTPRadius with the secret from Step 1. Add a second radius-server host line for a replica of a TOTPRadius cluster.
Use do show running-config to check that the settings were added. Newer IOS releases use the radius server <name> / address ipv4 … syntax instead of radius-server host.
The following settings activate SSH; skip them if SSH is already configured:
hostname cisco3750
ip domain-name example.com
crypto key generate rsa modulus 2048
ip ssh version 2
line vty 0 15
 transport input ssh
login authentication defaultmodulus 1024; 2048-bit keys are recommended where the switch supports them. The 0.3.x guide also used aaa authentication login default group radius without local.Step 3. Give the users a second factor
- Self-enrolment: users sign in with their Windows password on
https://radius.example.com/ldap-enroll/and scan the QR code with any TOTP app (Microsoft Authenticator, Google Authenticator, Token2 TOTP+ …), or associate a hardware token by serial number. Programmable tokens can be burned from the QR code with one of the NFC Burner apps. See Self-service enrolment. - By the TOTPRadius administrator: + New user, user name as in AD, Enrol a token now = Hardware token from the inventory (serial number of the engineer's token) or Authenticator app. Hardware tokens are added to the inventory under Hardware tokens (Hardware token management).
Test
- Open Settings → Test authentication, choose the switch's NAS client (Quick setup), enter the user, AD password and current code, and press Test: the last line must read Access-Accept.
- Log in to the switch with PuTTY or another SSH client: user name, then the AD password immediately followed by the 6-digit code.
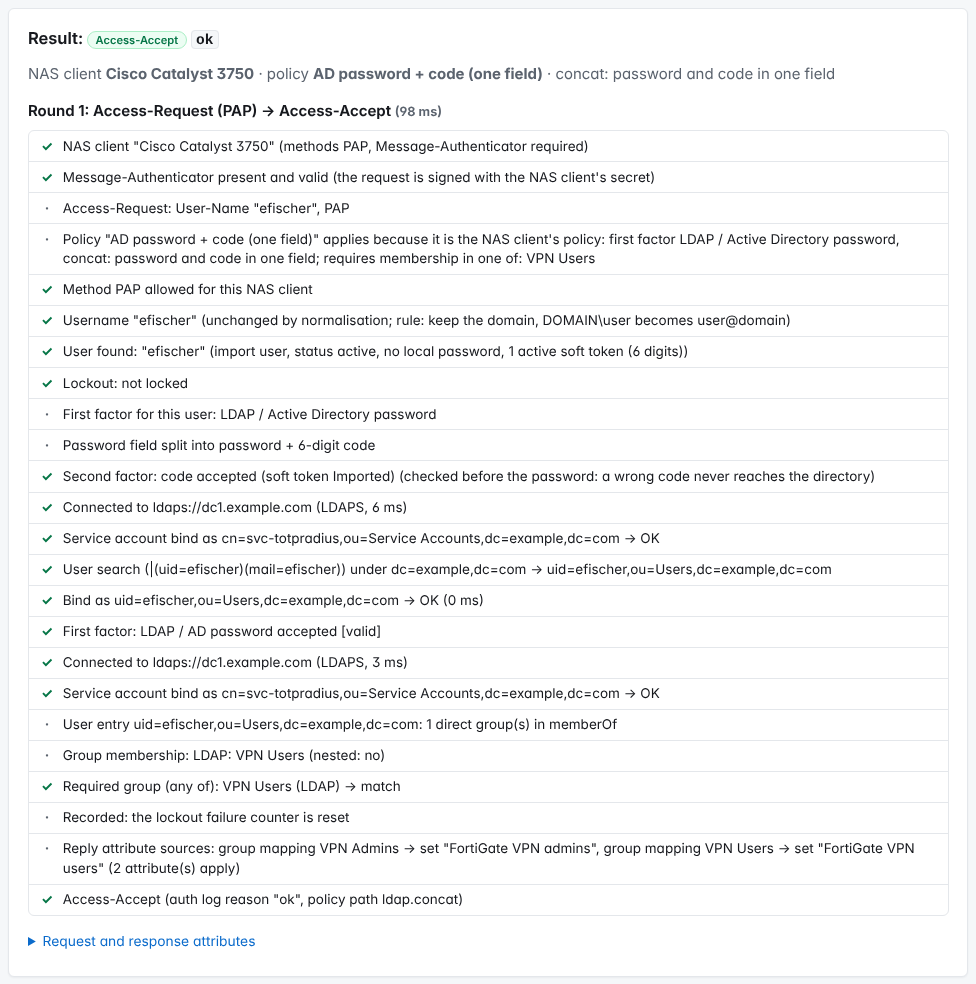
login as: efischer
[email protected]'s password: Winter2026!123456
Troubleshooting
| Reason in the authentication log | What to check |
|---|---|
| no entry at all | The switch sends from another interface address than the endpoint you entered (set ip radius source-interface on the switch, or add that address), UDP 1812 is blocked, or Message-Authenticator is missing: see Dropped requests (last 24 h) on the NAS clients page and untick Require Message-Authenticator for this client if the IOS release does not send it. |
otp_missing, otp_malformed | The code was not appended to the password, or not exactly 6 digits. |
otp_invalid | Wrong code; check the token's drift with the drift tool on the user page. |
first_factor_invalid | Wrong AD password. A RADIUS key on the switch that differs from the secret does not show up here: with Require Message-Authenticator on, the request is dropped and listed under Settings → NAS clients → Dropped requests (last 24 h) as Message-Authenticator wrong (no log entry). |
ldap_chap_unsupported | The switch uses CHAP (for example for PPP): only PAP can carry the AD password. |
group_not_allowed | The user is not in the required LDAP group. |
40. TOTPRadius : MFA-protected SSH access to Ubuntu servers with LDAP or Entra ID credentials and hardware or software tokens

SSH, the secure shell, is often used to access remote Linux systems that hold important data, so a second factor is recommended. This guide shows how to use the TOTPRadius appliance for SSH access to Ubuntu servers, with the on-premises Active Directory (LDAP) or Entra ID password as the first factor and a TOTPRadius code – from a mobile authenticator app or a hardware token – as the second.
Requirements
- A computer running Ubuntu (the 0.3.x guide was written for 16.04 LTS and later)
- SSH or console access to the Ubuntu machine
- A TOTPRadius 0.4 appliance (example
10.0.0.20) with available user licences - A phone with an authenticator app, or a hardware token, enrolled on TOTPRadius
- Active Directory (domain controller
dc1.example.com) or Entra ID as the first factor - Example Ubuntu server address:
192.0.2.60
Step 1. Install and configure PAM RADIUS on Ubuntu
Log in to the Ubuntu machine with an administrative account and install the module:
$ sudo apt-get install libpam-radius-authOpen the configuration file and add the RADIUS server:
sudo nano /etc/pam_radius_auth.confAdd the server as in the example below, where 10.0.0.20 is the TOTPRadius appliance and the shared secret is the RADIUS secret configured in Step 2:
# server[:port]   shared_secret          timeout (s)
10.0.0.20         <RADIUS secret>        10
10.0.0.21         <RADIUS secret>        10
The second line is optional: a replica of a TOTPRadius cluster, tried when the first server does not answer. (In 0.3.x this was a "slave" appliance.)
Configure the SSH server to use this PAM module. Open /etc/pam.d/sshd:
sudo nano /etc/pam.d/sshdand add the following line just before @include common-auth:
auth sufficient pam_radius_auth.soThe file should then start like this:
# PAM configuration for the Secure Shell service
auth sufficient pam_radius_auth.so
# Standard Un*x authentication.
@include common-auth
Finally, create local users whose names match the users in AD or Entra ID. This is a restriction of the PAM module: it only forwards the authentication to TOTPRadius and does not create accounts. The local password set here is not used; generate any complex one, or create the account without a password:
sudo adduser --disabled-password jsmithYou can also add users in bulk with a script like this:
sudo adduser --disabled-password --gecos "" user1
sudo adduser --disabled-password --gecos "" user2
sudo adduser --disabled-password --gecos "" user3(--gecos sets the user information field, so adduser does not ask for it.)
ChallengeResponseAuthentication / KbdInteractiveAuthentication and UsePAM settings in /etc/ssh/sshd_config if the PAM module is not called; their defaults differ between Ubuntu releases.Step 2. Configure TOTPRadius
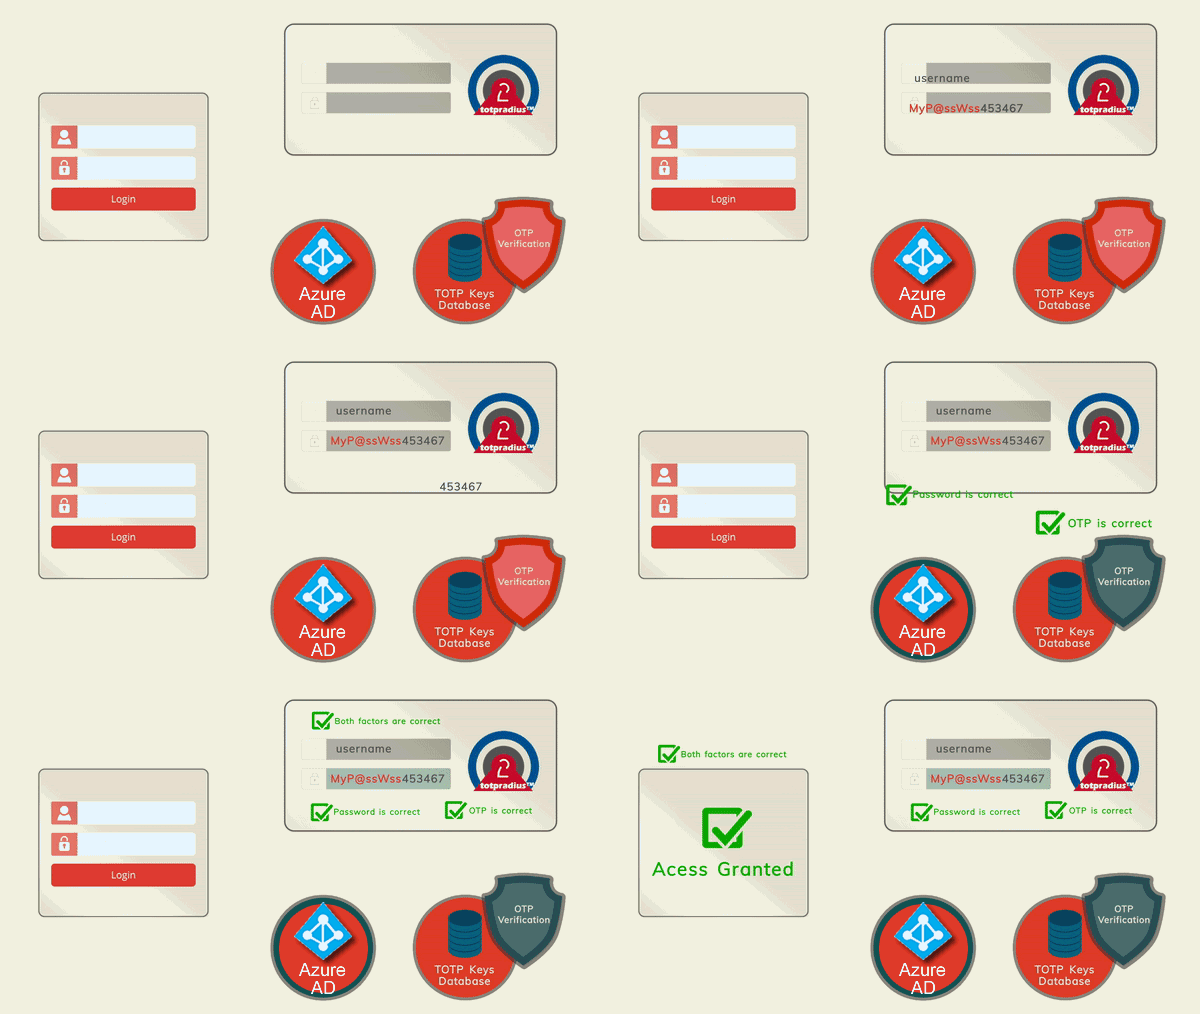
TOTPRadius is the only authentication source for SSH, so the user types the AD (or Entra ID) password immediately followed by the 6-digit code at the password prompt. TOTPRadius checks the code itself first and then the password against the directory.
- Open Settings → Quick setup.
- 1. RADIUS: Generate a strong one (shown once after saving) (enter it in
/etc/pam_radius_auth.conf); Endpoint IP and subnet = the Ubuntu servers, for example192.0.2.60or a network such as192.0.2.0/24; Allowed methods PAP. - 2. Login mode: LDAP password + code in one field; Allow initial login
0(logins without a token are not needed here). - 3. LDAP: LDAP enabled, LDAP server
ldaps://dc1.example.com, Username format%username%@example.com, LDAP search stringdc=example,dc=com; Fetch certificate → Trust this CA; Test LDAP. - 4. LDAP enrollment (self-service): tick Allow LDAP enrollment if users should enrol themselves.
- Press Save.
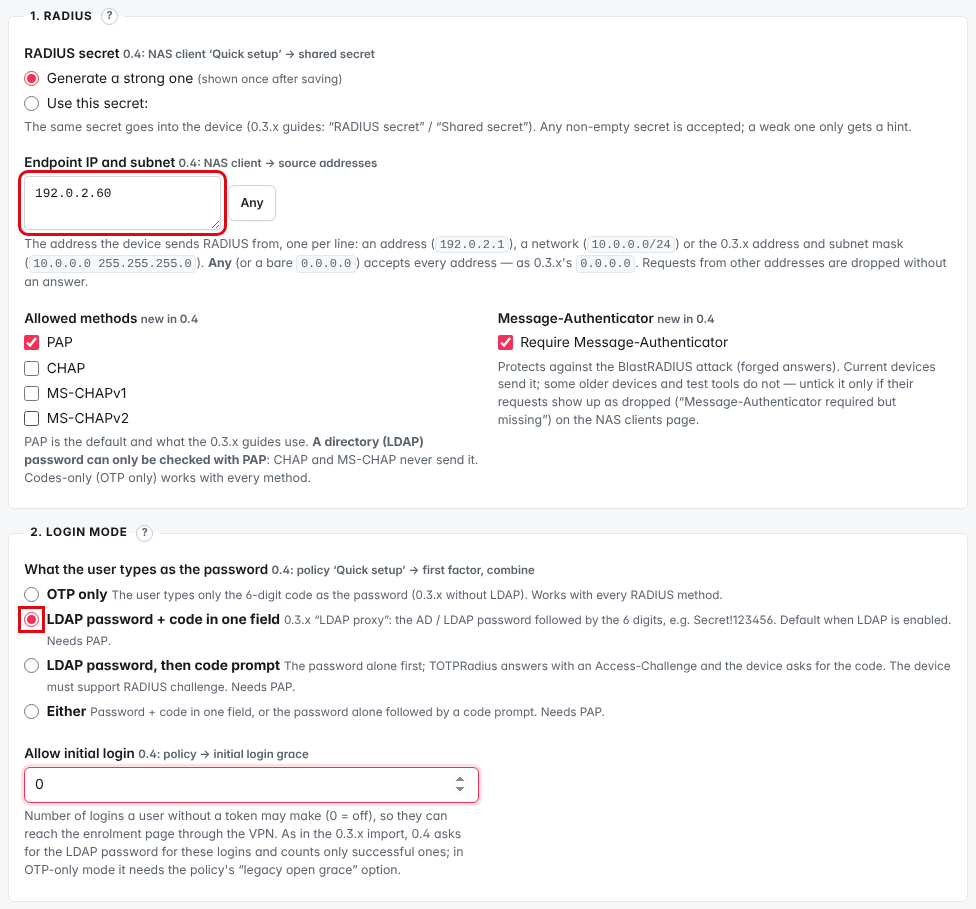
libpam-radius-auth versions may not send this attribute; their requests are then dropped and listed under Settings → NAS clients → Dropped requests (last 24 h) with "Message-Authenticator required but missing". In that case untick Require Message-Authenticator for this NAS client, or update the PAM module.Entra ID instead of Active Directory
The 0.3.x "Azure AD proxy" mode is the directory type Entra ID (legacy password check, ROPC) in 0.4 (Settings → Directories (LDAP / AD) → New, then a policy with Password checked against = Entra ID password (0.3.3 “Azure AD proxy”, legacy)). It uses the ROPC password flow with its known limitations; see Entra ID (legacy password check). Quick setup covers LDAP only.
Step 3. Give the users a second factor
- Self-enrolment: users sign in with their Windows password on
https://radius.example.com/ldap-enroll/(or the external portal/vpn/ldap/) and scan the QR code with a TOTP app (Microsoft Authenticator, Google Authenticator, Token2 TOTP+ …), or associate a hardware token by serial number. See Self-service enrolment. - By the TOTPRadius administrator: + New user, the user name as in the directory (and on Ubuntu), Enrol a token now = Authenticator app or Hardware token from the inventory.
Test
- Settings → Test authentication: choose the Ubuntu NAS client (Quick setup), enter the user, the AD password and the current code, press Test; the last line must read Access-Accept.
- Log in with SSH:
ssh [email protected], then type the password immediately followed by the code, for exampleWinter2026!123456. The user name must match the local Ubuntu user created in Step 1.
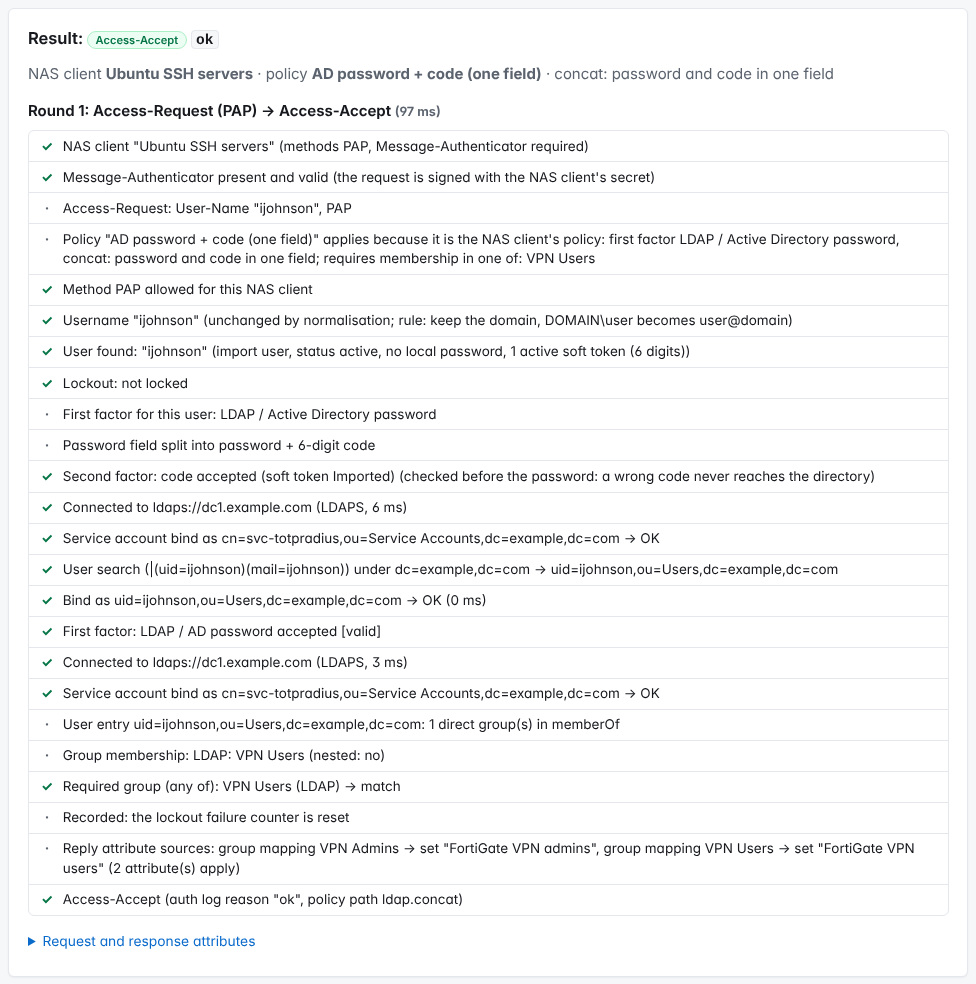
You can also test from the Ubuntu server with radtest (package freeradius-utils): see Testing authentication.
Troubleshooting
| Reason in the authentication log | What to check |
|---|---|
| no entry at all | The server's source address is not covered by a NAS client, UDP 1812 is blocked, or Message-Authenticator is missing (see above). |
otp_missing, otp_malformed | The code was not appended to the password, or not exactly 6 digits. |
otp_invalid, replay | Wrong or reused code. Some SSH clients try the same password twice – wait for the next code. |
first_factor_invalid | Wrong directory password. A different secret in /etc/pam_radius_auth.conf does not show up here: with Require Message-Authenticator on, the request is dropped and listed under Settings → NAS clients → Dropped requests (last 24 h) as Message-Authenticator wrong (no log entry). |
unknown_user, no_token | The user has no TOTPRadius record or no active token yet. |
| SSH falls back to the local password | TOTPRadius did not answer within the timeout of pam_radius_auth.conf, or the module is not called (check /etc/pam.d/sshd). |